Instructions for creating Google Group
Google group makes it easier for many people to exchange and email with each other..
Creating exchange groups always makes it easier to work with multiple people, or when you chat like creating Facebook chat groups. When working or emailing a group of people, we will think of creating a Gmail group for easier exchange. Then you only need to send one email and the others in the group will receive it. However, when creating an email group, users have to face spam mail. If so, should switch to using Google Group to limit the situation of spam.
Users can still exchange in groups quickly, access in many different devices, or in different locations to join group meetings. The following article will guide you how to create a Google group.
- Instructions for creating groups on Facebook
- How to create a job assignment table on Gmail?
- Applications turn Gmail into an effective collaboration tool
- Instructions for creating incoming mail filters on Gmail
Instructions for creating Google groups
Step 1:
First you need to have a Gmail account or a Google account. Next we access the link below to log in to a personal Gmail account.
http://groups.google.com/
Step 2:
In the next display interface, click on the Create group button above the interface.

Step 3:
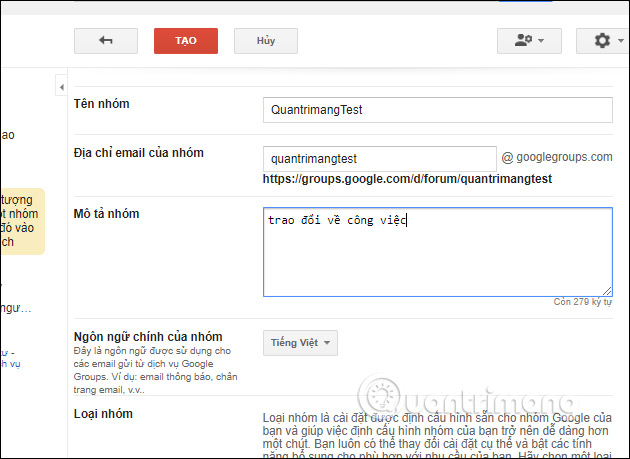
Switching to the new interface, we enter all the information required for group creation. You enter the group name, the group's email address looks like it
When you have completed the content, click the Create button above.
Step 4:
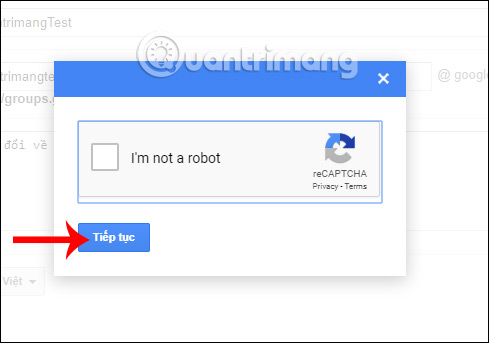
Proceed to the security confirmation and then press the Next button below.
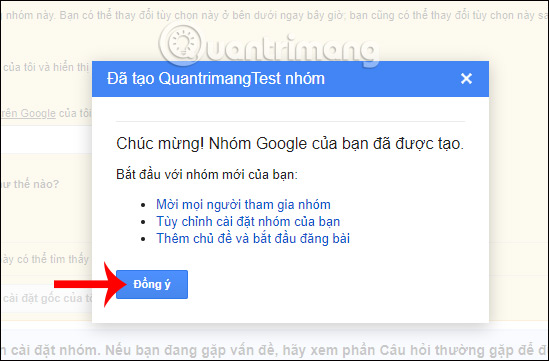
When successfully created the user receives the message as shown below, click OK .
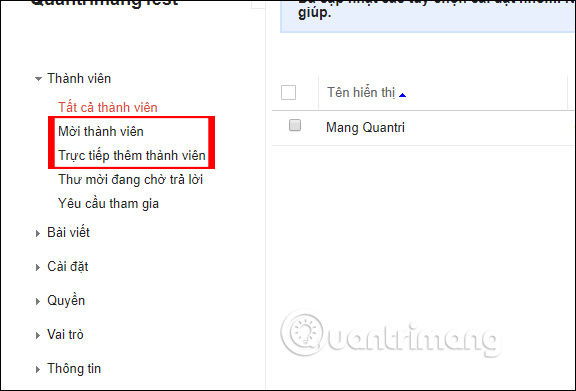
Step 5:
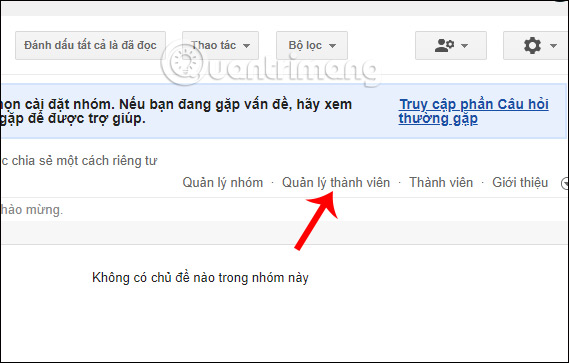
Next to add members to the Google group, we click on the group name and then click on Member Management .
Then on the left side of the screen there are 2 options to add members to the group: Invite members and Directly add members.
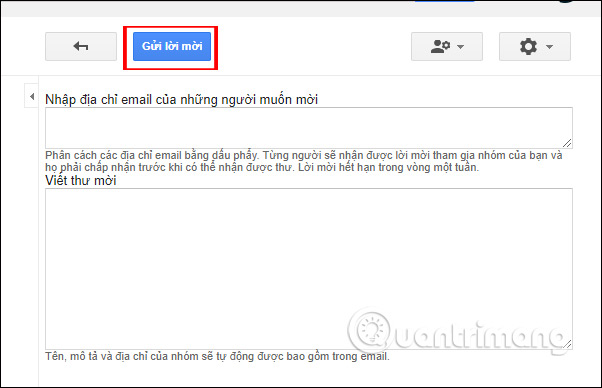
Step 6:
When writing an invitation to join the group, users enter the email address they want to invite , each email address is separated by commas. This invitation is limited to 1 week.
Below you can write more invitations if you want. The group's address is automatically added to the email. When entering, press Send invitation .
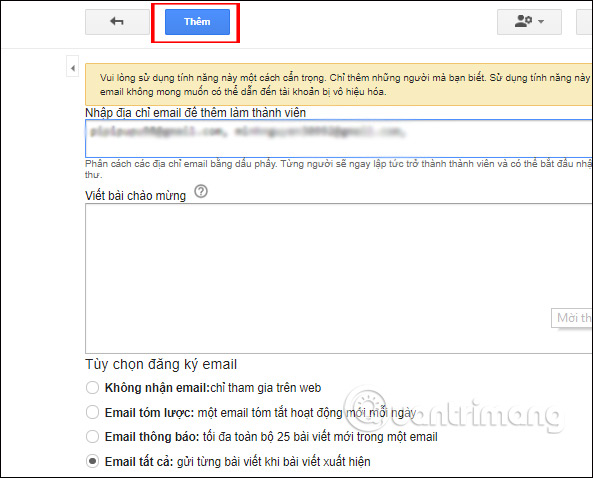
If you choose to add a member directly, you must select the people you know already, then fill in the content below. Click the Add button to add. Then the people you add are added immediately.
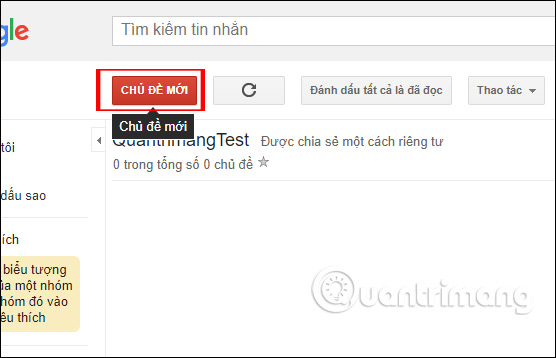
Step 7:
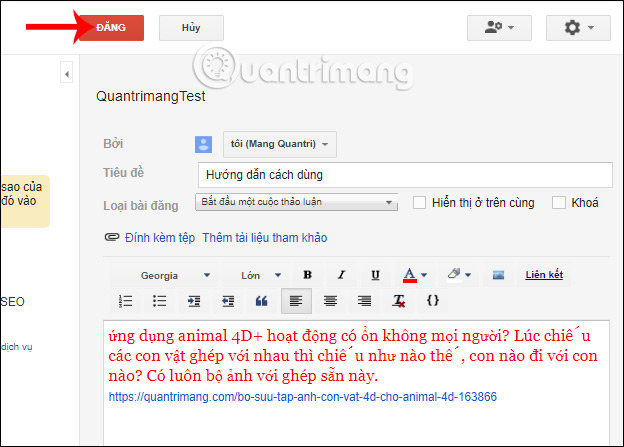
After adding the members we proceed to post in the group, click New topic .
In the next interface, the user sees your name in the article creator section, below the title of the article, can attach files, post references. Frame below to enter content and then adjust the format for content. Click the Post button to post the article.
Step 8:
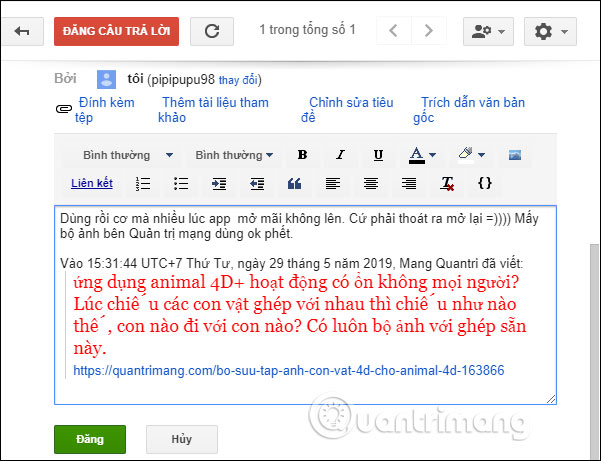
When clicking Post, all members of the group will receive the article. Other members want to reply just click on the blue Post button or Post Reply button . All messages for new posts are displayed in the interface for known people.
Step 9:
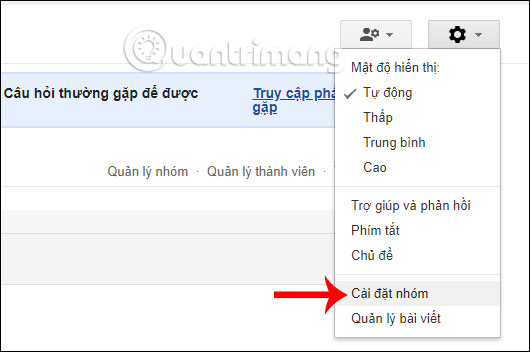
For those who create a Google group, they have the right to edit the content for the group, click on the gear icon to select Settings for the group .
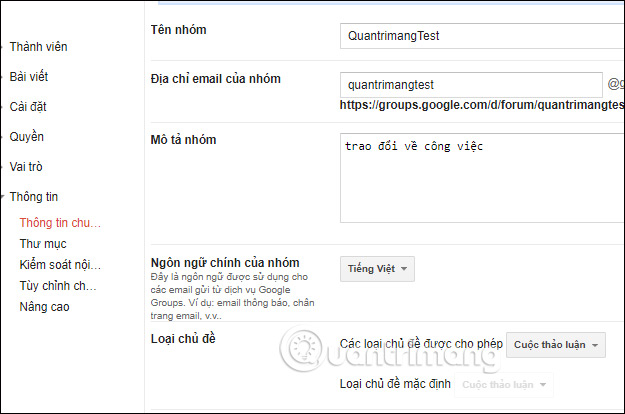
Then you see the interface or change information for the group.
Creating Google Group is very useful when we need to talk to many people, on different topics. The group you create can make public mode anyone can submit enrollment, or secret mode.
I wish you all success!