Instructions for creating groups on Facebook
Creating groups on Facebook will help users easily exchange tasks with each other, exchange public content in the group, not just in the Facebook chat group. You can now set up 3 different modes for the Facebook group, which is a public, closed group, so everyone can find the group, but only the posting members and secret groups are only for the group members. Facebook.
The following article will show you how to create groups on Facebook, including Facebook web platforms and Facebook applications.
- Instructions on how to create Facebook Fanpage for online sales
- How to call group videos on Facebook Messenger
- How to download closed Facebook videos
Video tutorial to create groups on Facebook PC
1. Create groups on Facebook computers
Step 1:
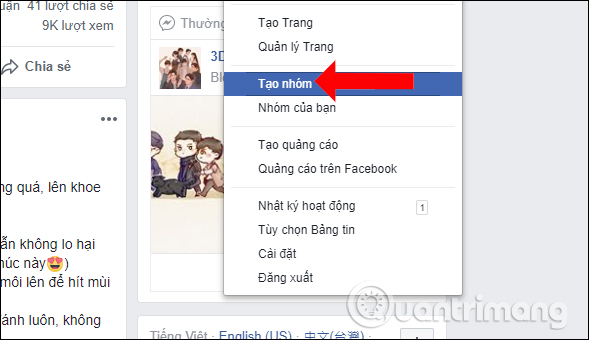
At the home page interface on Facebook, click on the gear icon and select Create group .
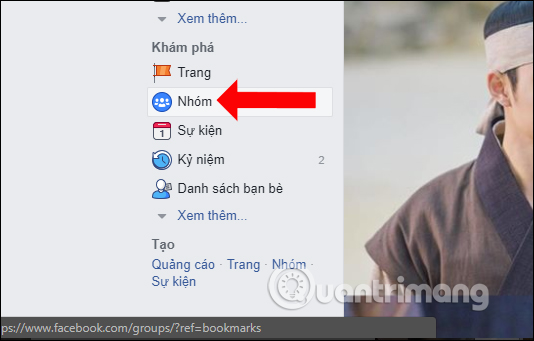
Or in the list section to the left of the Discovery section interface click on the Groups section.
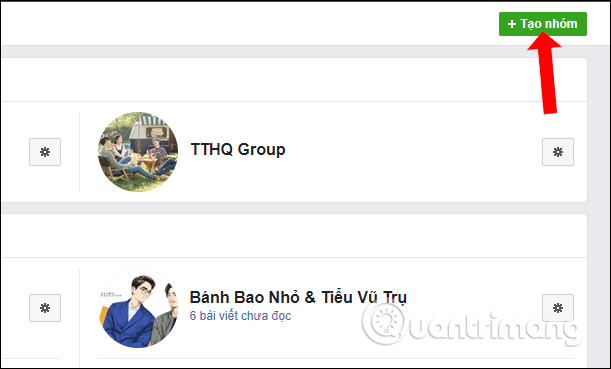
Switch to the new interface, we will see the entire group you are participating in including public and secret groups, click the Create group button above.
Step 3:
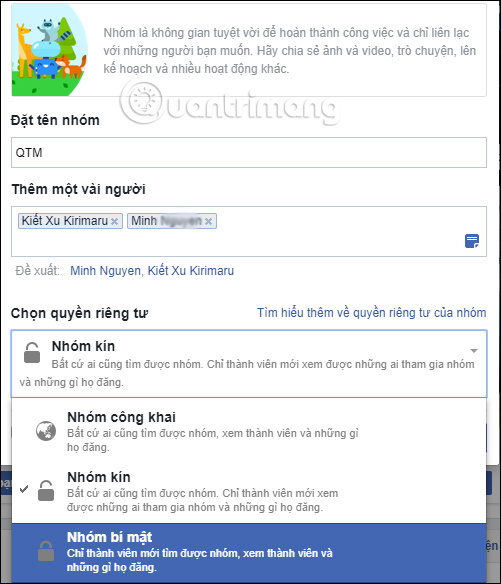
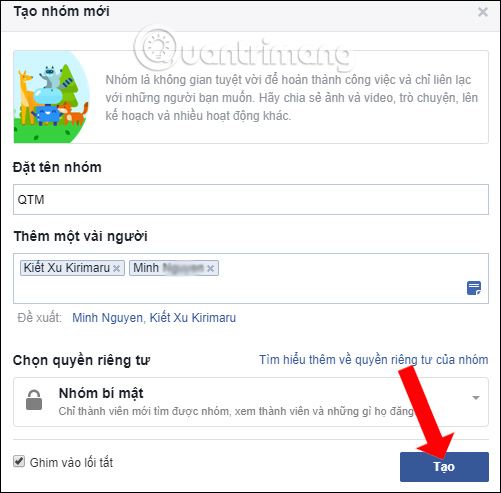
In the Create new group interface, users will enter a name for the group at Name group , add the Facebook account name they want to add to the group.
Next we select the display mode for the group with Public, Closed and Secret groups.
Step 4:
Then check the Pin to the shortcut to select quick access to your group and then click the Create button .
Step 5:
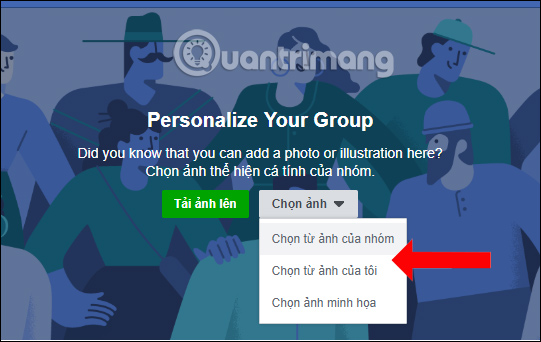
Immediately users will see the Facebook group interface I just created. Here you can download cover photos for Facebook group, then import information for the group on Facebook.
2. Create a Facebook group on your phone
Step 1:
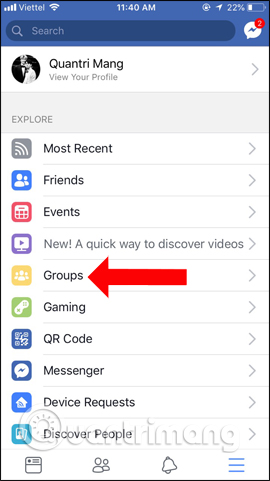
At the personal Facebook interface, click on the 3 dashes icon below. Switch to the new interface and click on the Group section.

Step 2:
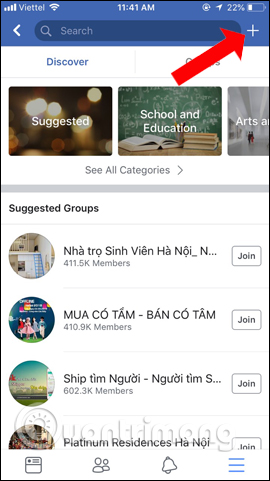
Next click the plus icon in the top right corner of the interface to create a new Facebook group. This is the interface to create groups on Faebook.
Step 3:
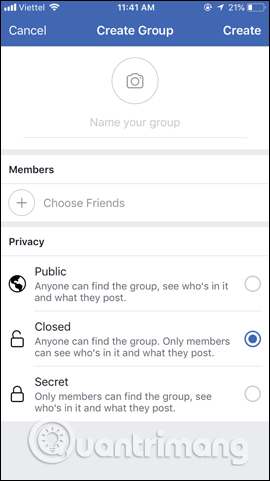
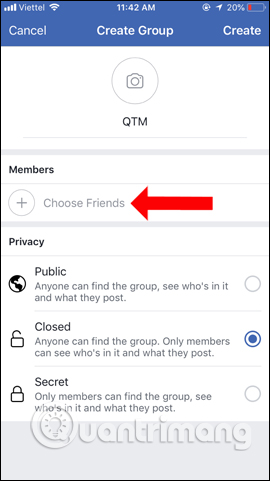
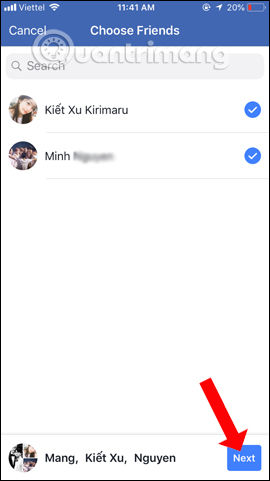
First, click the Name your group section to enter a name for the group. Next click on Choose Friends to select friends to add to the group. The entire list of friends on the list of friends will appear shortly after. Or you can enter your friend's name in the search bar if your friends list is large. Select the account you want to add to the group, then click the Next button .
Step 4:
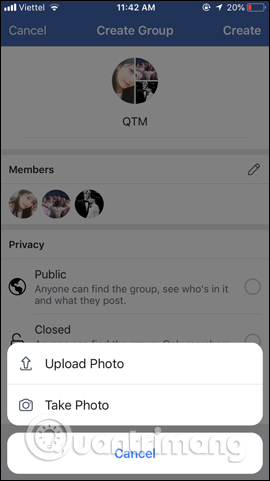
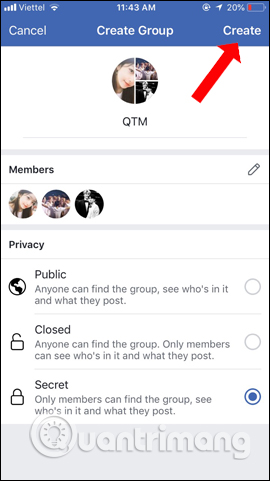
In case you want to replace the avatar for the group , click on the current group avatar, then choose how you want to upload the image to Facebook. The last step is to click on the mode you want to display for the Facebook group, then click the Create button above.
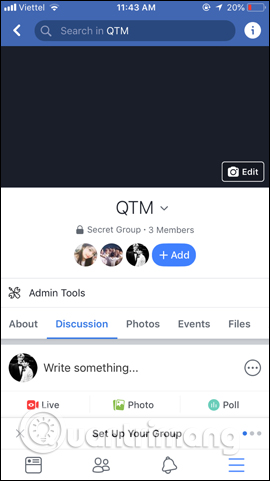
This will be the new group interface on Facebook. We also make changes to cover photos for Facebook groups and also add information to the group.
Above is the article how to create a Facebook group on the computer version, and the Facebook phone application version. If you are the admin of the group, you will be allowed to approve those who want to join the Facebook group, as well as who to remove from the group.
See more:
- Set the post management mode to be tagged on Facebook
- How to lock Wall Facebook, prevent others from posting on Facebook wall
- How to recover deleted messages on Facebook
I wish you all success!