Table of Contents
This guide explains how to smooth Skin with Photoshop, with clear steps, practical tips, and important checks before you begin.

Step 1 : Open the image you need to smoothen in Photoshop, press Ctrl + O to select the image:
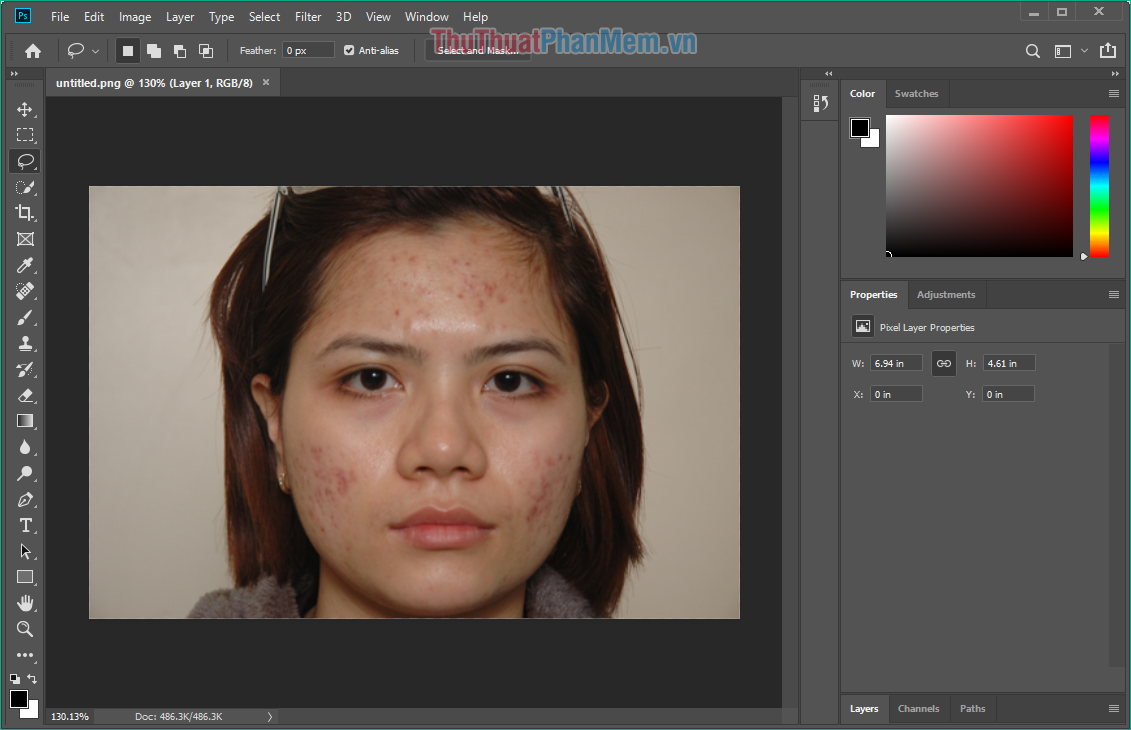
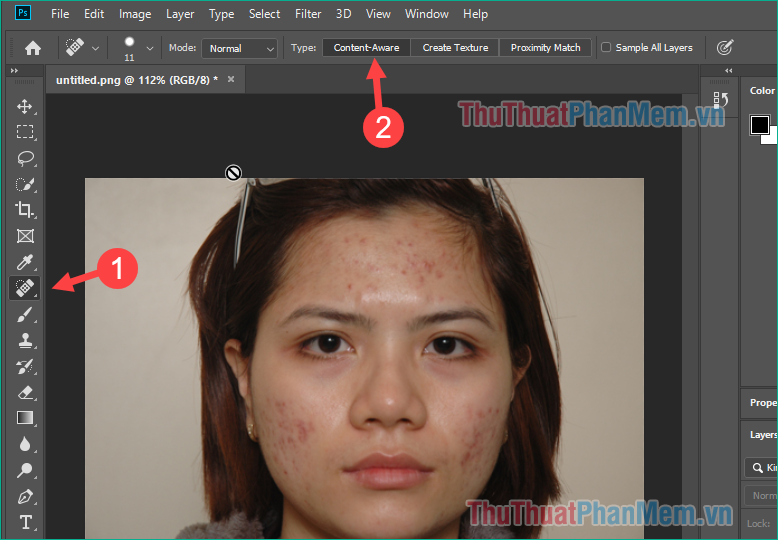
Step 2 : First we will use the Spot Healing Brush Tool to erase the acne on the face of the character. You can press J to select this tool or select on the toolbar as shown below, then remember to select Content-Aware in the Type above.
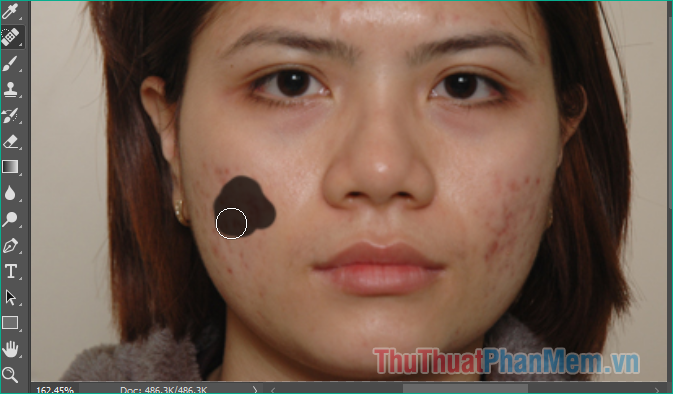
After you have selected, click and hover on the area with acne to remove:
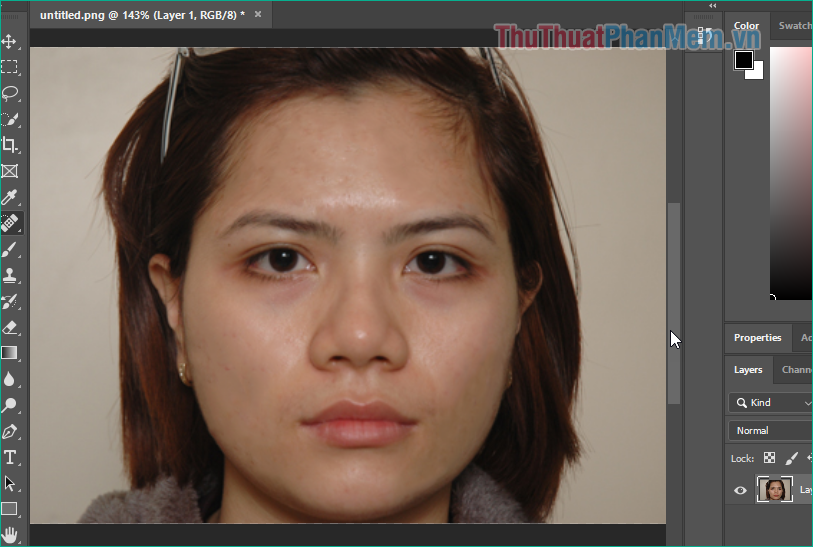
At this point, the character's face has all acne, but the skin is still not smooth:
Step 3: After removing acne, we will continue the steps to smooth skin.
You press Ctrl + J to change the Layer, then select Filter -> Noise -> Reduce Noise
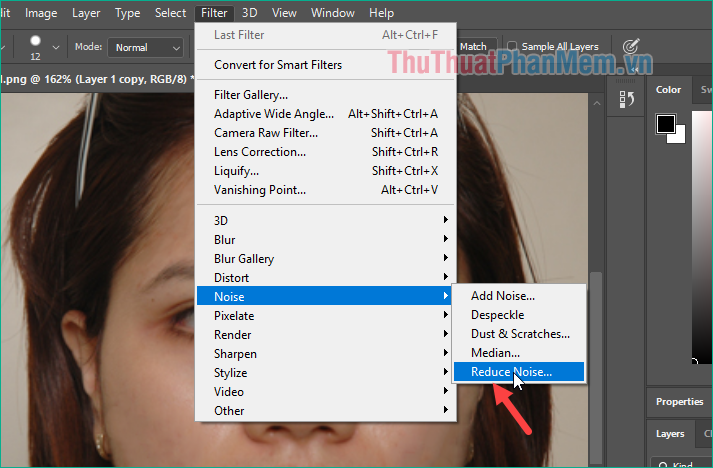
Step 4 : A custom window appears, select the parameters as follows:
Strength : to blur the image this should increase to 10
Preserve Details : to adjust the blur or vice versa
Reduce Color Noise : to adjust the color depending on the image
Sharpen Details : sharpen the image
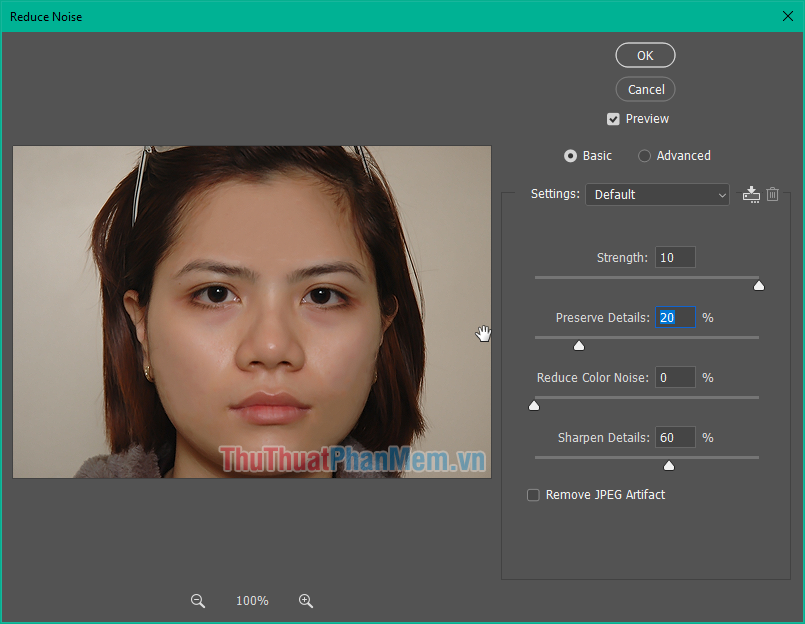
You can adjust the parameters so that the skin is as smooth as possible.
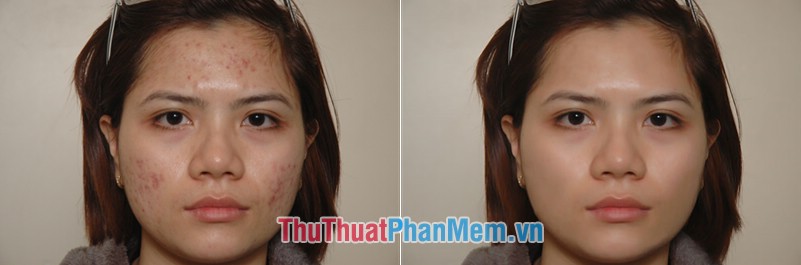
And here is our result after editing, you click File -> Save to save the image.

Compare photos before and after editing to see the difference:
Above TipsMake. com showed you some basic steps to smooth skin with photoshop quickly and simply, hope you will find the article useful. Good luck!
FAQ
What should I know about Smooth Skin with Photoshop?
Focus on the key features, requirements, limitations, and practical use cases explained in this guide.
How do I get the best results with Smooth Skin with Photoshop?
Follow the recommended steps, use current software or information, confirm compatibility, and review settings before major changes.
Are there any risks or limitations?
Potential limitations depend on compatibility, data quality, cost, privacy, support, and how the product or method is used.
Related Articles
 How to Smooth Skin in Photoshop7 minutes read
 Adjusting Skin Tone to Be Smooth and White in PhotoCat Is Extremely Easy3 minutes read
 5 Steps and 1 'Hot' Morning Habit to Help You Have Smooth, Bright6 minutes read
 7 Kinds of Fruit Juices Help You to Have Bright and Smooth White4 minutes read
 Easy Photoshop Skin Beautification Tutorial for Beginners5 minutes read
 Things to Do Before Bed to Help Your Skin Become Firmer and: Key Facts4 minutes read
Reader Comments 0
Sign in with email or Google to join the discussion.