Table of Contents
This updated guide explains how to Remove Vocals from Songs through clear steps, practical examples, and important checks that help prevent common errors.
Method 1 of 3:
Removing the Center Channel
-
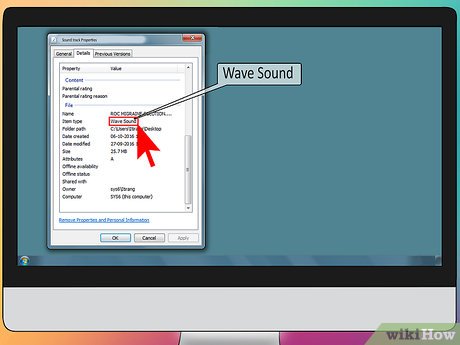 Start with high-quality audio tracks. If you put low-quality files into your editing software, it's not going to sound good when you start trying to take stuff out. It's important to start with. wav or. flac files and work from there. The results will be a lot more clear than you'll get from a super-compressed. mp3 file.
 -
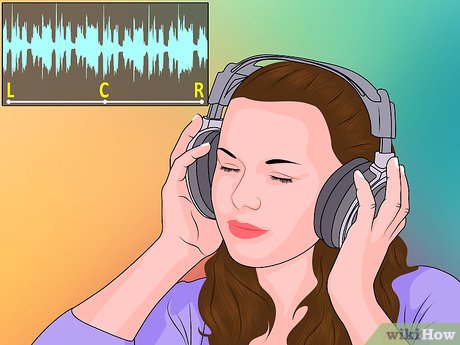 Locate the vocals in the mix. Stereo tracks all have two separate channels, with the instruments and vocals spread across them. Bass, guitar, and other channels will typically be pushed to one side or the other, while vocals are normally placed in the "center channel." This is done to make them sound "centered." To isolate them, you'll split this center channel and invert one of them.
- How can you tell where the vocals are? Just listen in good-quality headphones. If the vocals seem to be coming out of both channels simultaneously, they're mixed in the center. If not, they're to the side that you hear the vocals coming from.
- Some styles of music and specific recordings will have different balances between channels. If the vocals are shifted to one channel or the other instead of "centered," it's much easier to remove them.
- Songs with a lot of effects may be quite difficult to separate and invert. There may be a little echo of the vocals that will be difficult to remove.
-
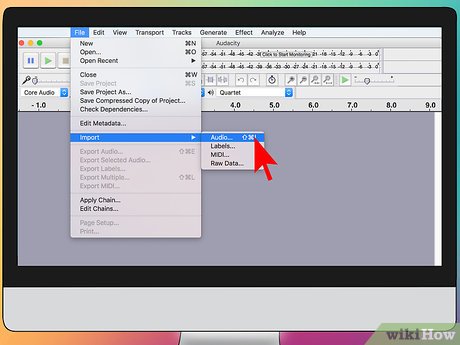 Import the audio into the editing software of your choice. You can do this basic process in any editing software that allows you to invert tracks for a particular channel. While the exact location of the tool for each will vary slightly, the basic process is the same for the following programs:
- Audacity
- Pro Tools
- Ableton
- Reason
-
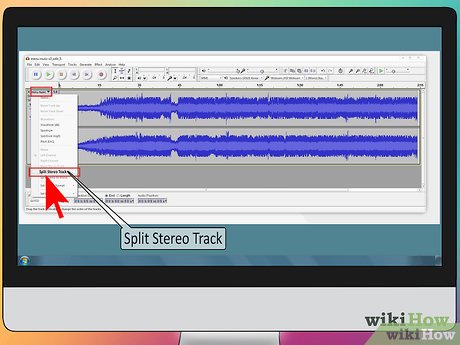 Break the channels into separate tracks. In most programs, you can break a high quality sound file recorded in stereo into the two tracks. You should see a black arrow next to the track title, which you can click and select, "Split Stereo Track." You should then have the separate channels to work with individually.[1]XResearch source
 -
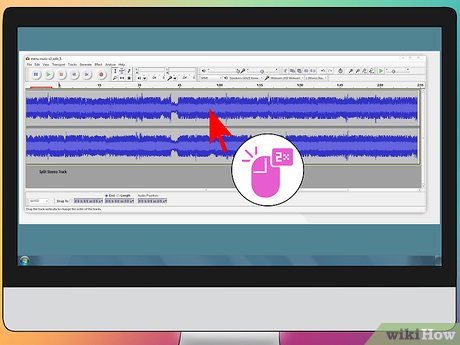 Select one of the channels to invert. Since they both have vocals embedded in the tracks, select either one. Double-click to select the entire track if you may need to remove the vocals on the entire song.
 -
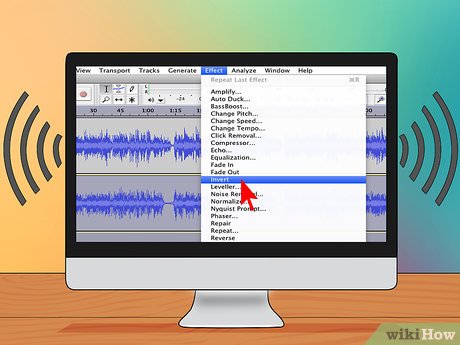 Invert the channel. Once you've selected the track, invert it using the "Effect" function and selecting "Invert." The song might sound a little strange after you play it. After inverting, the track should sound like it's coming from the sides, instead of the middle.
- You should still be able to hear vocals some, but don't worry. You'll complete the effect when you bounce it back to mono.
-
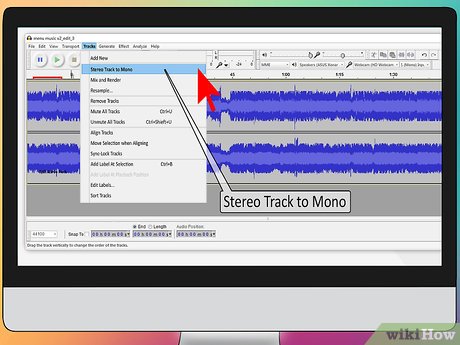 Convert the file back to mono. Combine the two stereo channels back into one channel. You should now have one combined track that should have a more diminished amplitude. That means the vocals will be massaged out and the instrumentation will be usable. You may still hear faint hints of the original singer hiding in the background.
Method 2 of 3:
Using Specialty Software
-
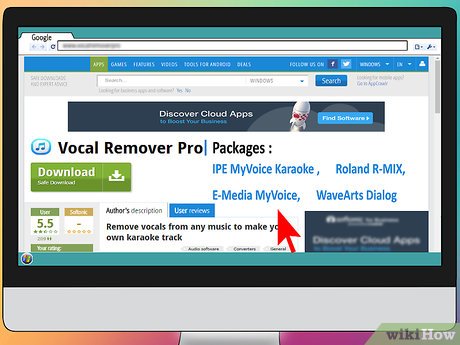 Choose vocal eliminator software. Vocal eliminator software packages are available on the Internet, for a variety of prices. Some vocal eliminator software packages may be downloaded for free, but most are available only through a purchase.[2]XResearch source Each software package provides instructions for installation. Here's a little of different packages at a variety of prices:
- Vocal Remover Pro
- IPE MyVoice Karaoke
- Roland R-MIX
- E-Media MyVoice
- WaveArts Dialog
-
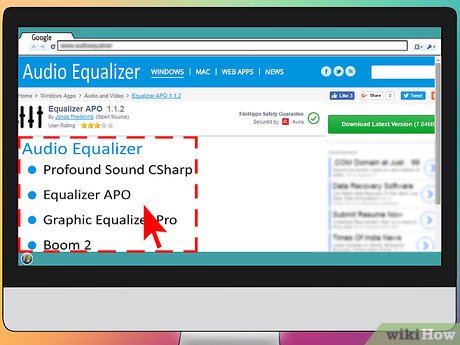 Install an audio equalizer software package. Audio equalizer software packages are not available for free download and must be purchased. Installation instructions will be provided with the package. Make sure that the audio eliminator is compatible with your operating system and the sound files you're using. Some audio equalizers include:
- Profound Sound CSharp
- Equalizer APO
- Graphic Equalizer Pro
- Boom 2
-
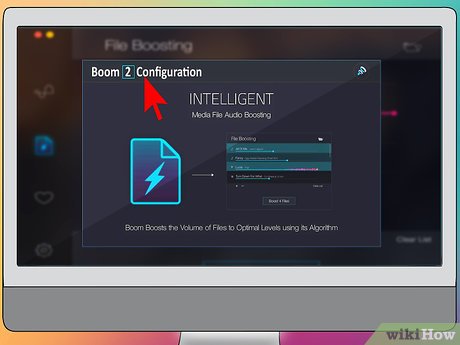 Open the song file and follow the instructions. Each software package works differently, but will offer a tutorial specific to the software to help guide you through the process. It's quite easy, especially on software specifically made for helping you record karaoke tracks. The software will execute the removal of the audio tracks automatically.
- With an equalizer, you'll usually just open the audio equalizer software and play the music file you may need to edit. The audio equalizer will remove of the audio tracks automatically.
-
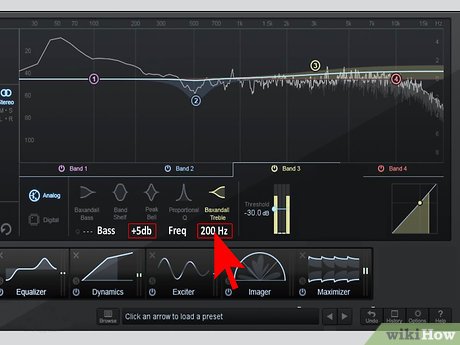 Adjust the audio equalizer to preserve the bass tones. To make sure you don't lose the bass, it's important to make a few adjustments. Set the signal attenuation for +5 dB at 200 Hz and below on both the left and right channels. This will preserve the bass tones.
Method 3 of 3:
Reversing Speaker Phase
-
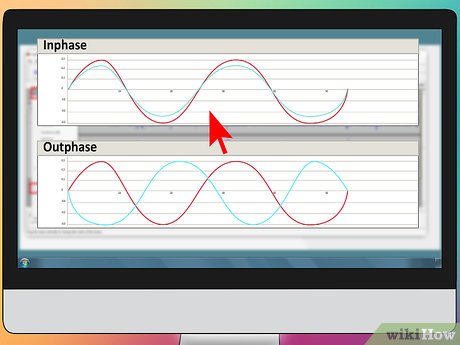 Understand the concept of channel phase. Two sound waves moving up and down together are said to be "in phase." When one of the waves is moving up at the same time as the other wave moves down, the waves are said to be "out of phase." Out-of-phase waves cancel each other out, resulting in a flat line of sound.[3]XResearch source Flipping the phase on one speaker will cancel the matching signal's waves in the other speaker.[4]XResearch source
- The efficiency of this as a technique is pretty debatable. It may theoretically work, but it's not a way to save a song file without vocals.
-
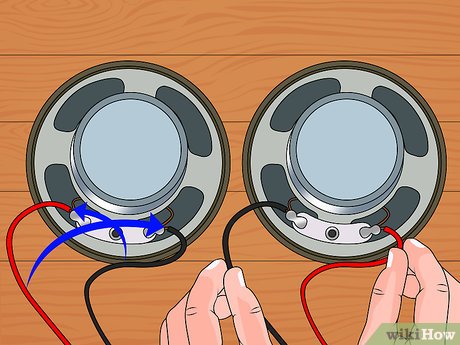 Find the wires leading into the back of one speaker. Each speaker usually has two wires going into it, one with a positive lead and one with a negative lead. Usually these are red and white, black and red, or black and white. Sometimes, they're black and black. Swap the two wires going into one speaker around.
- Where the black wire was connected, connect the red wire, and move the red wire to the black wire's terminal.
- Many modern stereo systems and head phones do not allow you to swap wires on the back of one speaker. Sometimes the wires are bundled into one wire sleeve. The only way to swap the bundled wires is to splice them or re-solder the connector.
-
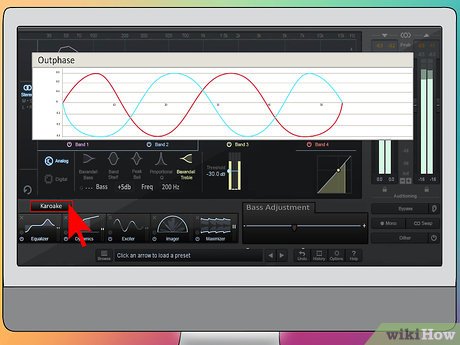 Use a digital phase processor. There are special digital techniques using chips called Digital Signal Processors to do the flipping of the wave inside the stereo or hi-fi. Usually the button is a "Karaoke" button, which flips the one side of the stereo image phase.
- If your stereo or app has one of these, then just press it and the Lead Vocals will get very soft or disappear.
-
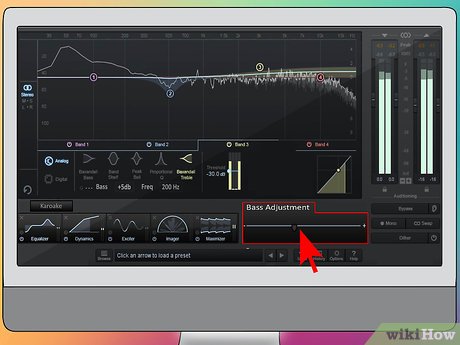 Adjust the levels to accommodate for the loss of vocals. Background vocals are often mixed more to the left or right, so these are hard to remove. You will have to sing along with them and pretend they are your very own backing choir, if you're trying to make a karaoke track.
- Flipping phase really affects Bass waves. So the Bass might disappear along with the Lead Vocals. Digital DSP Karaoke systems will fix this by flipping the phase on only the Vocal frequencies. Try adjusting the levels on your stereo to get it to sound correct.
- Sophisticated vocal removal systems or software allow you to decide which frequencies get flipped out of phase.
FAQ
What is the easiest way to Remove Vocals from Songs?
Start with the requirements in this guide, then follow each step in order. Check the result after every major change so problems are easier to identify.
Can beginners follow these instructions?
Yes. The process is organized into practical steps, and you can repeat any step before moving forward.
What should I check if the method does not work?
Confirm your software or device version, permissions, settings, file format, and internet connection when the task depends on online services.
Related Articles
 How to Extract the Lyrics from the Music to Get the Beat5 minutes read
 Instructions for Creating Your Own Songs on Suno AI4 minutes read
 Delete: How to Remove Songs from Your Ipod5 minutes read
 How to Separate Lyrics from a Song Using Audacity4 minutes read
 How to Manage an Itunes Playlist10 minutes read
 How to Composing Songs on Minimax3 minutes read
Reader Comments 0
Sign in with email or Google to join the discussion.