How to Remove the 'Read Only' Status on MS Word Documents
This wikiHow teaches you how to remove the 'Read Only' editing lock from a Microsoft Word document. While it's impossible to remove the read-only lock from a user-locked Word document if you don't know the password, you can easily copy the...
Table of Contents
Method 1 of 4:
Disabling Protected View for Online Files
-
 Understand which documents are likely to be protected. Any Microsoft Word document which you download from the Internet (e.g., an email attachment or a file from a website) will have read-only protection assigned to it whenever you open it. You can disable this protection when first opening the document.
 -
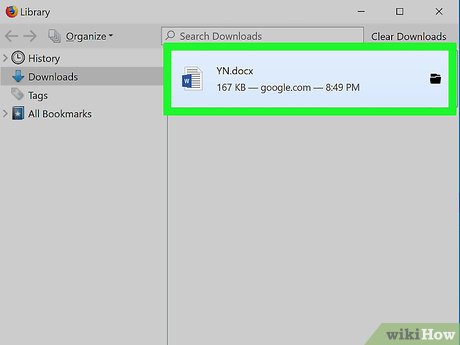
 Open the Word document. Double-click the Word document for which you want to remove the read-only protection.
- If the Word document is currently open, close it and re-open it.
-
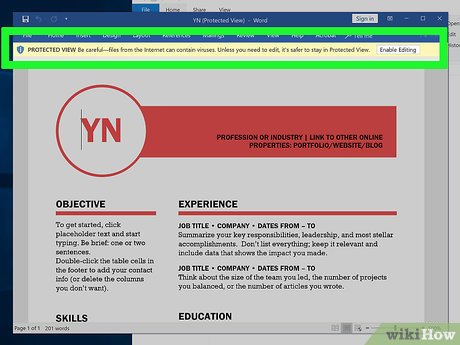 Look for a pale yellow banner. If you see a yellow banner with the phrase "Files from the Internet can contain viruses" written across the top of the Word document, your document qualifies to have its read-only status removed using this method.
- If you don't see this banner even after closing and re-opening the Word document, try one of the other methods in this article.
-
 Click Enable Editing. This button should be on the right side of the banner. Doing so will refresh the Word document and remove the read-only protection. You should now be able to edit the document.
Method 2 of 4:
Disabling Protected View for Password-Protected Files
-
 Open the Word document. Double-click the Word document from which you want to remove the protection. It will open in Word.
 -
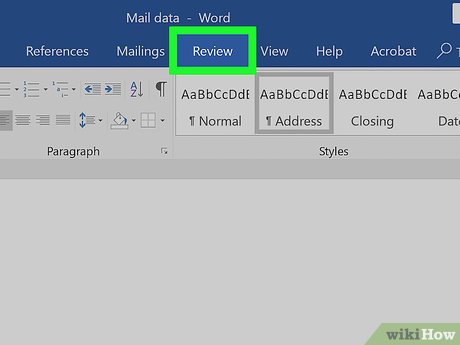 Click the Review tab. This tab is in the upper-right corner of the Word window. Doing so opens the Review toolbar at the top of the Word window.
 -
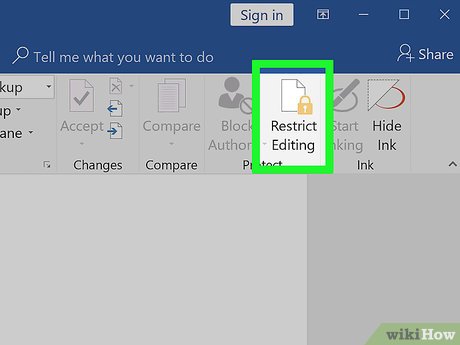 Click Restrict Editing. You'll find this option on the far-right side of the Review toolbar. Clicking it prompts a pop-out menu to appear on the right side of the window.
 -
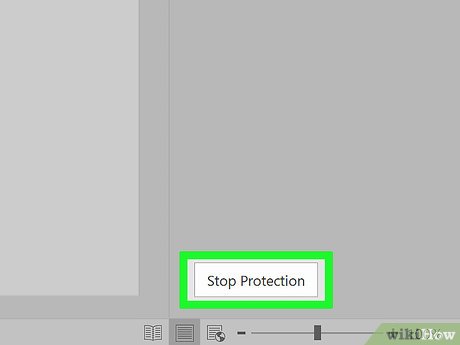 Click Stop Protection. It's at the bottom of the pop-out menu. You should see a pop-up window appear at this point.
- If you or another user on your computer's account created the protection without a password, clicking Stop Protection will automatically remove the protection.
-
 Enter the password when prompted. Type the document's password into the "Password" text box, then click OK. This will immediately remove the Word document's read-only lock if the password is correct.
- If you don't know the password, you'll have to copy and paste the file's contents instead.
-
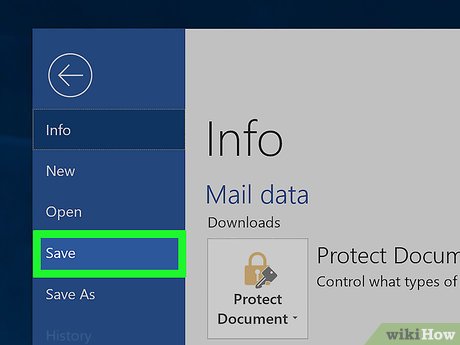 Save your changes. Press Ctrl+S (Windows) or ⌘ Command+S (Mac) to do so. From now on, the file won't be read-only protected unless you re-enable editing protection.
Method 3 of 4:
Changing the File's Properties
-
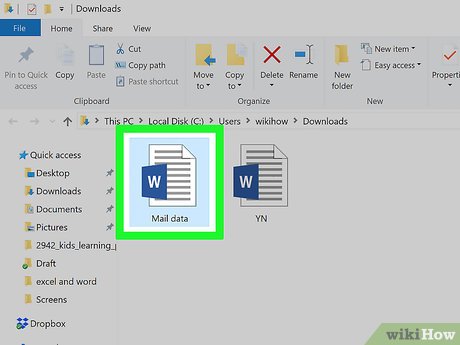 Go to the Word document. Find the folder in which the Word document is stored.
- If the file isn't actually on your computer (e.g., it's on a flash drive or a CD), move the file onto your computer before proceeding.
-
 Open the Word file's properties. This will vary depending on your computer's operating system:
- Windows — Click once the Word file, right-click the Word file, and click Properties in the drop-down menu.
- Mac — Click the Word file, click the File menu item in the top-left side of your Mac's screen, and click Get Info.
-
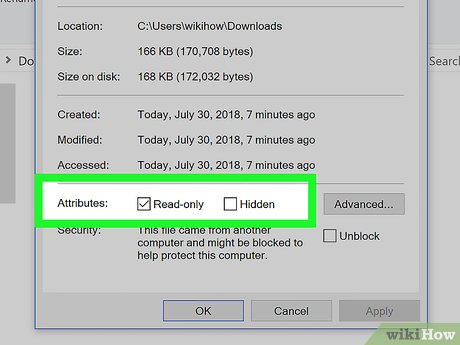 Find the "Permissions" section. On a Windows computer, you'll find the proper options in the "Attributes" section near the bottom of the Properties window.
- On a Mac, you'll have to click the Sharing & Permissions heading near the bottom of the window.
-
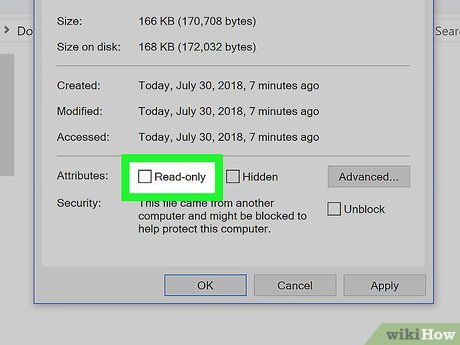 Disable the read-only protection. Again, this process will differ depending on whether you're using Windows or a Mac:
- Windows — Uncheck the "Read-only" box near the bottom of the window, click Apply, and click OK.
- Mac — Click the Read option to the right of your name, then click Read & Write in the menu which appears.
- You may first have to click the lock in the bottom-left corner of the Get Info window and then enter your Mac's password before you can do this.
- If this option is greyed out, unchecked, or otherwise not set to "Read-only", you'll have to try copying and pasting instead.
-
 Try to edit the file. Open the Word document by double-clicking it, then try to edit it. Keep in mind that you may first have to remove the online read-only lock before doing so.
Method 4 of 4:
Copying and Pasting
-
 Understand how this works. If your primary goal is to edit the Word document, you can copy the Word document's text and paste it into a new Word document and then save the new document onto your computer. While doing this won't remove the read-only protection from the original document, it will create an editable copy.
 -
 Open the protected Word document. Double-click the Word document to do so.
 -
 Click anywhere on the document. This will place your mouse cursor on the document's page.
 -
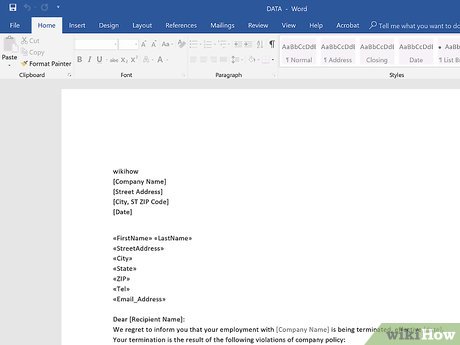
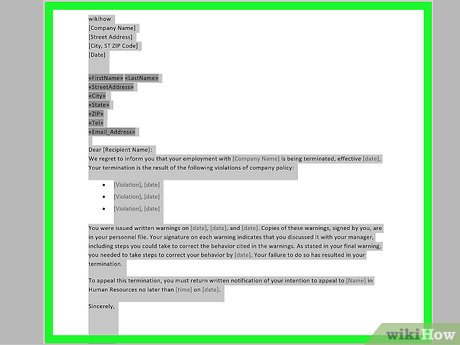 Select the whole document. Press either Ctrl+A (Windows) or ⌘ Command+A (Mac) to do so. You should see the entire document become highlighted.
 -
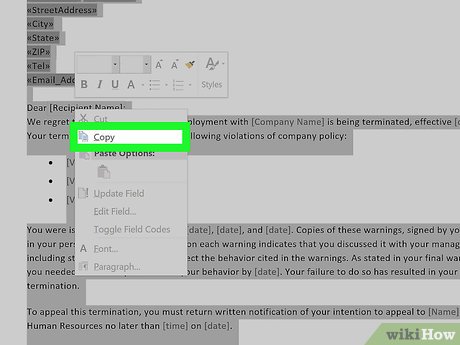 Copy the selected text. Press either Ctrl+C (Windows) or ⌘ Command+C (Mac). This will copy the document's text to your computer's clipboard.
 -
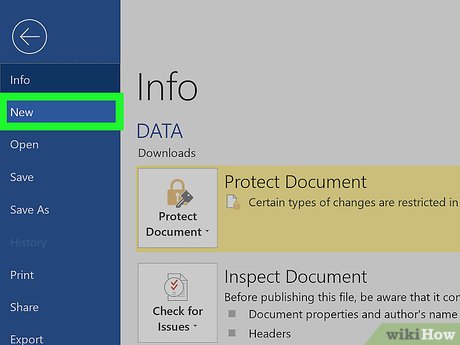 Open a new Word document. Click File in the upper-left side of the Word window, click New on the left side of the window, and click Blank document to open a blank Word document.
- On a Mac, click the File menu item, then click New Blank Document at the top of the drop-down menu.
-
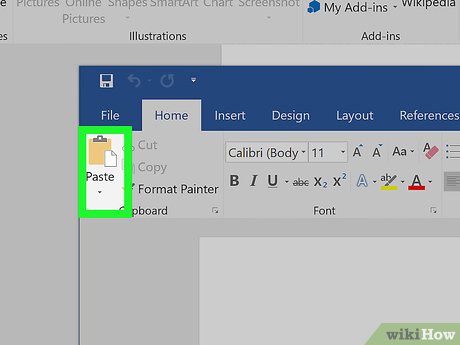 Paste in the copied text. Press either Ctrl+V (Windows) or ⌘ Command+V (Mac) to paste the locked Word document's text into the blank document.
- This may take a few seconds if the original document was particularly large or contained images.
-
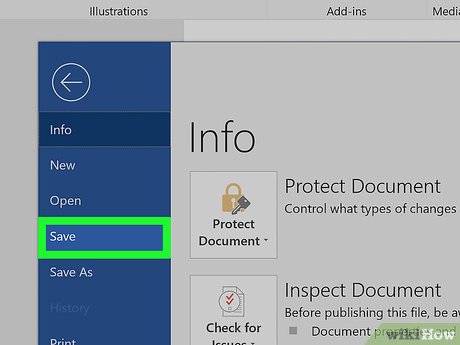 Save the document as a new file. Press Ctrl+S (Windows) or ⌘ Command+S (Mac), then enter your document's name and click Save. You'll be able to edit the document you just created like usual.
4.1 ★ | 7 Vote
- How to Remove 'Read Only' Attribute on MS Word Files
- The simplest way to remove red underlines in Word!
- Read Aloud - feature to read text in Microsoft Word
- How do computers read documents to you?
- How to remove the Read only property in Word, Excel
- Ways to remove the Read only message in Word
- How does the word in Microsoft Word jump?
- MS Word - Lesson 10: Read and check proofs for documents
- How to Delete Word Documents on a Mac
- How to turn off spell checking in Word, Powerpoint (remove the red underline in Word)
MORE LIKE THIS
- How to Convert a Doc File to a Docx File
- How to Download Microsoft Word
- How to Insert Fillable Fields on Word on PC or Mac
- How to Copy and Paste in Microsoft Word
- How to Protect a PDF File from Copying
- How to Type in Korean on a Computer
- How to Recover Word Documents
- How to Reinstall Wireless Drivers
- How to Connect a Wireless Mouse
- How to Trim a Video on PC or Mac
-
 How to reformat a Word document using the Design tab
-
Detailed guide on how to recover lost Word documents on Mac.
-
How to convert PDF to Word using Document Viewer on your phone.
-
How to create and insert a signature into a PDF file on a Mac
-
Quickly summarize documents in Google Drive using Gemini.
-
How to create document signature on iPhone
 How to reformat a Word document using the Design tab
 Detailed guide on how to recover lost Word documents on Mac.
 How to convert PDF to Word using Document Viewer on your phone.
 How to create and insert a signature into a PDF file on a Mac
 Quickly summarize documents in Google Drive using Gemini.
 How to create document signature on iPhone
-
 Free Tools
-
Application
-
Web Email
-
Website - Blog
-
Web browser
-
Support Download - Upload
-
Software conversion
-
Social Network
-
Simulator software
-
Online payment
-
Office information
-
Music Software
-
Map and Positioning
-
Installation - Uninstall
-
Graphic design
-
Free - Discount
-
Email reader
-
Edit video
-
Edit photo
-
Compress and Decompress
-
Chat, Text, Call
-
Archive - Share
-
-
System
-
Mac OS X
-
Hardware
-
Game
-
Tech info
-
Technology
-
Science
-
Life
-
Electric
-
Program
-
Mobile