How to Add Backgrounds in Word
This wikiHow teaches you how to change the blank, white background in a Microsoft Word document to a watermark or solid color. Open Microsoft Word. Its icon resembles a blue background with a white 'W' on top.
Table of Contents
Method 1 of 5:
Adding a Stock Watermark
-
 Open Microsoft Word. Its icon resembles a blue background with a white "W" on top.
- If you'd rather edit an existing document, simply double-click the document in question.
-
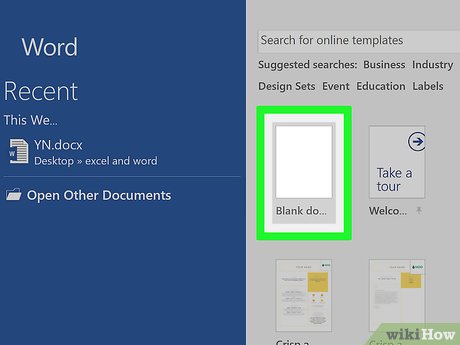 Click Blank document. It's in the top-left corner of the templates page.
- If you're editing an existing document, skip this step.
-
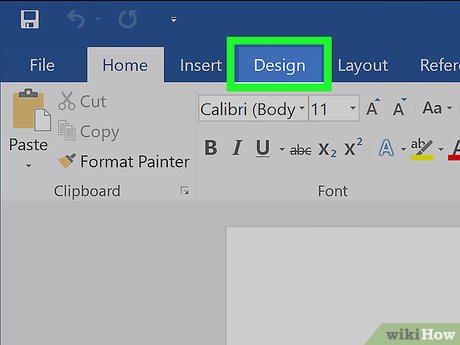 Click Design. This tab is near the top-left of the Word window, to the right of the "Home" and "Insert" tabs near the top of the page.
 -
 Click Watermark. It's in the top-right side of the Word toolbar, near the top of the window. You'll see this option to the left of the "Page Color" and "Page Borders" options.
 -
 Click a watermark template. You can select any of the following templates to apply their text to your Word document's background:
- "CONFIDENTIAL"
- "DO NOT COPY"
- "ASAP"
- "URGENT"
-
 Add text to your document, like usual. The watermark will remain in the background of your document, meaning anything you type will remain on top of the watermark.
- You can remove a watermark by clicking Remove Watermark at the bottom of the watermark templates drop-down menu.
Method 2 of 5:
Adding a Custom Image Watermark
-
 Open Microsoft Word. Its icon resembles a blue background with a white "W" on top.
- If you'd rather edit an existing document, simply double-click the document in question.
-
 Click Blank document. It's in the top-left corner of the templates page.
- If you're editing an existing document, skip this step.
-
 Click Design. This tab is in the top-left side of the Word window, to the right of the "Home" and "Insert" tabs near the top of the page.
 -
 Click Watermark. It's in the top-right side of the Word toolbar near the top of the window. You'll see this option to the left of the "Page Color" and "Page Borders" options.
 -
 Click Custom Watermark. This option is near the middle of the "Watermarks" drop-down menu. Clicking it will bring up the "Printed Watermark" window.
 -
 Click the circle next to "Picture watermark". It's near the top of the "Printed Watermark" window.
 -
 Click Select Picture. You'll see this button just below the "Picture watermark" section.
 -
 Click From a File. This option is at the top of the "Printed Watermark" window. Clicking it will open your computer's default picture storage file (e.g., "Photos") for browsing.
- You can also choose Bing or OneDrive from this menu if you'd rather search for a photo or use one from Cloud storage, respectively.
-
 Click a picture. Doing so will select it for your watermark.
 -
 Click Insert. It's in the bottom-right corner of the window. This action will take you back to the "Printed Watermark" window.
 -
 Click OK. You'll find this at the bottom of the window. Your selected picture will appear as your document's background watermark.
- You can also resize your picture by clicking the "Auto" box and choosing a percentage (e.g., 200), or you can uncheck the "Washout" box to prevent your picture from appearing transparent.
-
 Add text to your document, like usual. The watermark will remain in the background of your document, meaning anything you type will remain on top of your selected image. Your text color will also change to stay visible if the picture you chose is too dark or too light to adequately display text.
Method 3 of 5:
Adding a Custom Text Watermark
-
 Open Microsoft Word. Its icon resembles a blue background with a white "W" on top.
- If you'd rather edit an existing document, simply double-click the document in question.
-
 Click Blank document. It's in the top-left corner of the templates page.
- If you're editing an existing document, skip this step.
-
 Click Design. This tab is in the top-left side of the Word window, to the right of the "Home" and "Insert" tabs near the top of the page.
 -
 Click Watermark. It's in the top-right side of the Word toolbar near the top of the window. You'll see this option to the left of the "Page Color" and "Page Borders" options.
 -
 Click Custom Watermark. This option is near the middle of the "Watermarks" drop-down menu. Clicking it will bring up the "Printed Watermark" window.
 -
 Click the circle next to "Text watermark". It's in the middle-left side of the "Printed Watermark" window.
 -
 Type your watermark's text into the "Text" box. This box is near the middle of the window; it should say "ASAP" by default. Your other customization options include the following:
- Font - The style of text that your watermark uses.
- Size - Your watermark's size. "Auto", which automatically resizes your text, is the default setting.
- Color - The watermark's color.
- Layout - You can click Diagonal or Horizontal here to determine how your watermark is oriented.
- You can also uncheck the "Semitransparent" box to display your watermark in a bold format.
-
 Click OK. You'll find this at the bottom of the window. Your custom text watermark will be applied to your document's background.
 -
 Add text to your document, like usual. The watermark will remain in the background of your document, meaning anything you type will remain on top of your watermark text.
Method 4 of 5:
Adding a Background Picture
-
 Open Microsoft Word. Its icon resembles a blue background with a white "W" on top.
- If you'd rather edit an existing document, simply double-click the document in question.
-
 Click Blank document. It's in the top-left corner of the templates page.
- If you're editing an existing document, skip this step.
-
 Click Design. This tab is in the top-left side of the Word window, to the right of the "Home" and "Insert" tabs near the top of the page.
 -
 Click Page Color. It's in the top-right side of the Word toolbar near the top of the window.
 -
 Click Fill Effects. It's at the bottom of the drop-down menu here.
 -
 Click the Picture tab. You'll see it at the top of the "Fill Effects" window.
 -
 Click Select Picture. It's near the top of the window.
 -
 Click From a File. This option is at the top of the "Printed Watermark" window. Clicking it will open your computer's default picture storage file (e.g., "Photos") for browsing.
- You can also choose Bing or OneDrive from this menu if you'd rather search for a photo or use one from Cloud storage, respectively.
-
 Click a picture. Doing so will select it.
 -
 Click Insert.
 -
 Click OK. It's at the bottom of the window; doing so will apply your selected picture to your document's background.
- Unlike with an image watermark, this background picture won't be transparent.
-
 Add text to your document, like usual. Your text color will change to stay visible if the picture you chose is too dark or too light to adequately display text.
Method 5 of 5:
Changing the Background Color
-
 Open Microsoft Word. Its icon resembles a blue background with a white "W" on top.
- If you'd rather edit an existing document, simply double-click the document in question.
-
 Click Blank document. It's in the top-left corner of the templates page.
- If you're editing an existing document, skip this step.
-
 Click Design. This tab is in the top-left side of the Word window, to the right of the "Home" and "Insert" tabs near the top of the page.
 -
 Click Page Color. It's in the top-right side of the Word toolbar near the top of the window.
 -
 Click a color. Doing so will apply it to your document's background. If needed, your document's default font color will change in order to stay visible.
- If you want to create your own color, click More Colors below the color options here. You'll be able to click and drag a slider around a color gradient to create a custom color.
- You can also click Fill Effects to add pre-determined textures or patterns to your document's background.
Was this article helpful?
Your feedback helps us improve.
Related Articles
 How to separate the background from photos on Word5 minutes read
 100+ Best PowerPoint Slide Backgrounds 20232 minutes read
 How to create text wallpaper in Word5 minutes read
 How to change wallpaper on Opera browser4 minutes read
 How to combine backgrounds and change image backgrounds with simple Paint6 minutes read
 How to Convert PowerPoint to Word3 minutes read
Reader Comments 0
Sign in with email or Google to join the discussion.