Table of Contents
This updated guide examines How to Create an Index in Word and organizes the essential facts, background, and practical takeaways in clear American English.
Part 1
Marking Terms
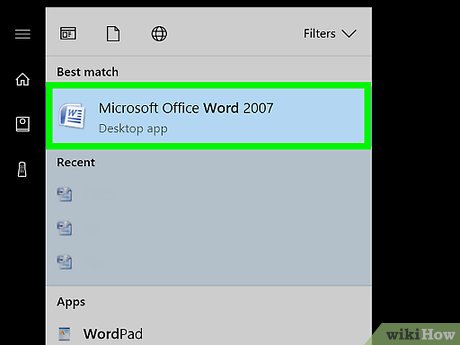 Open a Microsoft Word document. MS Word lets you add an index to any document regardless of its length, style or subject matter.
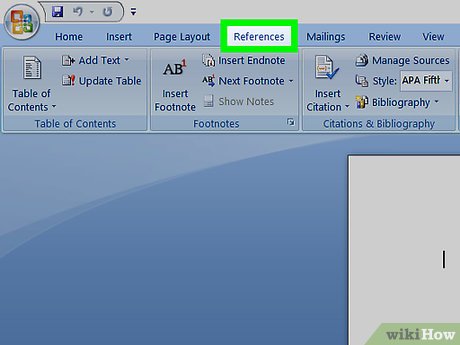 Click theReferencestab. This button is on the MS Word toolbar at the top of your screen next to other tabs like Home , Insert , and Review . It will open the References toolbar at the top of your Word window.
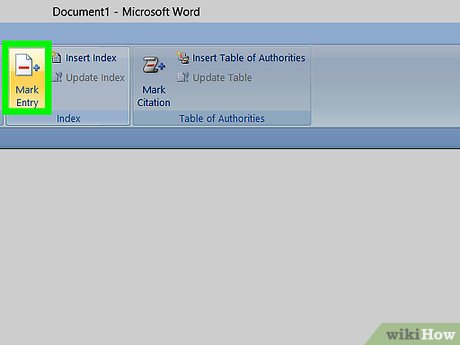 Click theMark Entrybutton. This button looks like a blank page icon with a green arrow and a red line on it. It is located between Insert Caption and Mark Citation on the References toolbar towards the upper-right corner of your screen. Clicking on it will open a dialogue box titled Mark Index Entry to select important terms and phrases for your index.
 Select a word or a group of words for your index. Double-click on a word with your mouse, or use your keyboard to highlight it.
 Click on the Mark Index Entry dialogue box. The term you just selected in your document will now appear in the text field next to Main entry .
- Optionally, you can enter a subentry , or a cross-reference to accompany the main index entry. Subentries and cross references will be listed under their corresponding main entries in your index.
- You can also add a third-level entry by entering a subentry text in the Subentry field followed by a colon (:), and then typing the text of your third-level entry.
 Format the page numbers in your index. Under the heading Page number format , select the corresponding checkbox if you want your index page numbers in bold or italic .
 Format the text for your index entry. Select the text in the Main entry or Subentry field, right-click, and click Font . This will open a new dialogue box where you can customize the font style, size, color, and text effects, as well advanced options like character scale, spacing, and position.
- If you want to learn more about formatting fonts in Word, This article will show you different font and character options that you can use in any Word document.
 ClickMark. This button will mark the highlighted term and add it to your index with the corresponding page number.
 ClickMark All. This button will search the entire document for your index entry, and mark every instance it is mentioned.
 Select another word or group of words to mark. Highlight another term in your document and click on the Mark Index Entry box. Your new term will now appear in the Main entry field. You can customize all subentry, cross-reference, page number, and font formatting options for your new index entry in the Mark Index Entry dialogue box.
Part 2
Inserting Index Page
 Scroll down and click on the bottom of the last page.
 Click theInserttab. This button is on the MS Word toolbar at the top of your screen.
 Click thePage Breakbutton on the Insert toolbar. This button looks like the bottom half of a page above the top half of another page. It will end your previous page and start a new one.
 Click theReferencestab. It's on the MS Word toolbar at the top of your screen.
 ClickInsert Index. This button is located next to the Mark Entry button on the References toolbar. It will open a dialogue box titled Index .
 Select your index type. You will choose from Indented and Run-in . An indented index will be easier to navigate for readers, whereas a run-in index will take up much less space on the page.
- You will be able to preview all different types and formats in the Print Preview box as you customize your index.
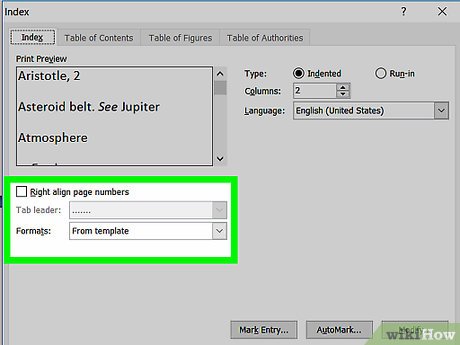 Select an index design from Formats. You can customize your index by selecting a design from the available format presets.
- You can also create your own design by selecting From template , and clicking the Modify button. This will let you customize fonts, spacing, and style for all entries and subentries to create your own design format.
- You can preview different format designs in the Preview box before you decide.
 Change the number of columns. You can increase the number of columns in the Columns box to take up less space, or you can set the number of columns to Auto.
 ClickOK. This will create an index page with all of your marked entries and their corresponding page numbers. You can use this index to look up the pages where important terms and concepts are mentioned throughout your document.
FAQ
What is How to Create an Index in Word about?
It provides a structured overview of index, explains the main context, and highlights practical takeaways for readers.
Why does this topic matter?
Understanding the main concepts helps readers evaluate the issue, avoid common mistakes, and make better-informed decisions.
How should readers use this information?
Use the guidance as a practical starting point, confirm details that may have changed, and follow current product, safety, or security recommendations.
Related Articles
 Index (INDEX) in SQL5 minutes read
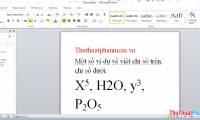 How to Indexing on the Index on the Index in Word3 minutes read
 How to Create the Index on the Bottom, Write the Exponent in Word5 minutes read
 How to Adjust the Low Height of the Upper and Lower Index in Word4 minutes read
 How to Write the Above Index, Below Index in Excel15 minutes read
 Database Index: Use Index in Access 20164 minutes read
Reader Comments 0
Sign in with email or Google to join the discussion.