
Guide to insert symbols, special characters using the Insert Symbol feature in Word.
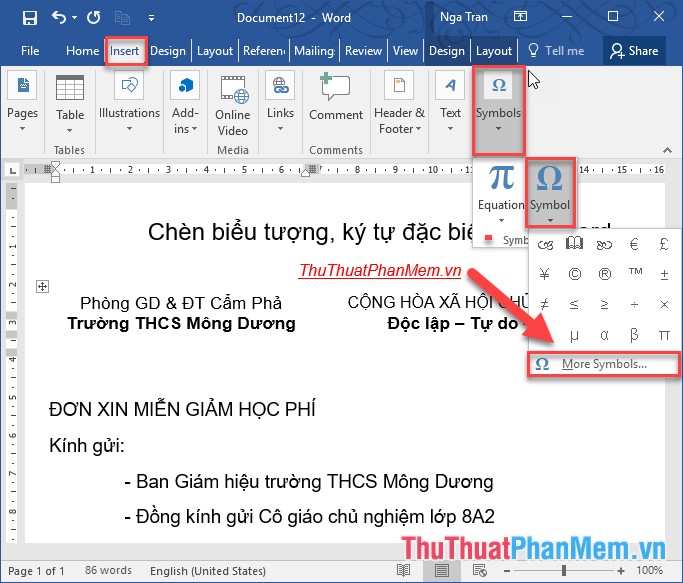
Step 1: Place the cursor at the position you want to insert -> on the Insert tab -> Symbols -> Symbol -> select commonly used characters displayed on the window or click More Symbols . to add symbols other self:
Step 2: The Symbol dialog box appears in the Font section, select the character group to insert -> Select the character to insert -> Insert or double-click the character to insert:
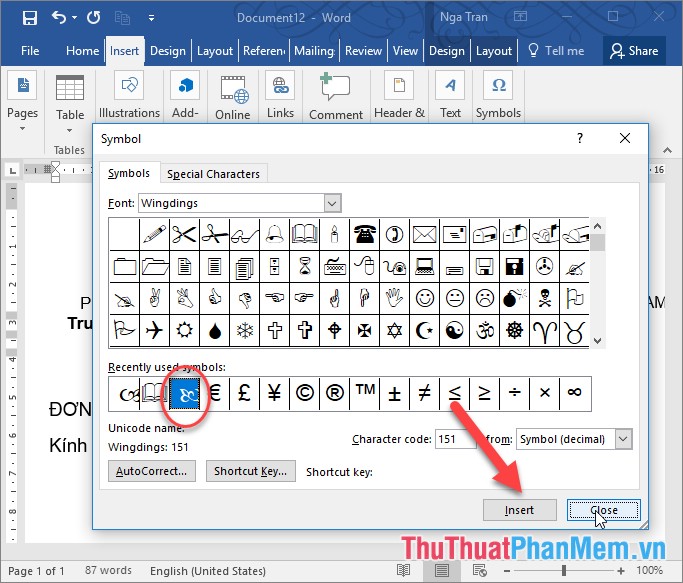
Step 3: After inserting the characters to be inserted -> click Close to close the dialog box -> the result has inserted special characters into the text:
Here you need to know the special character group to minimize the time to search. The following groups of characters in the Font section :
- Font = Wingdings: A group of common characters about books, phones, hands, etc. is the most commonly used and popular character group.
- Font = Wingdings 2: Similar to the Wingdings font but adds more special characters like stars, moon .
- Font = Wingdings 3: A collection of symbols about arrows.
- Font = MS Gothic: There are many interesting fonts for you to use when playing games or Facebook without worrying about font errors.
- Font = Webdings: Contains a lot of beautiful characters from many different topics
- Font = Segoe MDL2 Assets: Includes commonly used characters in software such as pointers, arrows, folders, calendars, etc.
- Font = Segoe UI Emoji: Includes special characters about animals and emojis.
In addition, if you want to use the shortcut combination to insert special characters -> click to select the Special Characters tab -> now you only need to press the shortcut combination in the Shortcut key to insert special characters:
Above is a detailed guide on how to insert symbols, special characters in Word. Good luck!