How to convert FBX files to OBJ for free
But fortunately, there are free and easy-to-use programs available, such as Autodesk's FBX Converter.
FBX Converter allows users to convert file formats to and from FBX. In addition, it features FBX Viewer to view 3D models before and after conversion.
Why convert FBX to OBJ?
If you have a 3D model in FBX format, some cases will require you to convert it to OBJ. For example, the conversion is necessary if you want to:
- Using files for 3D printing : If you're going to print a 3D file (especially when printing in multiple colors), you'll need to convert the file to OBJ.
- Smaller file size : FBX files are larger and they store more data when compared to OBJ. Stored data includes meshes, camera settings, lighting, and geometry. So if you don't need all of this and want a smaller file, you can convert it to OBJ.
- Open files in a variety of ways : You can open OBJ files in more 3D design applications than FBX, which only a few CAD packages support.
- Easy file modification : The OBJ file encodes the surface geometry of the model. This allows the user to align the surface of the model with polygons, curves, and shapes. They can be further modified based on requirements.
How to convert FBX files to OBJ for free
You can follow the steps below to convert FBX files to OBJ using Autodesk FBX Converter.
Step 1: Download the software

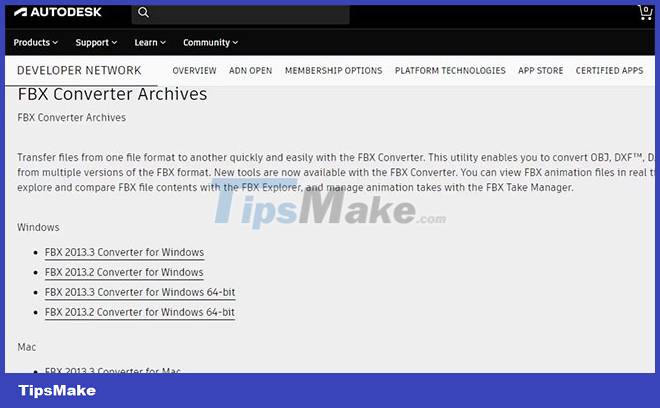
To download FBX Converter, visit the Autodesk website and select the format that is appropriate for your computer. FBX Converter supports Windows and macOS operating systems. The latest available version will be at the top of the list.
Once downloaded, double-click the file to install. You can then launch the app and move on to the next step to learn about the user interface.
Step 2: Interface of FBX Converter

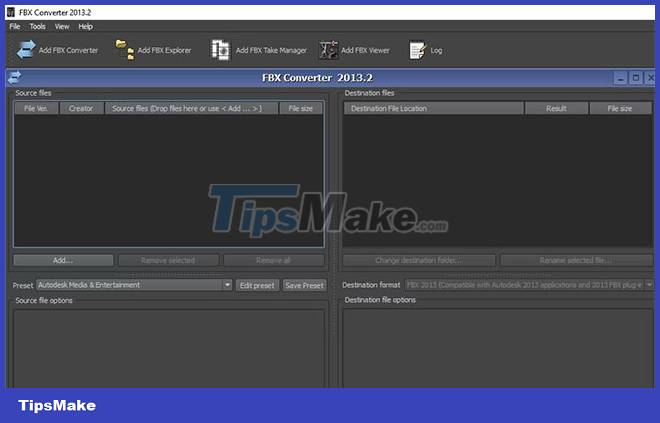
The user interface of FBX Converter is very simple and user-friendly. As in most other applications, in the top left corner of the menu bar you will find the File menu , which contains options for setting up and exiting the software.
Next, we have the Tools menu , which contains the following tools:
- Add FBX Converter : To convert FBX files to many different file formats.
- Add FBX Viewer : It allows you to interact with 3D files, view them before and after the conversion process without switching to another separate software package.
- Add FBX Explorer : It helps you to search and compare the contents of FBX files.
- Add FBX Take Manager : Useful for extracting animations from FBX files and creating separate FBX files from each file.
On the right is the View menu where you can see the option to minimize or close all windows and choose to show or hide the toolbar.
Step 3: Import the FBX . file(s)
To get started, click Add FBX Converter from the Tools menu and two windows: Source files and Destination files will open.
To import the FBX file, select Add… in the Source files window , go to where you saved your file and import it. Then you will see the loaded file in the source file window.
One of the outstanding features of FBX Converter is the ability to import and convert multiple files. So, in case there are many FBX files you want to convert to OBJ, you can do it in this program.
If you mistakenly import one or more files that you don't like, just select that file and then click Remove selected . You can select Remove all if you want to delete them all.
Step 4: Convert FBX to OBJ
In the Destination files window , you will see the Destination format . When you click on it, you will see a drop-down menu with a list of formats supported by the software.
Select OBJ and make sure that the Triangulate and Bake deformations boxes are checked if you need those details in the converted OBJ file; if not, uncheck them. You can also change the destination of the file after conversion by selecting Change destination folder .
If you do not change the directory, the software will store the OBJ file in the same directory as the original FBX file. After selecting the settings, click Convert. If successful, you will see Converted written in the results section.
Now you have successfully converted the FBX file to OBJ. If in the future you want to perform a conversion without having to repeat the same process, you can create a preset conversion setting.
Step 5: Create conversion presets
In the Preset section of the Source files window , click the Edit Preset button , as shown below.
You will be able to see a list of available options. Select OBJ and a pop-up dialog will appear prompting you to specify the name of the preset value and save it.
You can always access your presets in the Presets section of the Source files window .
You should read it
- How to convert AI files to PNG, JPG without software
- How to convert Word to a CSV file
- How to convert PowerShell script file (.ps1) to .exe by IExpress on Windows 10
- How to convert image file to PDF on Windows 10
- How to convert a PDF file to PNG
- What file is M4A? How to open, edit and convert M4A files
- How to Convert MP3 to WAV
- How to Make an ICO File
- How to convert PDF to JPG, PNG images
- What file is XSD? How to open, edit and convert XSD files
- The convert in Windows command
- How to Convert AVI to MP4 on Mac
Maybe you are interested
Don't download cracked software to avoid these 4 dangers! Some tips to increase FPS while playing games on laptops Invite experience Super Mario 75 'battle royale' version of players, see who broke the island first Instructions for installing .NET Framework 3.5 Offline on Windows 10 How to reduce PDF file size by software How to fix errors that are not backed up are noted on OneNote 2016
