Guide to making horror photos online Halloween
Just over a week away from Halloween, do you want to make horror photos to post to Facebook to show off to your friends? There are a lot of photo editing software to help you do this, but you will have to install it very time consuming and take up hard drive space. Therefore, TipsMake.com will introduce to you a tool to help you make online horror photos that you will not need to register for an account. Let's follow it.
Just over a week away from Halloween, do you want to make horror photos to post to Facebook to show off to your friends? There are a lot of photo editing software to help you do this, but you will have to install it very time consuming and take up hard drive space. Therefore, TipsMake.com will introduce to you a tool to help you "processing" online horror photos that you will not need to register an account. Let's follow it.
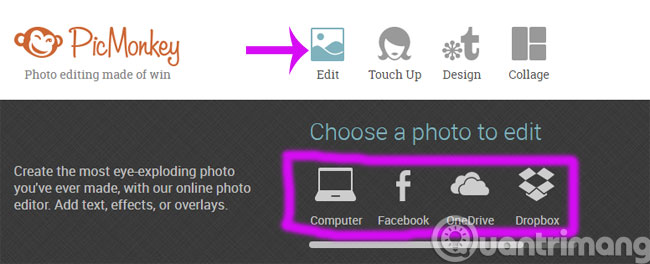
Step 1 : Access to PicMonkey homepage, click on Edit . Here, you can choose which photos you want to edit from your computer, Facebook , OneDrive or Dropbox .
Step 2 : Soon you will be redirected to the image editing interface. Click on the black cat icon to see the Halloween effects that the service offers.
There are many effects groups for you to choose from:
- Vampires : The effect of transforming portraits into vampires.
- Zombies : Live body photo effects.
- Day of the Dead : Effect of death day.
- Witches : Witch effect.

Step 3 : In each group, the effect is divided into many small sections to help you edit the skin, eyes, nose, and mouth colors, . Click on each item and then use the mouse to apply the effect to the face on the image.
Note : The effect has a crown icon, you must buy it to use it.
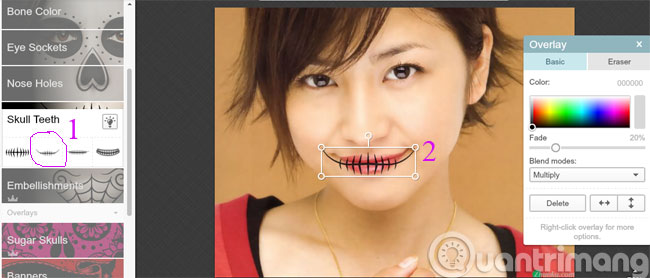
Here we illustrate the Skull Teeth effect, select the lip type and fill the lip area on the image, select the color in the Blend modes section. If you want to delete the applied effect, press Eraser . After editing, click Apply .
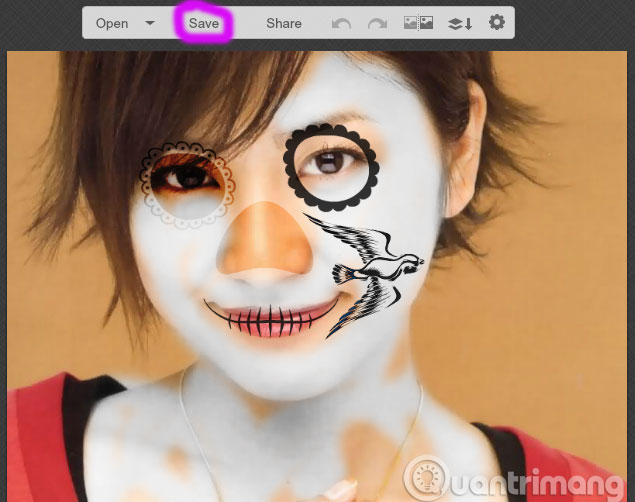
Step 4 : After editing, click the Save button to download the image to your computer.
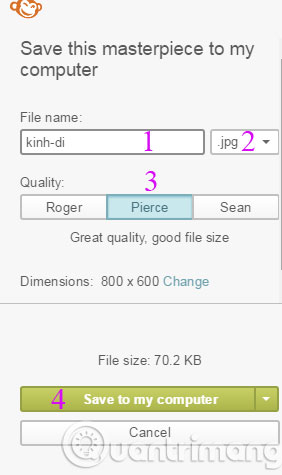
Step 5 : Name the image in the File name section then click the drop down button right next to that item to select the image format to save (here we choose JPG).
You can also choose the quality of the output image in Quality from low to high order, including Roger, Pierce, and Sean . Then, click the drop down button next to the word Save to my computer to choose how to save: Computer, OnDrive or Dropbox.
So, with just a few simple steps, you know how to make horror photos for the upcoming Halloween 2015 season.
- Create Zombie photos during Halloween in Photoshop
- Good Windows applications for Halloween
- Make photos as beautiful as hotgirl with Lightroom
Good luck!
Was this article helpful?
Your feedback helps us improve.
Related Articles
 Halloween wallpapers for phones2 minutes read
 Horror movies not to be missed during the 2017 Halloween season5 minutes read
 Top 8 great Halloween movies you should watch5 minutes read
 Guide to disguise as a horror Zombie on Halloween6 minutes read
 Instructions on how to make a unique Halloween paper mask3 minutes read
 The Best Horror Movies on HBO Max3 minutes read
Reader Comments 0
Sign in with email or Google to join the discussion.