
Instructions to enable battery saving mode on Windows 11
1. Use Quick Settings
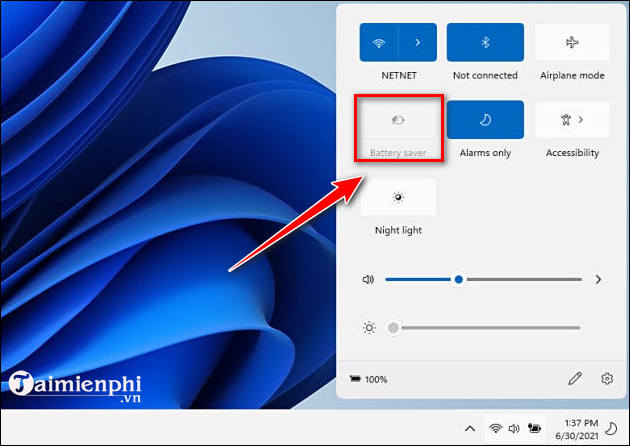
Click the area containing the Wi-Fi, battery, and speaker icons or press Windows + A to open the Quick Settings menu.

Then, just click on Battery Saver.
To turn off battery saver, open the quick settings menu and select Battery Saver .
You can also turn off the Windows 11 startup sound to reduce noise and save battery.
2. Turn on power saving mode in Settings
Step 1: Click on the Windows icon => select Settings or press Windows + I to open the Settings application.
Step 2: In the Settings window , select System => click Power & battery.
Step 3: In the Power & battery window , select Turn on now under Battery.
If you want to turn off battery saving mode, just follow the same steps => click Turn off now to turn it off.
If the Battery Saver option is grayed out and you can't click it, it means your laptop is plugged in. Unplug the charger to enable battery saver on Windows 11. Note that you won't see this option if you're using a desktop computer.
You should read it
- How to enable battery saving mode on Opera
- Use Low Power Mode to save battery on iOS
- How to customize battery saving mode on Android Oreo
- How to turn off battery saving mode on Android, Samsung, Xiaomi phones
- Tips to increase battery life for iPhone 5
- 11 tips for maximum battery saving for your phone
- Instructions to enable / disable Windows 10 Battery Saver (Battery Saver) feature
- Use 'power saving mode' on Apple AirPods models
- 12 best battery saving apps today for Android
- Steps to enable battery saving mode (Battery Saver) on Windows 11
- How to create battery saving shortcuts on iPhone
- Instructions for setting up and using 'Battery Saver Mode' on Android