
How to use Photoshop CS5 - Part 2: Panels
One of the best things about Photoshop is also the worst: it is overloaded options.Browse through the default panels to be able to grasp what features to use in the process of using Photoshop so you can find them again when needed.

- See the basic part 1 introduction to Toolbox in Adobe Photoshop CS5
The default panel is located on the right side of the Photoshop work window. It contains all the useful settings for new users of Photoshop, you can adjust, hide or show them. Photoshop's workspace can be wider for you to work comfortably when you hide the panels.
The default settings of the panels in the Essentials section will look like the following. In addition to the Essentials window, you can also choose other frameworks such as Design, 3D . by clicking
Panels can be combined by clicking
You can drag the panel to any position convenient for use by clicking and dragging the corresponding panel out of its fixed position.
Of course, the panel can also be reset to its original position by dragging to the right side of the Photoshop window, until you see a green bar on the right side of the window.
Learn the default panels:
In Essentials framework there are several default panels. It appears at the top (next to the Help menu).
Virtual browsing of photo folders in Photoshop is very useful. Bridge will only load when you open the panel and select Start Browsing . The intuitive tool will navigate to the folders on the computer; Important and often used files / folders can be added to the Favorites section for quick access when needed.
As you can see in the picture below, the left picture is the action done on the image, the right one is the undo operation that is almost the whole work done.
Using the History panel, you can back the most recent work done with the image or even restore the original image (in case of improper editing) by clicking on the top part of the History panel. .
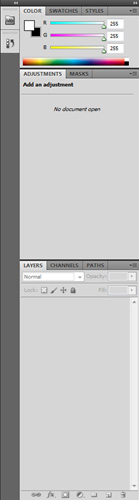
You can adjust the Red, Green and Blue values from 0 to 255. The higher the color value, the brighter and vice versa. You can also choose colors from the color bar at the bottom of the panel, it seems easier to choose.
You can also customize other color options by clicking
By default, CS5 will save 122 colors primarily for your use.
You can create a new swatch from the foreground color by clicking
The color you choose to save will be displayed in the Swatch panel.
Quite simply, just click on any of the default styls to quickly reuse them later. If you don't want to select a specific format for the layer, edit them manually or click on the button
Lots of default effects
You can select more available formats by clicking
Click 'Levels' to automatically create a new adjustment layer.
You will see the slider options to adjust the contrast of the image.
These changes can be undo without using history or other undo functions, just delete the created adjustment layers.
Many adjustment layers can be created at the same time and if any adjustment layer is needed, you just need to hide other adjustment layers because they are separate layers.
Panel Mask is a unique feature in CS5, it can help new users cut the background from the photos without much effort.
A new art editing layer makes the photo (or worse) look better without affecting the original image layer.
A layer can be copied, masked and many other operations. Adjustments for also created and managed classes in this Layers panel.
Layers are stacked together, combined to create perfect photos.
Opacity and Blending modes are also managed in this panel. Editing images with layers can create rich images and are easy to edit.
If you are interested in using Channels, save the image before testing.
Next lesson: How to use Photoshop CS5 - Part 3: Introducing Layers
Previous lesson: How to use Photoshop CS5 - Part 1: Toolbox
Good luck!
You should read it
- How to use Photoshop CS5 - Part 1: Toolbox
- Instructions for using Photoshop CS5 to edit photos in full set
- How to use Photoshop CS5 - Part 4: Basic menus
- Instructions for using Photoshop for newbies
- How to use Photoshop CS5 - Part 5: Photo editing
- How to use Photoshop CS5 - Part 3: Introducing Layers
- How to use Photoshop CS5 - Part 6: Digital art
- Link download Adobe Photoshop CC
- How to use Photoshop CS5 - Part 7: Design and present with the Type Character Panel
- 15 common problems in Photoshop and basic remedies
- These great new features of Adobe Photoshop CC 2018 the Designer should not be missed
- Do you want to learn Adobe Photoshop tips within 1 minute? Take a look at these tutorial videos
Maybe you are interested
How to turn on / off Fullscreen Optimizations for apps and games in Windows 10 Activate Update Restart Notifications on Windows 10 Few doubts of concrete can help limit air pollution 70% of Windows 10 users are completely satisfied with Microsoft's data collection Google pays Apple billions of dollars to be the default search engine on iDevice Google Maps updates traffic jam prediction