15 common problems in Photoshop and basic remedies
Currently, Adobe's Photoshop software is the most popular and professional graphic image processing program in the world. But even so, this software still has some problems that often occur and cause annoyance to users. In the article below are the most common 'errors' of this graphics application and how to fix it.
Common problems in Photoshop and basic remedies
- 1. The cursor disappears or the shape changes
- 2. The control panel is not displayed
- 3. Brush function or some other tools stop working
- 4. The Clipboard Export process fails when switching to another program
- 5. New Documents and files always open through tabs
- 6. Important and essential files are not automatically opened in Photoshop
- 7. Cannot control when going to Smart Quotes mode
- 8. Size constantly changes after Zoom
- 9. Storage is always in full capacity
- 10. Photoshop works weak on machines with normal configuration
- 11. Change units to pixels
- 12. Rule of thirds
- 13. Rotate photos properly
- 14. Bird eye view mode
- 15. Classify smart objects
1. The cursor disappears or the shape changes

You may encounter this situation because after working with some border picker tools, go back to the Brush and realize that the shape has been changed, it is difficult to see and observe. What happened?

If your cursor shape looks like the above it might be because of ' precise cursors ' mode. Click Caps Lock to return to normal mode or press Ctrl + K to display Preferences> Cursors> Normal Brush Tip .
2. The control panel is not displayed
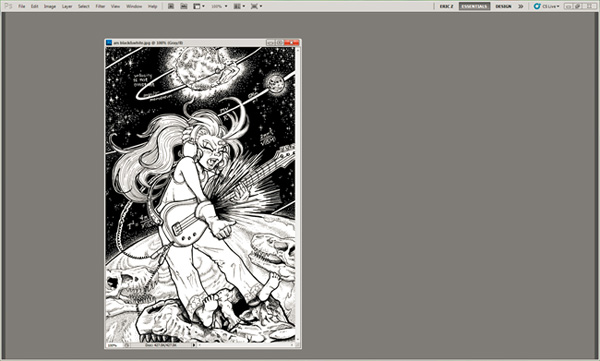
After completing a work or a work, you realize that all the surrounding panels disappear, leaving only the menu bar. Why?
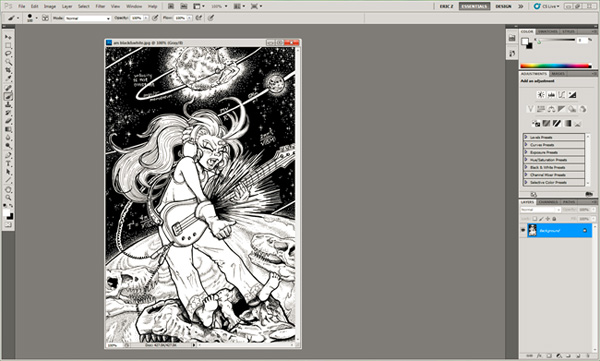
Very simple, because during the operation or typing any character, you have pressed the TAB button - has the function of expanding the screen to work by temporarily hiding all the toolbars around. Clicking on the second time will help the program re-display these tools, and it will not affect the menu bar at all.
3. Brush function or some other tools stop working
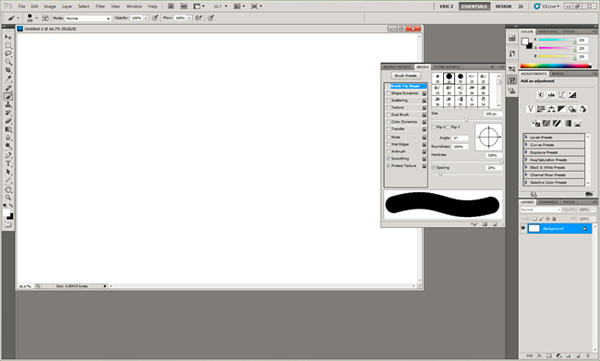
While you want to fill, remove the selection, sample . but suddenly Photoshop does not display the highlighted points on the working area.
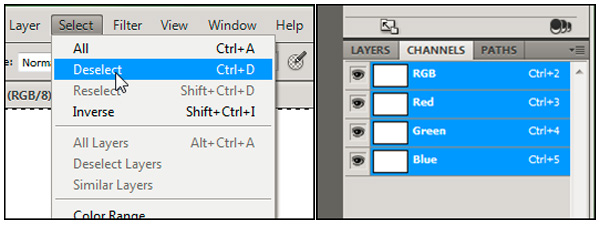
The solution is as simple as this: click Select> Deselect if there are any selections with the Marquee Tool , which you forget or cannot see. Then, open the Channels tab in the Layer panel, double check all layers to make sure we don't work with Quick Mask Channel or any other Channel mode. In the opposite case, proceed to pool Channel RGB . If you are selecting Quickmask mode, just press Q to return to normal.
- Instructions for installing Brush on Photoshop
4. The Clipboard Export process fails when switching to another program
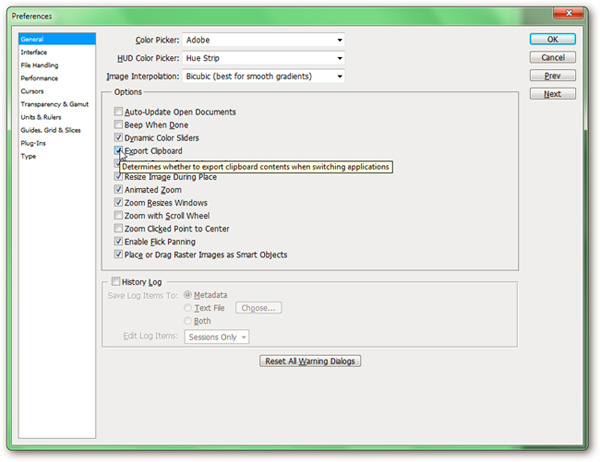
Phenomenon: Photoshop crashes every time we switch to any program, displaying strange notifications about the clipboard.

Press Ctrl + K to display the Preferences panel, below General you will see the Export Clipboard option. This function prevents copying image data from Photoshop but does not restrict the reverse process, ie copying images from outside into Photoshop.
5. New Documents and files always open through tabs
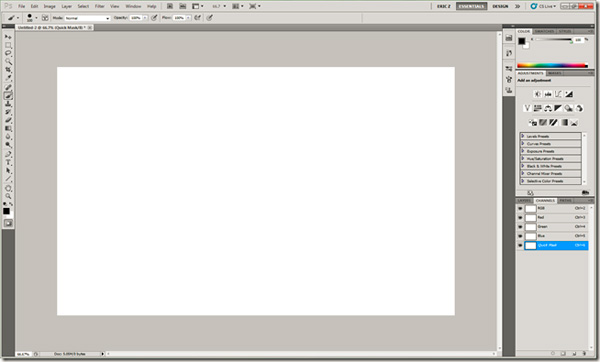
You just switched to using a new version of Photoshop, unless you have to use the Tab feature every time you open an image or create a new file.

Press Ctrl + K to display the Preferences panel, go to Interface section and uncheck the check box in Open Documents as Tabs .
6. Important and essential files are not automatically opened in Photoshop
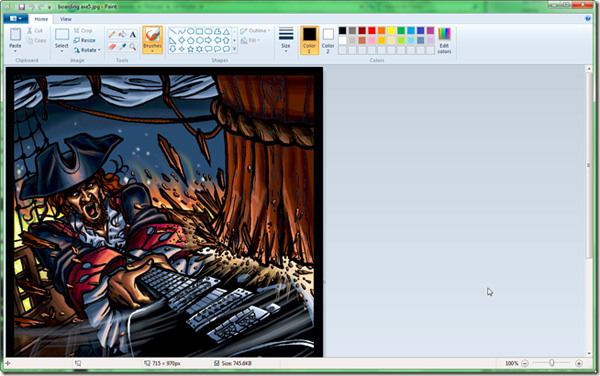
When you double click on a normal image file, you usually open it in Photoshop, and another program just installed will boot instead of Photoshop.
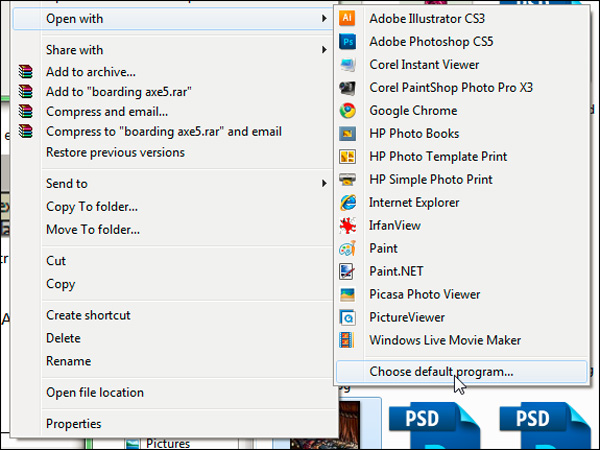
Right-click the file and select Open With> Choose default program , find the Adobe Photoshop application in the displayed list, then click OK :

7. Cannot control when going to Smart Quotes mode
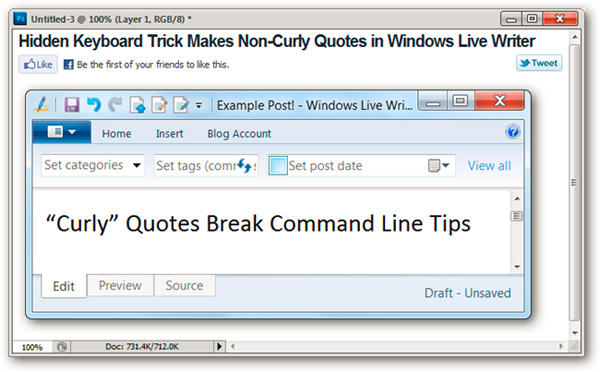
For many reasons, you want to use Straight Quotes more than Smart Quotes , but can't control this function.
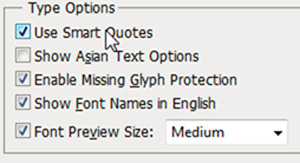
With a bit of practical experience from many users, Straight Quotes mode doesn't really cite the whole, but only in a fixed distance depending on the unit of foot or inch . Most programs automatically fix Smart Quotes, but in return will cause many other errors. The easiest way to ignore the problem is to disable this feature, press Ctrl + K> Type , you will see the option to turn off Smart Quote.
8. Size constantly changes after Zoom
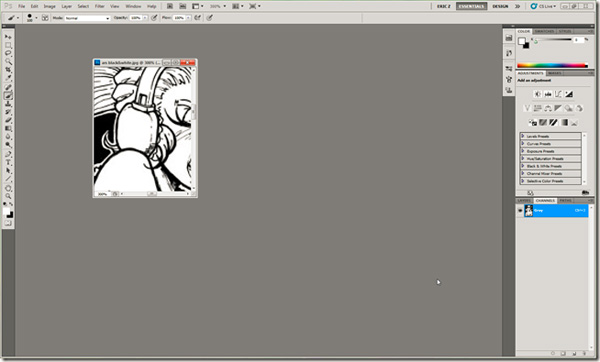
The common problem is that after you zoom out or enlarge the image, Photoshop will do the opposite. This means that when zoomed in, the image is still small and the user must constantly change the size.
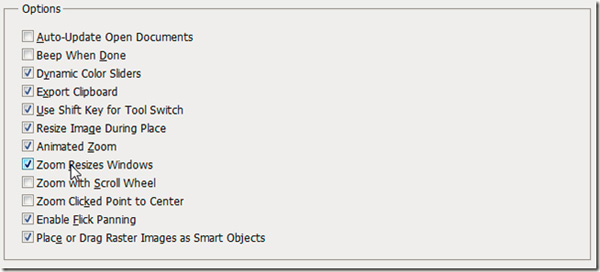
The Preferences panel contains the option to restrict this, press Ctrl + K and look at the General tab. Here you will see the Zoom Resizes Window section , automatically resizing the window when zooming in or out.
9. Storage is always in full capacity

Photoshop's activities become more sluggish and sluggish than ever, the system partition is full of data. When you perform complex operations or apply filters multiple times, the program displays strange error messages.
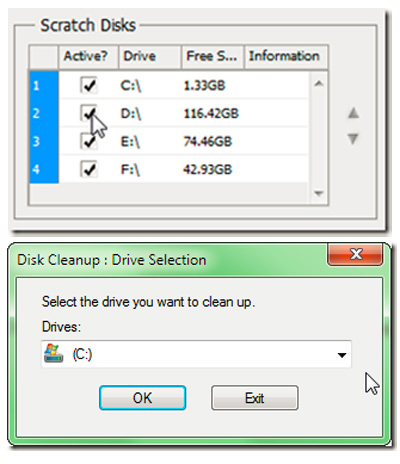
Keep using Preferences to solve this problem. You press Ctrl + K> Performance , the table to select the storage partition display settings, select the drive with a large amount of free space to do this. Besides, you can use the system cleanup utility like Disk Cleanup or CCleaner to delete the extra files in the C drive.
- How to free up computer memory Windows 7, 8 / 8.1 and Windows 10
10. Photoshop works weak on machines with normal configuration

Every time you use any effect or filter, the whole program is paralyzed.
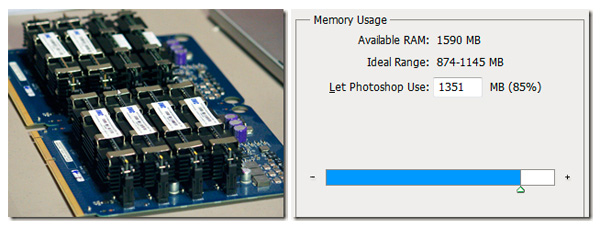
The solution should be done immediately to upgrade the hardware for the computer, especially RAM and VGA. However, not all users are well versed in this area, so take advantage of the self-tuning function. and distribute Photoshop system resources. Open Preferences> Performance , where you will see the option for the program to maximize the amount of physical memory, up to 100% RAM. Besides, don't use many other programs simultaneously with Photoshop if you haven't upgraded the hardware for the system. If none of these methods work, try turning it off and restarting Photoshop.
11. Change units to pixels
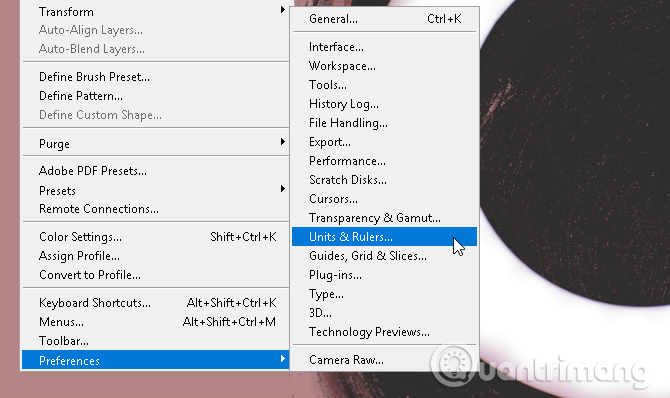
When using Photoshop, you can see that the unit of measurement is changed to inches instead of pixels. This makes you uncomfortable when handling the work designed for the website. To change, click Edit , hover over Preference and click Units & Rulers . You can also open the Preference window by clicking Ctrl + K and selecting Units & Rulers on the side menu.
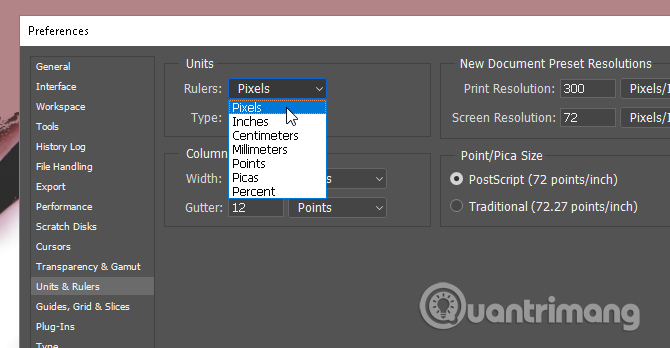
From the Preferences window, change the Rulers setting to Pixels using the drop down menu.
Click OK .
12. Rule of thirds
Most people don't usually use grids in Photoshop even when creating any shapes. You can change this by creating a Third Rule, accessed by creating a simple keyboard macro.
To do this, first press Ctrl + K on the keyboard to open the Preferences window, then select the Guides, Grid & Slices options in the side menu.
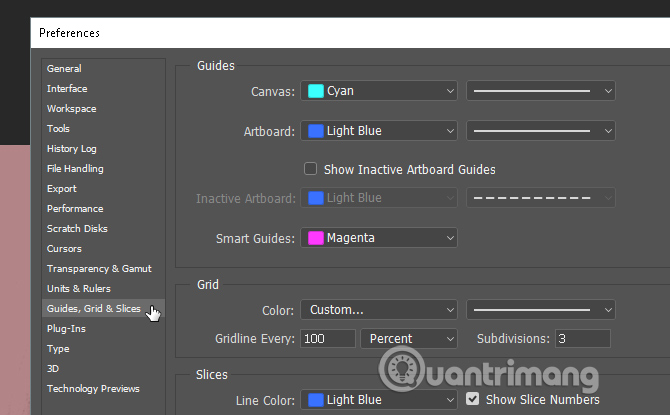
In the Grid section, change the Gridline Every to 100 and Percent ; in Subdivisions into 3 and click OK . Now, you can quickly access the Rule of Thirds by pressing Ctrl + Tilde on the keyboard.

If you want to use the measurement unit table while working, you can press Ctrl + R on the keyboard to open a ruler (ruler bar) that displays information on the artboard.
13. Rotate photos properly
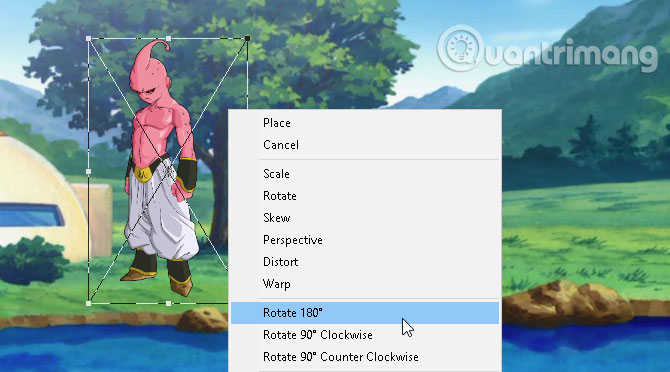
Stop rotating the image with the Image adjustment page, you can accidentally rotate the artboard. To rotate, move, and tilt images, you can use the Transform tool.
Select the image, then press Ctrl + T on the keyboard, you will see a box appear around the image. Then, right click on the image and select your option.
14. Bird eye view mode
Most of the time you use Photoshop to view and edit small details in the project. It's annoying when you have to constantly zoom in and out when you finish a canvas.
If you have enlarged a part of your design and want to zoom in to that size in another location, just press and hold H , click and drag the cursor, place the square zoomed in to any other location. in the artboard.

Now you do not have to continue to zoom in and zoom out manually to complete your project.
15. Classify smart objects
For example, you are using a filter for a layer to look better. Usually when you make a mistake, you will have to go back to each filter and use it again. What happens when you forget the specific value of the filter or there is a problem with the filter. All of these problems can be overcome by converting the class to Smart Object . To show the difference, this is an image of a simple class:
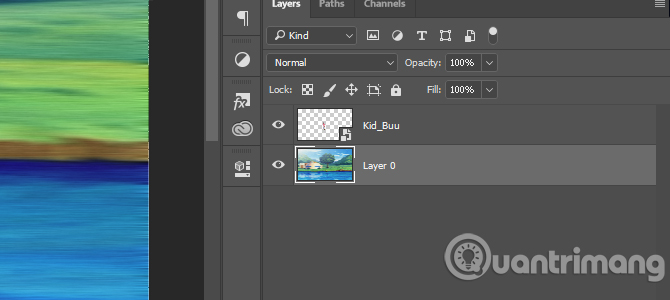
Smart objects allow users to list changes that are made on a class and allow editing, deleting, or creating any specific modifications. To convert the class into a smart object, right-click the class name and select Convert to Smart Object . You will see a small icon appear in the class thumbnail.
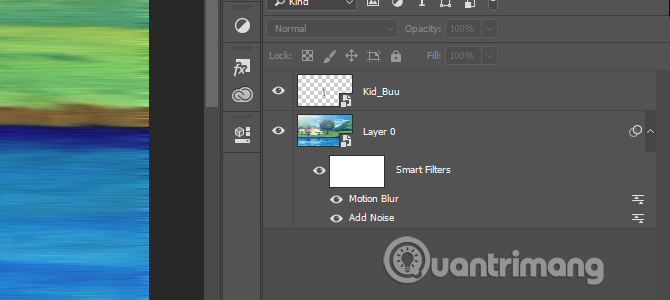
Now you will have a smart object to make your class. To view or delete filters, just click the eye icon on the left of the list. To edit options, double-click the level icon on the right.
I wish you all success!
See more:
- Instructions for using Photoshop for newbies
- Instructions for using Photoshop CS5 to edit photos in full set
- How to rotate the "brush" in Photoshop in just 5 seconds with this tip