How to use Photoshop CS5 - Part 3: Introducing Layers
One of the standard components of Photoshop is Layers, which is the foundation for you to create beautiful photos. In this article, TipsMake.com will introduce some operations using basic layer to highlight a photo.
Table of Contents
One of the standard components of Photoshop is Layers, which is the foundation for you to create beautiful photos. In this article, TipsMake.com will introduce some operations using basic layer to highlight a photo.

Basic introductions to Adobe Photoshop CS5 may interest you:
- Part 1: Toolbox and friends.
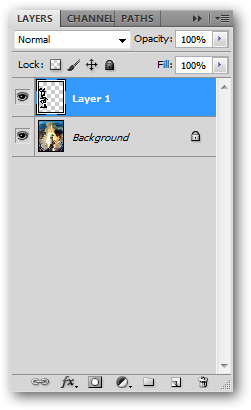
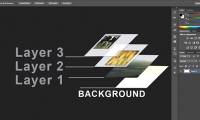
The Layers panel is one of the most important components of Photoshop, and whenever you use Photoshop you also spend a lot of time working on this panel.
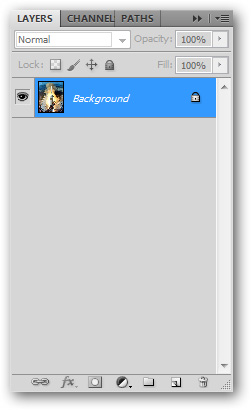
If you don't see this component displayed in the working window, you can reopen it by going to Window menu> Layers (or pressing F7 ).

Use the lasso tool to create any shape, in this case, the layer will be drawn. But Lasso will not create a new layer, so you have to click
 in the Layers panel (or press Ctrl + Shift + N ) to create a white layer.

You can include this new layer with a new image file or any component depending on your photo editing purpose. By default, a new layer will be created in the background (transparent).
If you want to add a background to this new layer, simply go to Edit > Fill and choose the color to set.
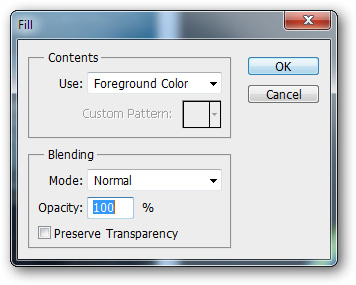
The new layer background color in the example we just made is black. After you have filled the object you just painted, remove the selection to perform another operation. To deselect a region, simply press Ctrl + D on the keyboard.

Press Ctrl + D to deselect
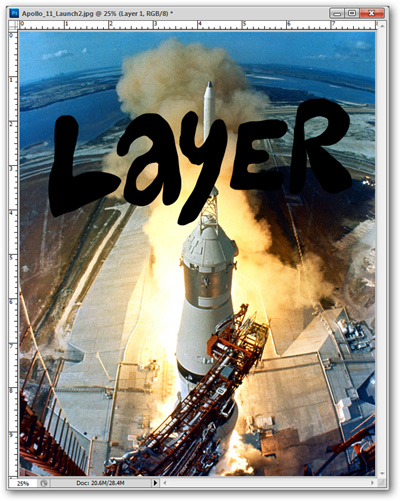
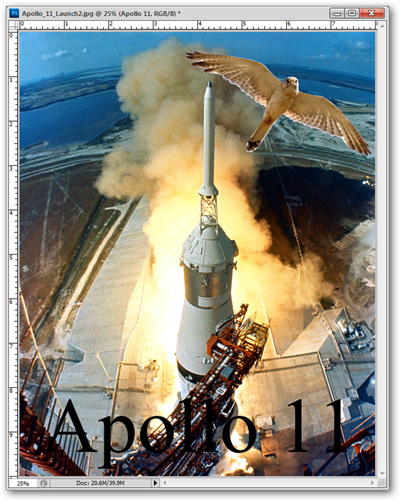
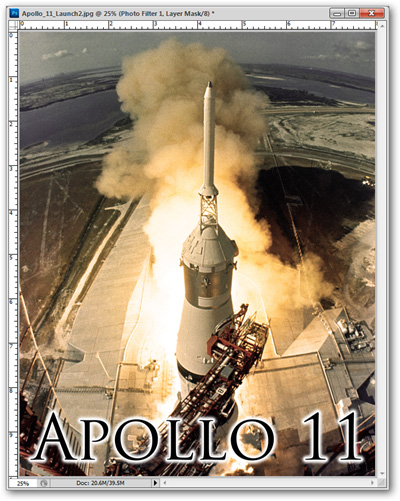
As in the image in this example, the Layer text overlaps the image of the rocket's head and is bad for the image, in which case you need to correct the position of the Layer letter so that it is reasonable.
Use the Move Tool (shortcut V ) to move the selected layers in Photoshop's Layers panel.
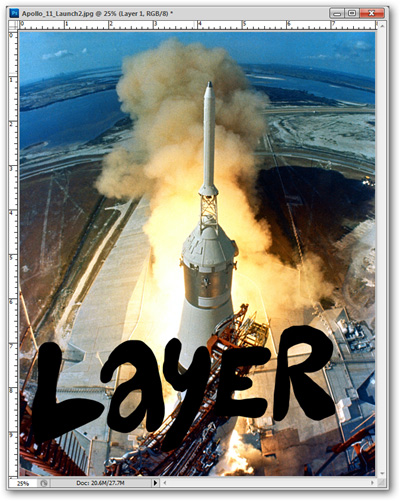
According to the image above, the space shuttle is still obscured by the Layer letter, you can drag and rotate it in a different position so as not to worsen the original image.
To rotate the layer you can select the layer to rotate, press Ctrl + T on the keyboard, place your mouse pointer over the corner of the rectangle around the layer and rotate.
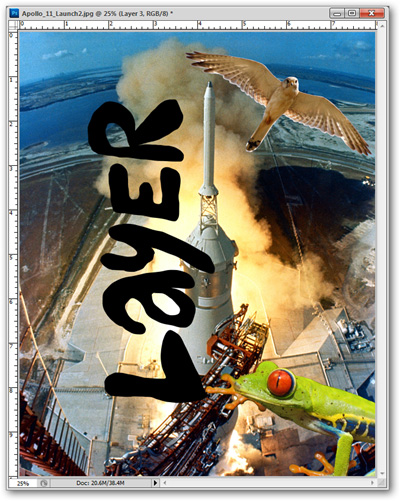
In addition to the layer you just created, you can insert different layers on the image, each layer is an independent component, which will help you edit more flexibly.
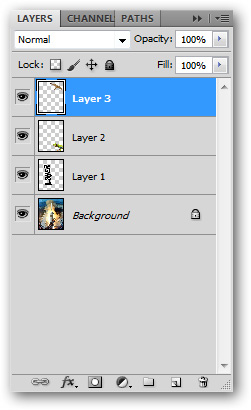
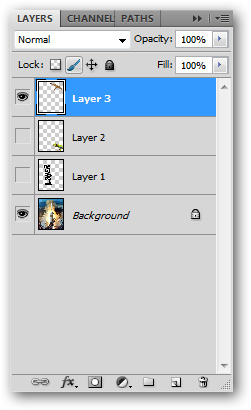
If there is a layer that does not match when there are other layers, you can hide it by clicking on the icon
 on the corresponding layer you want to hide. Revisiting the layer does the opposite, clicking on the empty square at the top of each layer.
To create a caption for the image, select the Type Tool (shortcut: T ) and enter the caption content. This content can be changed if you need to edit it later.
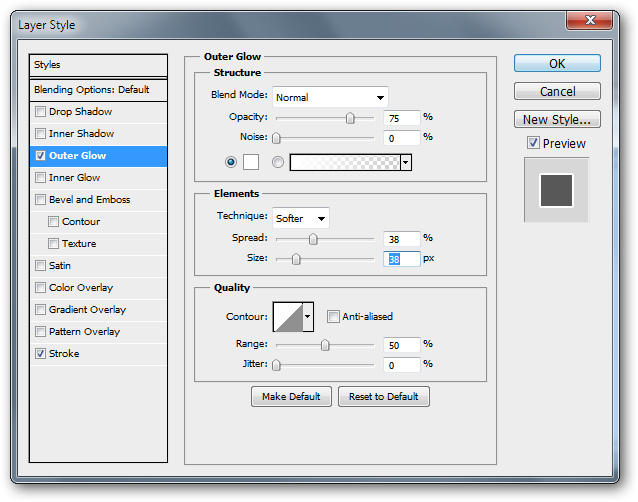
With a content on the background, the image is not very prominent, you can use the Blending Options option to add effects to the currently selected layer. Right-click on any layer to create an effect and select Blending Options on the menu.

With this option you will see the Layer Style dialog box appear. Here you can select shadow effects, create borders . and lots of other effects for the object.
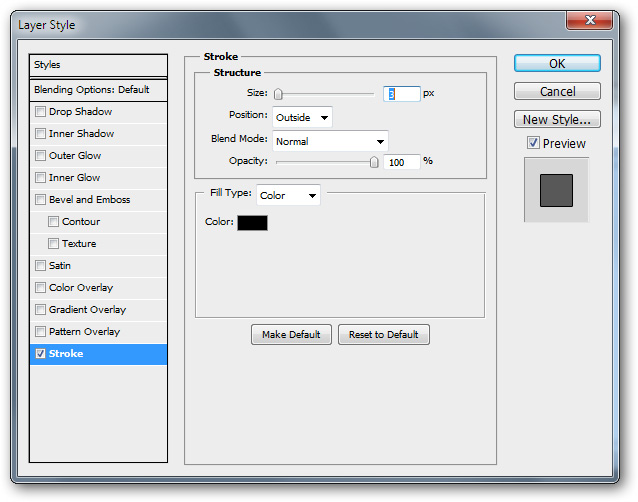
You can use different types of effects for the same object / layer as long as it helps the team stand out more on a complex image background.
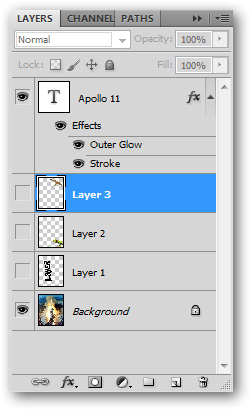
Even if the effect is selected, if you need to change the content of the object (in this case, Aplollo 11 font), it can still be done.

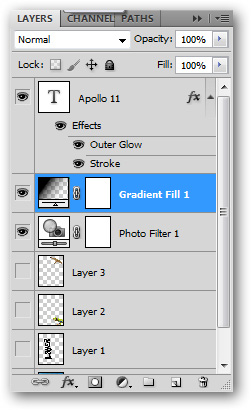
In the Layer panel, you can control all layers and layer effects. If you need to hide the effect or any layer still need to click on the icon
 . There are many different types of layer effects in the Layer panel depending on the object you create.

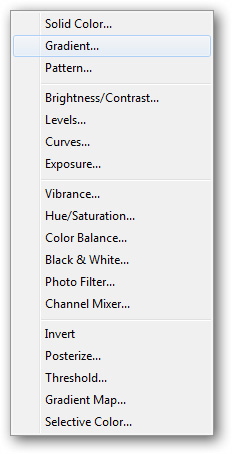
In the Layers panel, you can click
 to create another layer of color layers, also called Adjustment layers
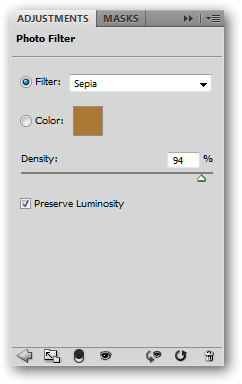
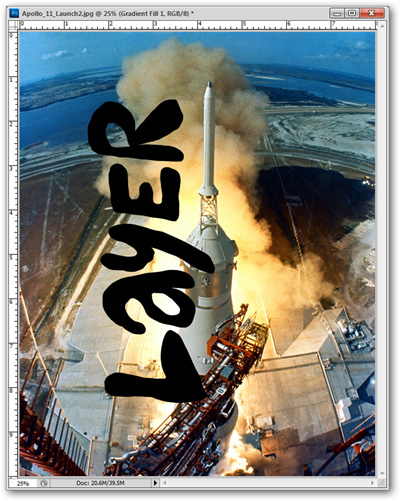
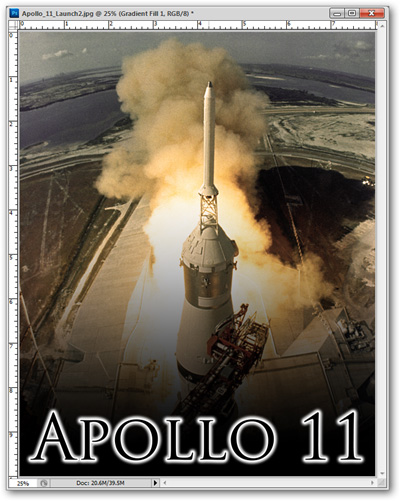
The following image has been added to an Adjustment layer
This Adjustment layer is also listed in the Layers panel and it only affects the layers below it. Try changing the class position to see the interplay between the classes. This Adjustment layer can also edit the same effect as normal layers.
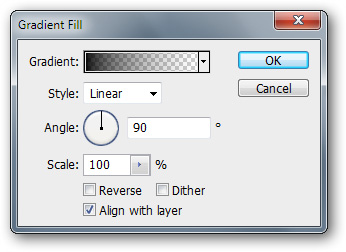
There are many optional effects to edit Adjustment layers, including the Gradient component.
You can edit some options with gradient effects such as style, color, angle .
Adjustment layers are hidden or edited by double-clicking them on the list in the Layers panel
Working with layers in the Layers panel will increase your ability to use Photoshop, thereby achieving the desired effect on the image you need to edit.
Next lesson: How to use Photoshop CS5 - Part 4: Basic menus
Previous lesson: How to use Photoshop CS5 - Part 2: Panels
Good luck!
Was this article helpful?
Your feedback helps us improve.
Related Articles
 3 tips to manage layers in Photoshop5 minutes read
 How to combine layers in Photoshop6 minutes read
 How to resize layers in Photoshop2 minutes read
 10 Photoshop beginner skills need to know16 minutes read
 How to Unlock Layers in Photoshop5 minutes read
 How to combine 2 or more layers in Photoshop2 minutes read
Reader Comments 0
Sign in with email or Google to join the discussion.