How to set the default font in Word, Excel 2016
How to set the default font in Word, Excel 2016 helps you not to make font settings every time you create a new file according to your own.
You often work with Word and Excel text files, each time you create a new data file, the first thing to do is to set the font and font size for the data file. So every time you create a new file, you must perform this operation. The following article details instructions How to set the default font in Word, Excel 2016 helps you not to make font settings each time you create a new file as you like.
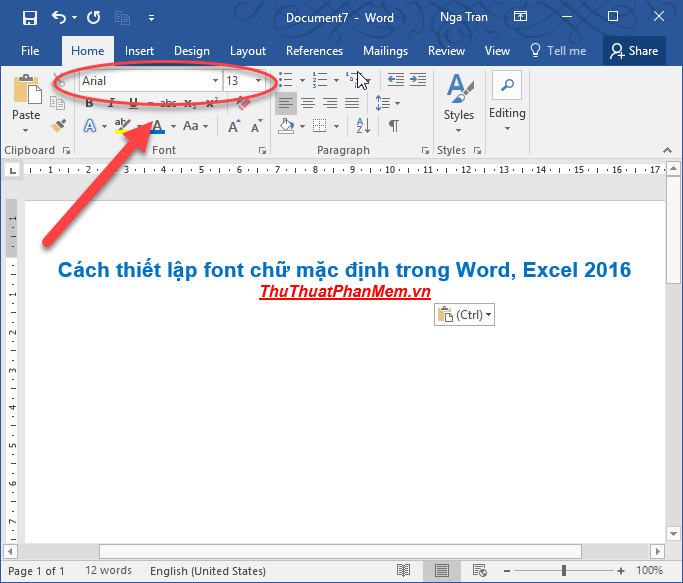
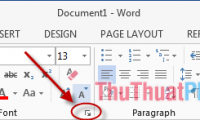
Step 1: On the MS Word interface -> go to the Home tab -> click the arrow in the Font section or press Ctrl + D:

Step 2: The Font dialog box appears, select:
- Font item : Select the font you want to set (frequently used fonts)
- Size Size: Select the font size
- Font Style: Select a font style
Finally, click Set as Default to set the default font:

Step 3: After setting up the Microsoft Word dialog box, click All document based on the nomarl.dotm template to apply the default font setting for all Word files -> click OK:

The result when you create a new text file, the default font and font size have been set you do not need to manipulate again:
With Excel File you perform the same operation. Above is a detailed guide on how to set the default font in Word, Excel 2016. I wish you success!
Was this article helpful?
Your feedback helps us improve.
Related Articles
 Instructions for setting the default font in Microsoft Word4 minutes read
 How to set the default font and font size on Excel3 minutes read
 Set the default font in Excel2 minutes read
 How to default the font in the word5 minutes read
 Set the default font and font size in Excel2 minutes read
 Instructions for installing default fonts in Word, Excel and PowerPoint3 minutes read
Reader Comments 0
Sign in with email or Google to join the discussion.