Tutorial for Word 2016 (Part 27): How to use Style
- Complete guide for Word 2016 (Part 15): Page numbering
- Complete Word 2016 tutorial (Part 22): How to create a chart
- Word 2016 full guide (Part 23): How to check spelling and grammar
Style is a set of formatting, font size and color applied to a portion of text in your document.
Styles can help your document have a more professional look. In addition, you can also use different styles to quickly change a few things in the document at the same time. Like a Template, different text sections that apply the same Styles in the same Theme will have the same format.
Check out the video below to learn more about how to use Style in Word 2016:
How to use Style in Word 2016:
- I. Apply a Style to the text
- II. Apply a style
- III. Change Style
- IV. Create a new Style
I. Apply a Style to the text
1. Select the text you want to format or place the cursor at the beginning of the line.

2. In the Styles group on the Home tab, click the More drop-down arrow.
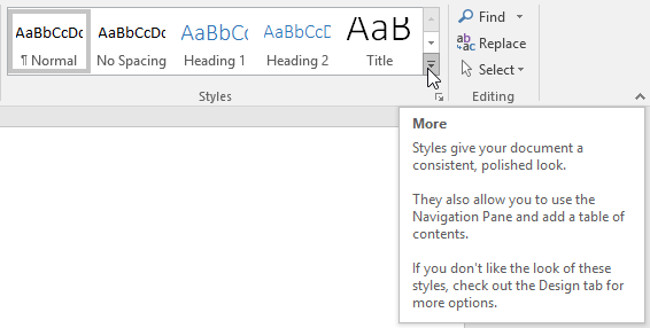
3. Select the Style you want from the drop down menu.

4. The text will appear in the selected Style.

II. Apply a style
Style sets include a combination of title, heading and paragraph types. Style sets allow you to format all parts of a document at once instead of modifying each part separately.
1. From the Design tab, click the More arrow drop down in the Formatting Document group.

2. Select the Style set you want from the drop down menu.

3. The selected Style set will be applied to your entire document.

III. Change Style
1. Locate and right-click the Style you want to change in the Styles group, then select Modify from the drop-down menu.

2. A dialog box will appear. Make desired format changes, such as font style, size and color. If you want, you can also change the name of Style. Click OK to save your changes.
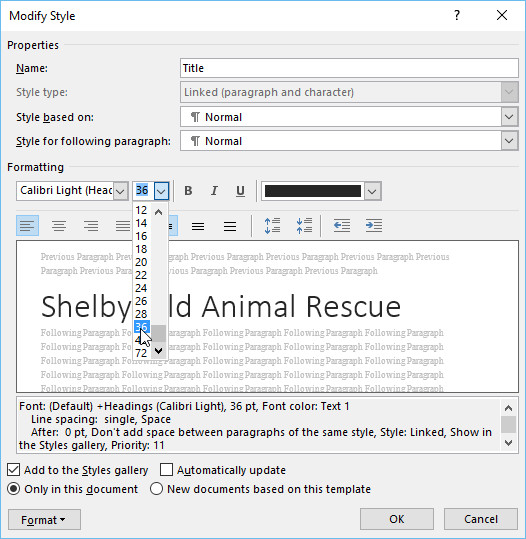
3. Style will be modified.

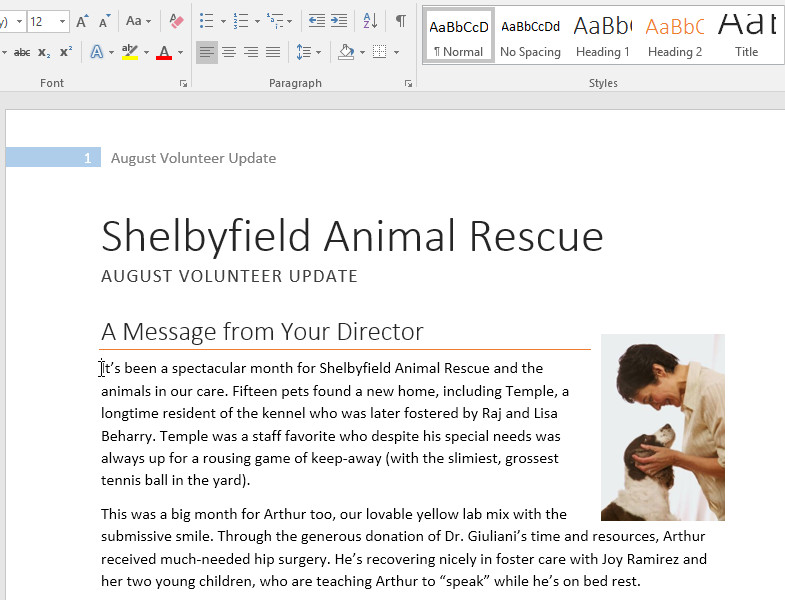
- When modifying a Style, you are changing every way of displaying that Style in the document. In the example below, we modified the Normal style to use a larger font size. Because both paragraphs use style Normal, they have been updated automatically to use the new size.
IV. Create a new Style
1. Click the arrow in the bottom right corner of the Styles group.

2. The Styles task pane will appear. Select the New Style button at the bottom of the task window.
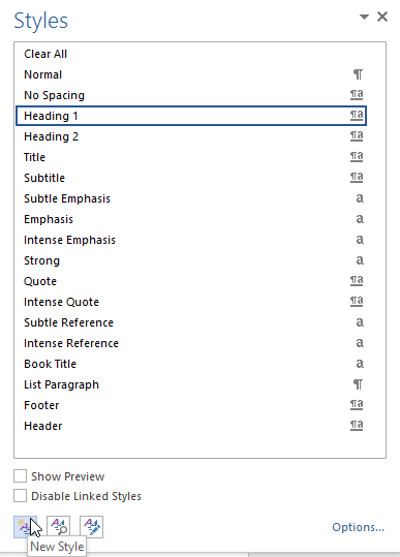
3. A dialog box will appear. Enter a name for Style, select the desired text format and then click OK .
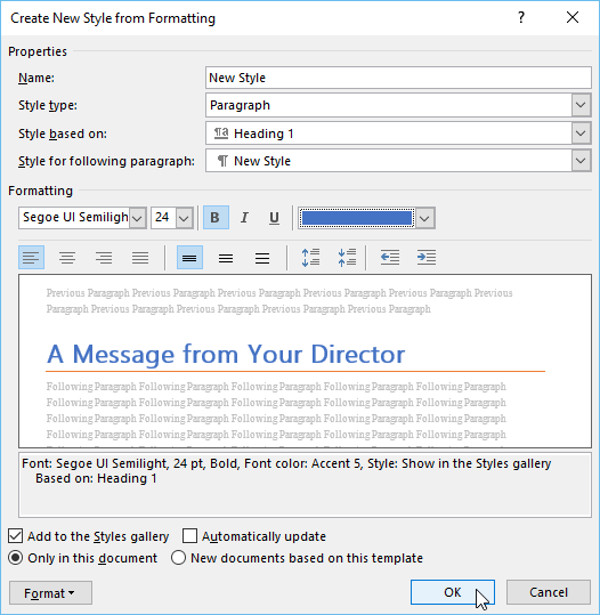
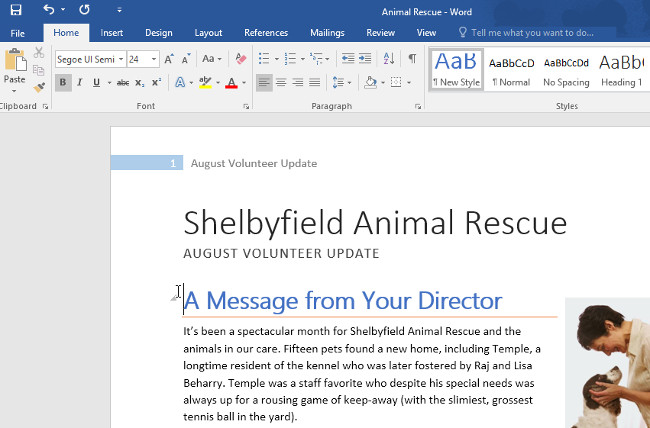
4. The new style will be applied to the currently selected text. It will also appear in the Styles group.
- Alternatively, you can use Styles to create a table of contents for the document. To learn how to do this, please refer to the article Creating a table catalog in our automated Word!
Refer to some more articles:
- Word 2016 Complete Guide (Part 24): How to use Track Changes and Comments
- Word 2016 Complete Guide (Part 25): How to check and protect Word documents
- Full Word tutorial 2016 (Part 26): Create SmartArt graphics
Having fun!
You should read it
- ★ Word 2016 Complete Guide (Part 3): Get familiar with basic text manipulation
- ★ Full Word tutorial 2016 (Part 4): Formatting text
- ★ How to create and use styles in Word 2016
- ★ Complete guide Word 2016 (Part 2): Get familiar with OneDrive, create, save and share documents
- ★ Instructions for installing and using Office 2016