Table of Contents
This guide explains how to schedule Twitter Posts, with clear steps, practical tips, and important checks before you begin.
Instructions for scheduling Twitter posts
Step 1:
At the tweet frame, click on the clock icon as below to schedule.
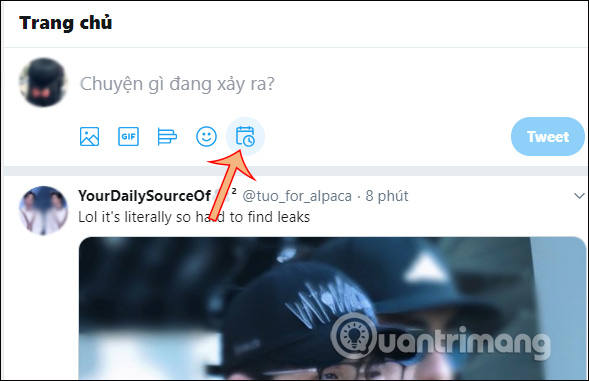
Step 2:
Now display the interface for users to set the time for the post you want to post . The default time zone will be set according to the system time zone. You only need to enter the specific time and date you want to post the article.
Click Confirm in the corner after selecting the time.
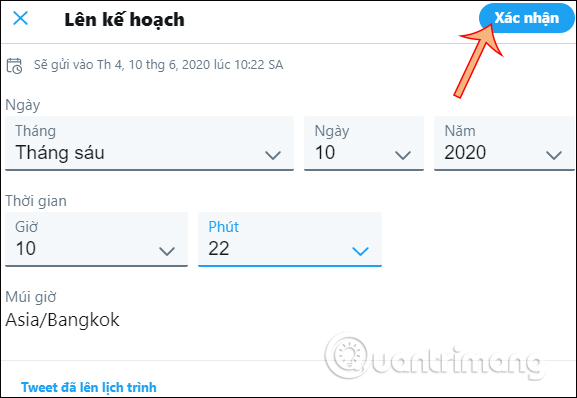
Step 3:
Back to the Twitter interface, we write the tweet as usual, then check that the scheduled time is correct. Finally click Schedule to post time. We continue to do the same with the remaining posts.

Step 4:
To review the scheduled posts , we also click the clock icon again , select the scheduled Tweet . In the Scheduled section will be a list of articles you will post in the future. If you want to edit any article, click. To delete everything, click Edit, then select Delete below.

In addition, the pop-up tweet interface has the ability to save drafts when you do not want to post.

When writing tweets you are also selected the mode for who can reply to your tweet as shown below.

FAQ
What should I know about Schedule Twitter Posts?
Focus on the key features, requirements, limitations, and practical use cases explained in this guide.
How do I get the best results with Schedule Twitter Posts?
Follow the recommended steps, use current software or information, confirm compatibility, and review settings before major changes.
Are there any risks or limitations?
Potential limitations depend on compatibility, data quality, cost, privacy, support, and how the product or method is used.
Related Articles
 How to Link Twitter Posts into a Topic on Iphone and Ipad: Threats3 minutes read
 Twitter Will Soon Allow Tweet Scheduling2 minutes read
 Schedule Automatic Posts on Instagram5 minutes read
 How to Turn Twitter Topics into Blog Posts4 minutes read
 How to Schedule Facebook and Instagram Posts Automatically6 minutes read
 How to Schedule Posts on Facebook Fanpage: Step-by-Step3 minutes read
Reader Comments 0
Sign in with email or Google to join the discussion.