Table of Contents
Learn how to create social media posts in Canva AI with clear steps, practical tips, and troubleshooting guidance for a reliable result.
Guide to creating social media posts in Canva AI
Step 1
You access Canva AI, then select the Design section , and then select Social Media Posts .
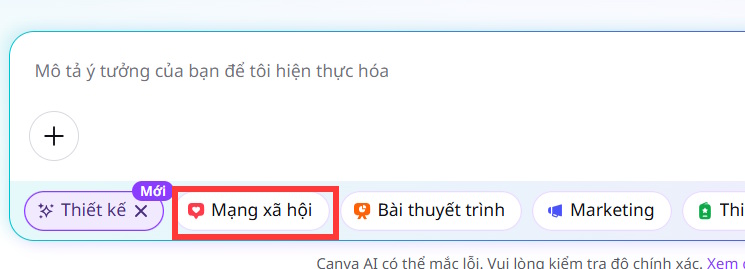
Next, choose which type of social media platform you want to post on , for example, choose to post to Facebook.
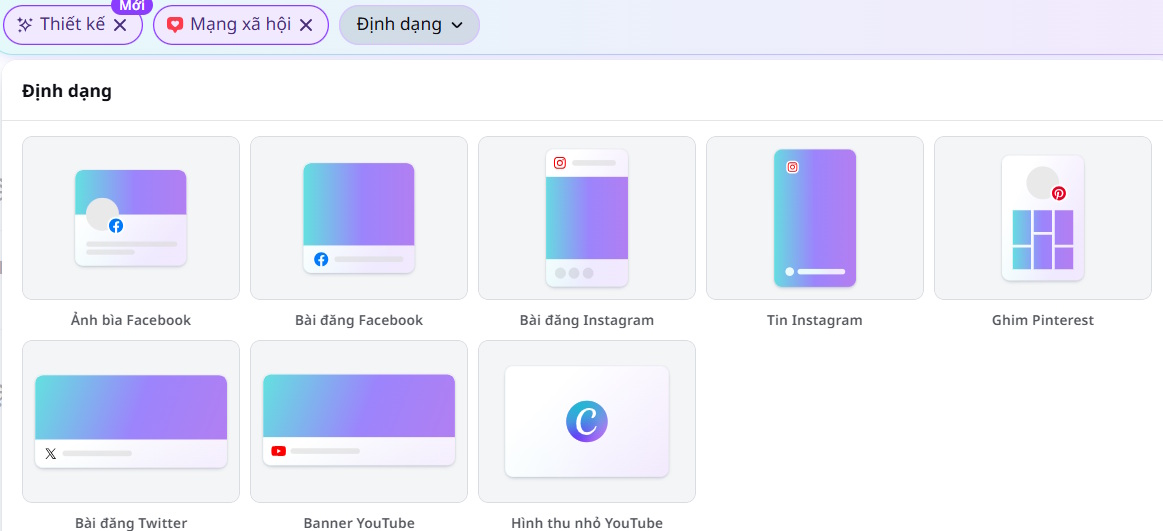
Step 2
Enter the command to create a social media post. We need to specify the command, the target audience of the post, the topic of the content, the style to be used, and colors if desired.

Step 3
The Facebook post is now based on the command we entered. Click "Add" to see more templates.

You will then see several other post templates; click on the one you like best to use.

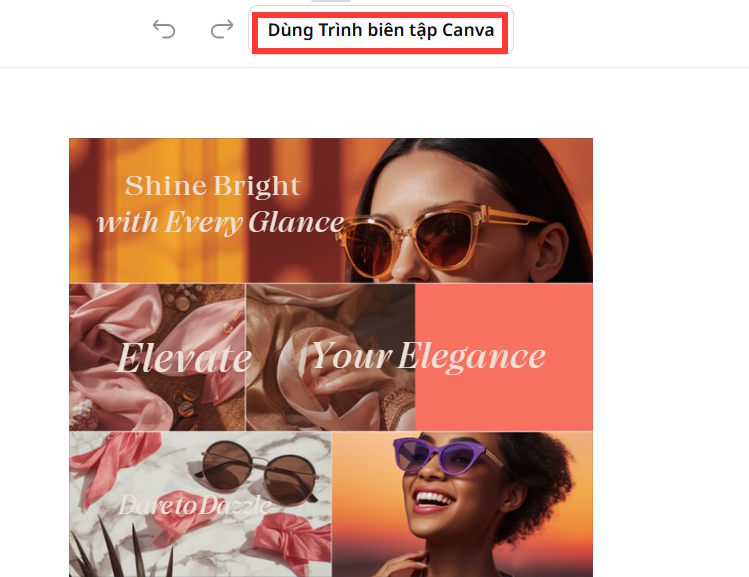
Switch to the new interface and select " Use editor" to continue editing this design template.
Step 4
The design editing interface now displays the tools available in Canva. You can continue editing this design to get the most satisfactory result.
Below is a sample Facebook social media post advertising women's summer sunglasses.

Final Thoughts
Use this guide as a practical checklist for how to create social media posts in canva ai. Work through the steps in order, verify each result, and adjust the options to match your needs.
FAQ
What do you need before following this How to Create Social Media Posts in Canva AI guide?
Review the required tools, accounts, settings, or materials mentioned in the article. Learn how to create social media posts in Canva AI with clear steps, practical tips, and troubleshooting guidance for a reliable result.
What are the main steps for how to create social media posts in canva ai?
Follow the sections in order, especially Guide to creating social media posts in Canva AI, Step 1, Step 2. Complete each step before continuing and verify the result as you go.
What should you do if the process does not work as expected?
Recheck the prerequisites, update the relevant app or service, review the settings, and repeat the step that caused the issue. Use any troubleshooting notes included in the guide.
Related Articles
 11 Awesome Ways to Use the Canva App: What You Need to Know10 minutes read
 Guide to Creating 3D Designs Using AI in Canva4 minutes read
 Advertising Is Making People Use Social Media Less7 minutes read
 How to Design Greeting Cards on Canva AI4 minutes read
 10 Things You Can Create with Canva9 minutes read
 9 AI Social Media Management Tools to Compare in 202610 minutes read
Reader Comments 0
Sign in with email or Google to join the discussion.