How to Make a Self‐Writing Mosaic Program in Python
Part 1 of 4:
Downloading the Photo
-
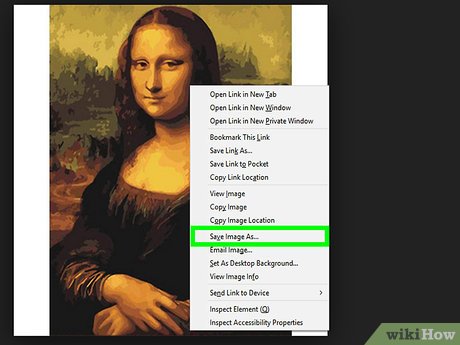
 Download the Mona Lisa Photo. This is the base picture you will be using to create your mosaic. Note the picture's dimensions in pixels as this will be important for your code later.
- Save it as "mona.jpg"
- The image is 743px by 1155px. Ensure sure the it saves as this size or else the mosaic will not be drawn properly.
Part 2 of 4:
Creating the Main Program
-
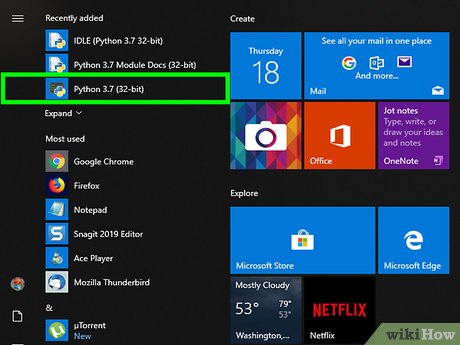
 Open a new Python shell. Name the file "makeMona.py"; this file name is for your own reference.
 - Import your modules. For this program, you'll need the Pygame module to display your image and the Math module in order to perform your adding functionality.
from pygame import * #Import Pygame from math import * #Import Math
- Set up display and image. Before you can start mapping the image, you must create the display screen that the image will appear on and load in Mona Lisa.
- display.set_mode((743,1155)) is how you set your display. (743,1155) represents the screen size; note that it is the exact same size as your Mona Lisa image in pixels.
screen = display.set_mode((743,1155)) #Set your display size m = image.load("mona.jpg") #Assign a variable name to your base image and load it screen.blit(m,(0,0)) #Blit your image m into the top right corner
- Create a file for the self-writing program. Within your makeMona program, you will set up the new file you will be writing to.
- Variable mon is your reference to the mosaic file. Within the quotations, you declare the file name "mona.py". The "w" declares that you will be writing to the new file.
mon = open("mona.py", "w") #Create your mosaic file
- Initialize the program. You can now start writing to mona.py. Here you will import your modules and set your display size.
- mon.write signifies that you are now writing the following code to your new file. Your display size will be the same as the Mona Lisa image.
mon.write("""from pygame import * from math import * screen = display.set_mode((743,1155)) """) #To write to mon, you use triple quotes to isolate the desired code
- Display the image in makeMona.py. To confirm that your image was properly loaded into your program, you will display the image onto the screen.
running = True #Tell the program to run display.flip() #Displays the image
- Map the mosaic pattern. You can now start parsing the image into small rectangles to create the mosaic. To get the best mosaic effect without distorting the image, you will map every 5 pixels into a rectangle.
- mon.write("draw.rect(screen,"+c+",("+str(x)+","+str(y)+",4,4))n") is the most important line to note. The breakdown is as follows:
- draw.rect(screen,"+c+", signifies that you will draw your mosaic piece (individual rectangles to your screen, then appending "c" relates to str(screen.get_at((x,y))), which is how you map the colour at each pixel location.
- The "x" and "y" in ("+str(x)+","+str(y) represent the location of your rectangle. You use str() because you need the program to read these x and y values as strings (because you are inside your triple quotes, which is all string formatting).
- The 4,4 in +",4,4))n") represent the dimensions of each rectangle in your mosaic. "n" is your newline character, which tells the program to go to the next line and start writing the next line of code.
for x in range(0,743,5): #For every 5 pixels in the x direction from 0-743 for y in range(0,1155,5): #For every 5 pixels in the y direction from 0-1155 c = str(screen.get_at((x,y))) #Get the pixel colour at every x,y pair mon.write("draw.rect(screen,"+c+",("+str(x)+","+str(y)+",4,4))n") #Write your pixel location to mona.py in the shape of a rectangle mon.write("display.flip()n") #Display the image
- Create the while-running loop. As with any Pygame program, you must include your "while running" loop in mona.py.
mon.write("""running = True while running: for evnt in event.get(): # checks all events that happen if evnt.type == QUIT: running = False quit()""") #Finally, you write your pygame "while-running" loop, which will allow the graphics module to run mon.close() #Saves and closes mona.py
Part 3 of 4:
Code Review and Testing
- Review your code. Your main program makeMona.py is now complete. Here is all the code together.
from pygame import * #Import Pygame from math import * #Import Math screen = display.set_mode((743,1155)) #Set your display size m = image.load("mona.jpg") #Assign a variable name to your base image and load it screen.blit(m,(0,0)) #Blit your image m onto the top right corner mon = open("mona.py", "w") #Createy your Mosaic file mon.write("""from pygame import * from math import * screen = display.set_mode((743,1155)) """) #To write to mon, use triple quotes to isolate the desired code running = True #Tell the program to run display.flip() #Displays the image for x in range(0,743,5): #For every 5 pixels in the x direction from 0-743 for y in range(0,1155,5): #For every 5 pixels in the y direction from 0-1155 c = str(screen.get_at((x,y))) #Get the pixel colour at every x,y pair mon.write("draw.rect(screen,"+c+",("+str(x)+","+str(y)+",4,4))n") #Write your pixel location to mona.py in the shape of a rectangle mon.write("display.flip()n") #Display the image mon.write("""running = True while running: for evnt in event.get(): # checks all events that happen if evnt.type == QUIT: running = False quit()""") #Finally, you write your pygame "while-running" loop, which will allow the graphics module to run mon.close() #Saves and closes mona.py
- Open the new mona.py program. If you go to wherever your makeMona program is saved, directly below it you will find your new program file mona.py.
- If you open this file, you will see hundreds of lines of code. Magic! This code is each individual piece of the mosaic. Each line represents a new rectangular piece of Mona Lisa.
- It may take several seconds to open; this is normal because it is such a big file.
- Run mona.py. If everything up to this point is looking good, your last step is to run your program and behold your new Mona Lisa mosaic.
Part 4 of 4:
Avoiding Common Errors
- Troubleshoot your program. It's easy to make small little mistakes once you're implementing the code for your own mosaic. Here are some common issues people run into and how to resolve them.
- Where is my new program? - After running the main program, the new one should appear in the same file location as the main program.
- My new program isn't running - All code you wrote for the self-writing program is contained in triple quotes. Review all of the code inside of these quotes throughout the program and ensure you didn't miss things like colons, closing brackets/quotes, or indentation formatting.
- Why is the image distorted? - This can be a result of your display size. Ensure that your display size in display.set_mode() all throughout your code is the same.
Update 05 March 2020
You should read it
- Discover the 8 biggest secrets in Da Vinci's 'Mona Lisa' painting
- Best free image conversion programs 2021
- Finding the nude portrait of the Mona Lisa made the experts confused
- How to install GIF images on the standby screen Always On Display
- How to Enable / Run Windows Disc Image Burner in Windows 8.1
- The secret no one has hidden in world famous paintings
- Solution to handle Google Chrome image display error
- Graphics Converter Pro: Convert image file formats used in graphics
- How to Change the Wallpaper on a Mac
- Choose the display location of images in Word
- How to write text on pictures
- How to Adjust Brightness in GIMP
Maybe you are interested
Facebook testing Quiet Mode to mute mobile app notifications Laptop batteries operate for 20 hours thanks to nanowire technology Great tips for Word 2010's text test tool How to use FaceAtom to surf Facebook faster, lighter on the phone Facebook cover photo Cuong Tieu Ngu How to set a 360-degree photo as a cover image on Facebook
