Table of Contents
This guide explains how to write Text on Pictures, with clear steps, practical tips, and important checks before you begin.
Here are the actions that you can use to write text on images using the Paint program.
Step 1: Open the image to be written in the Paint program.
First, click the Start Menu and enter the Paint keyword into the Search Programs and Files box and select Paint to open the Paint program (or you can choose the Start Menu -> All Programs -> Accessories -> Paint ).

On the Paint program interface, select the Paint icon -> Open ( Ctrl + O shortcut combination ) and select the image you want to write text to open the image in the Paint program.

You can also open images in the Paint program quickly by selecting the image to be written and right-clicking, in the right-clicking menu showing you choosing Open With -> Paint .

Then the image you selected will be displayed in the Paint program.

Step 2: Write text on the selected image.
On the Paint toolbar, select the Home tab and select the A symbol in the Tools section.

Next, click the left mouse button on the position where you want to write text on the image (or you can click and hold the mouse at the beginning and drag the mouse to the end position to select the writing area).
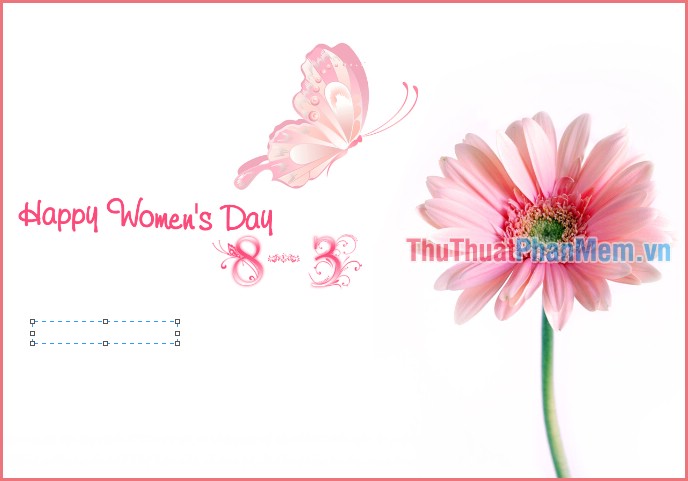
A frame with a dashed line appears, left click on the frame and write the text that you want to insert into the image.
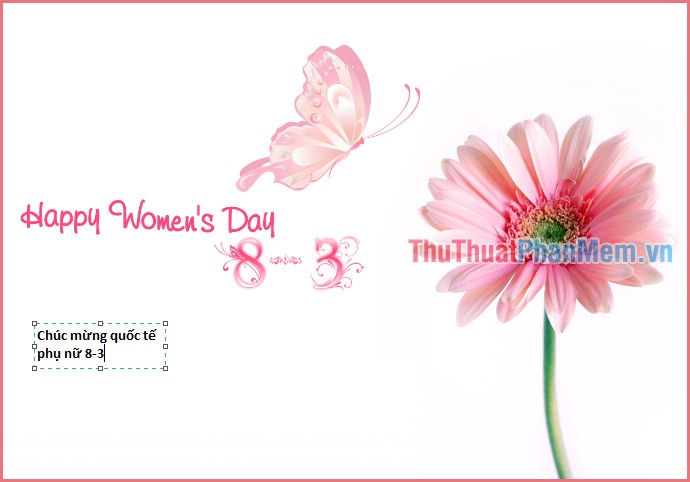
Step 3: Edit the text just written on the image.
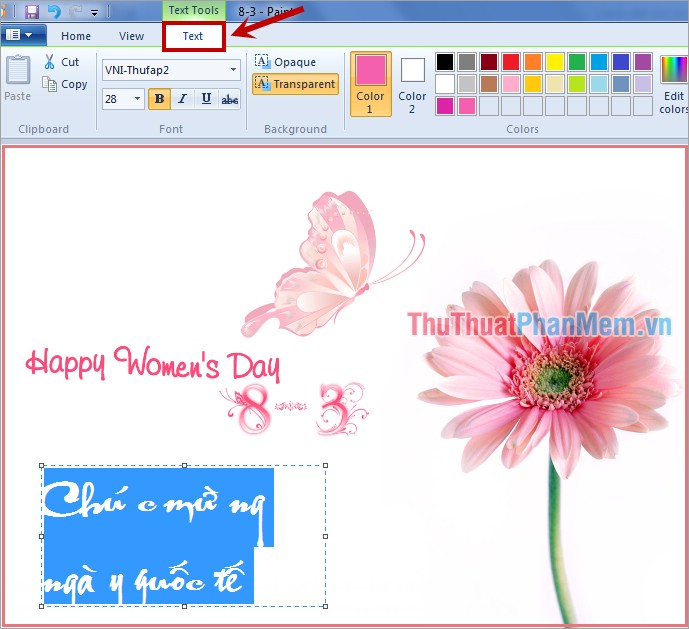
Select (black out) the text to edit, on the toolbar of Paint appears Text tab of Text Tools . You can edit the text in the sections of this card.
- Font: edit font, font size, type.
- Background: choose the background for the text (Opaque:, Transparent:).
- Colors: choose colors for the text (click on Edit colors to choose more colors).
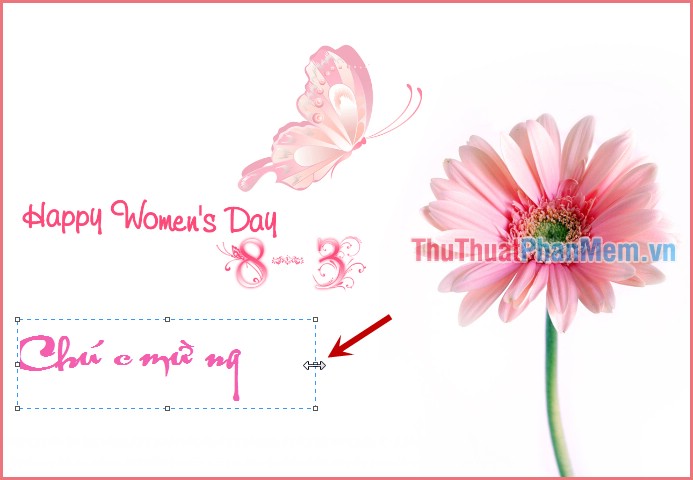
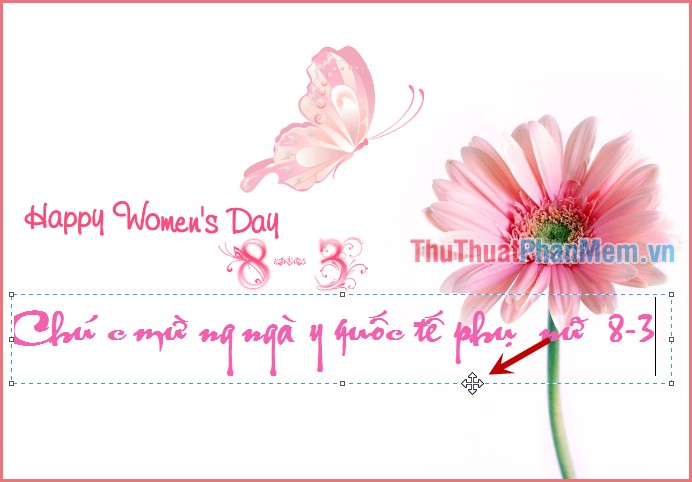
You can expand the text area so that you do not lose the text by moving the mouse pointer to one of the eight square buttons in the text box so that the mouse appears a two-way arrow, then press and hold and expand the text area accordingly.
In addition, you can move the text to another position of the image by moving the mouse pointer on the crossword to appear the cursor as shown below, then hold down the mouse button and move to another position that you want.
Step 4: Save the image you just inserted.
On the Paint interface, select the Paint icon, here you have two options:
- Save: save over the original image.
- Save as: save as a new image, keep the original image.
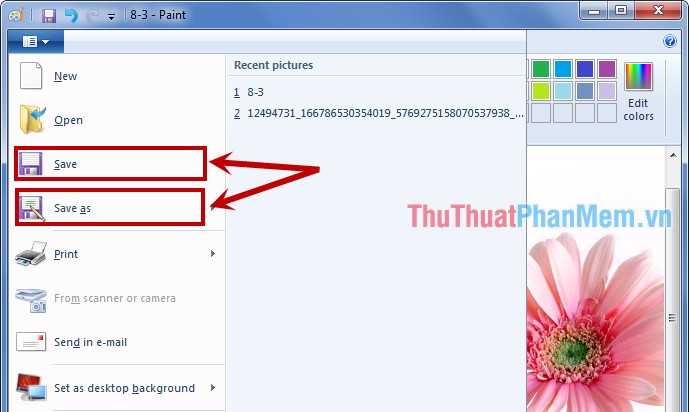
If you select Save as , the interface will appear Save As , you select the location to save the image, name the image and choose the format for the image and then click Save to save the image.

Good luck!
FAQ
What should I know about Write Text on Pictures?
Focus on the key features, requirements, limitations, and practical use cases explained in this guide.
How do I get the best results with Write Text on Pictures?
Follow the recommended steps, use current software or information, confirm compatibility, and review settings before major changes.
Are there any risks or limitations?
Potential limitations depend on compatibility, data quality, cost, privacy, support, and how the product or method is used.
Related Articles
 How to Insert Text into Pictures in Paint3 minutes read
 How to Write Text on Images, Insert Text on Images on Smartphones3 minutes read
 How to Write Text in Paint4 minutes read
 Insert Text Into Pictures with Word3 minutes read
 Synthesize Applications to Write Text on Photos on the Phone: Phonto12 minutes read
 3 the Easiest Way to Add Text to Photos8 minutes read
Reader Comments 0
Sign in with email or Google to join the discussion.