Table of Contents
This guide provides a practical overview of Choose the Display Location of Images in Word, including its main features, benefits, limitations, and important considerations.
Images in text have a lot of places to display, for example, above, below, or to the left compared to text input. Or you can leave the image behind, before the text.
Step 1: Click on the image you want to change position -> on the Format tab -> Arrange -> Possition -> select the display position types:
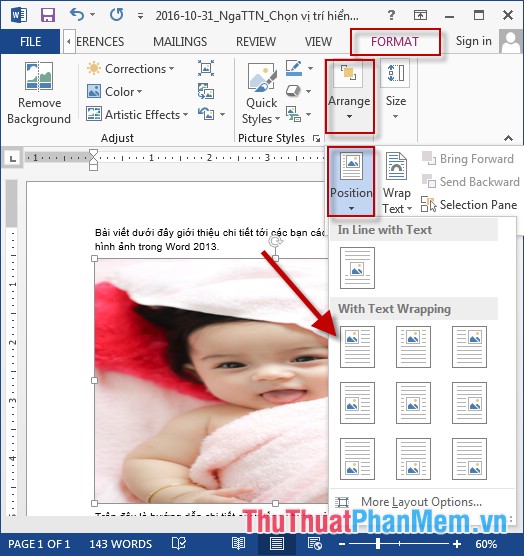
Step 2: After selecting the location to get results:
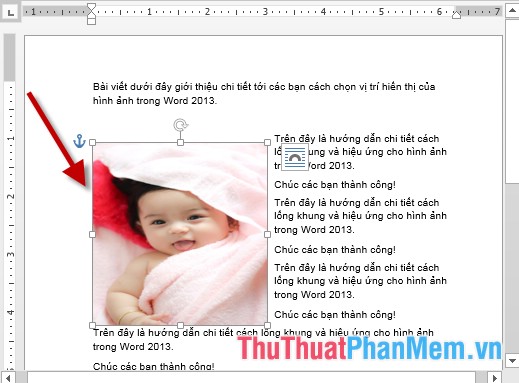
Step 3: You can also select other positions for the image by clicking More Layout Options:

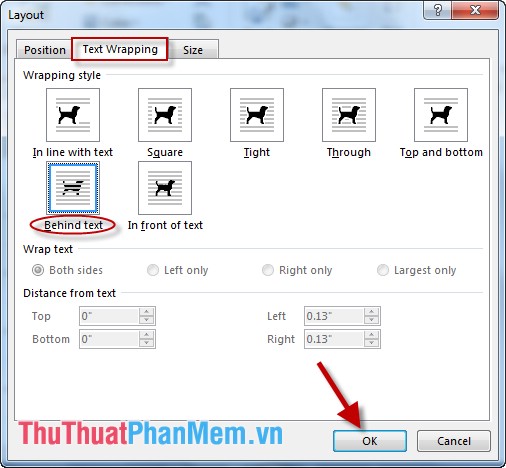
Step 4: Layout dialog box appears -> move to Text Wrapping tab -> choose position for image including:
- In line with text: The image is in the same position as the text.
- Square: Images are in the text but the father is not tight.
- Tight: Images are in the text with tight fathers.
- Through: Images in the middle of the text are aligned left and right.
- Top and Bottom: Images are at the top and bottom evenly spaced.
- Behind Text: The image after the word.
- In front of Text: The image displays in front of the text.
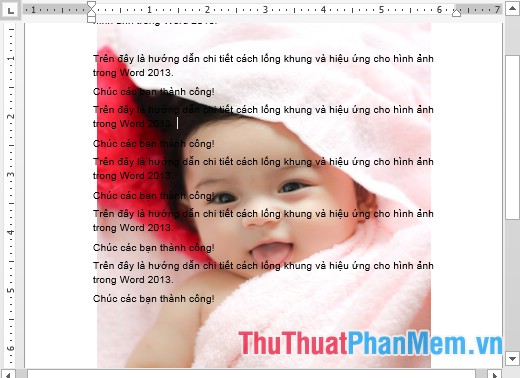
For example, here choose the image position after the word -> click OK:
Step 5: After clicking OK the results:
Above is a detailed guide on how to choose the display location of images in Word.
Good luck!
FAQ
What should I know about Choose the Display Location of Images in Word?
Focus on the key features, requirements, limitations, and practical use cases explained in this guide.
How do I get the best results with Choose the Display Location of Images in Word?
Follow the recommended steps, use current software or information, confirm compatibility, and review settings before major changes.
Are there any risks or limitations?
Potential limitations depend on compatibility, data quality, cost, privacy, support, and how the product or method is used.
Related Articles
 How to Find the Position of an Open Word File - Display the3 minutes read
 Find a Way to Fix the Error of Word Files Not Displaying Images Quickly and7 minutes read
 Insert Images into Word 2016 and Align Images in Word 20166 minutes read
 How to Block the Display of Images in Gmail2 minutes read
 How to Display Ruler Ruler Bar in Micorosoft Word 2010, Word 20033 minutes read
 How to Rotate Images in Word3 minutes read
Reader Comments 0
Sign in with email or Google to join the discussion.