How to Draw Something in GIMP
Method 1 of 2:
Drawing Smaller Objects
-
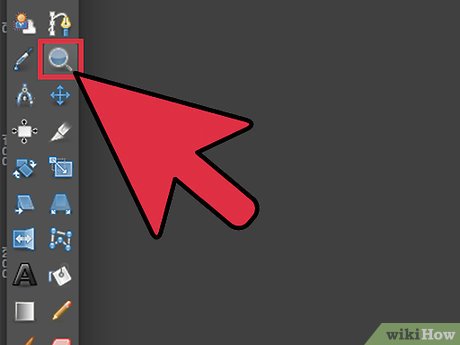
 Zoom in. The zoom tool is your friend. Just press "+" or click the magnifying glass icon to zoom in and press "-" to zoom out.
 -
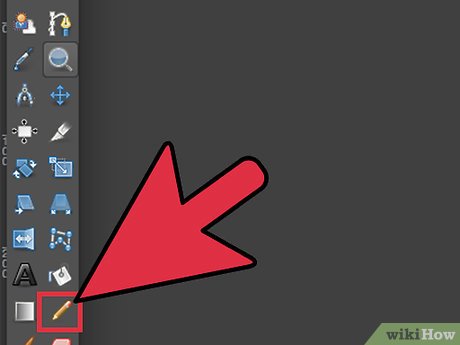
 Use the pencil tool and draw an outline of the object with which you want to draw. Mentally divide the object into smaller objects. For example, if you were drawing a mug, you would divide it into the opening, the body, and the handle.
 - Pick three to five different shades of the color that each object is and have these colors handy.
- Think of the shape of the smaller object. Getting the exact shape right is the most difficult part of pixeling.
- Outline the smaller object, and then shade it in using the different shades of color you chose. You many need to use more shades depending on how smooth your object is. You can "create" these shades using the smudge tool, if necessary.
- Zoom out, view your work, zoom in, and tweak it.
- Repeat these steps with all of the smaller objects.
- Add details to your object. If there was a logo on your mug, this would be when to draw it. Do not be afraid that something is too big, this will only confuse you.
- Again, zoom out, view, and tweak. Repeat this step until everything looks perfect.
- You should be done! Enjoy your small mug.
Method 2 of 2:
For larger objects
- As with the smaller objects, you will start by drawing the basic shape of your object.
- This time, instead of using the pencil tool, you will use the paths tool. The paths tool is your friend. Learn to use it and learn to love it.
- Click (*do not drag*) to form a series of points that form the basic shape of your object. Do not try to make things round, leave them angular for now. Make sure the paths tool mode is set for "design".
- This is when you will decide the scale of things. Make sure everything is the right size in comparison. If you are drawing a mug, make sure it is of the correct broadness and that the handle is not really big. Tweak things to make them the right size.
- Double click the paths toolbox and set the tool mode to "edit" (or you can hold CTRL while doing the next step, instead)
- Form your path into the shape you want your object to be in. To do this, click somewhere on your path and drag it. This is where you will round shapes that are supposed to be round. While doing this step it can be useful to zoom in and out.
- Tweak it until it is perfect.
- Then, go to Edit-Stroke Path. Select "Stroke Using Tool" and select pencil. Set the color to black, set the brush to a 1 pixel brush, and stroke it.
- Now, as in pixeling, divide the object into several smaller objects mentally. Color each object it's basic color with the fill tool.
- Now, you must texture the object. There are many, many different methods for this, and so much depends on what kind of object you are texturing.
- Oftentimes, you can use gradients to texture the object. Sometimes you can use the patterns that Gimp provides.
- To make the texture rougher, try filters-distorts-shift, or filters-noise-spread.
- To make it smoother, try using many gradients set on lower opacities.
- After you have gotten your texture right, you will need to add some lighting. There are a few methods to do this, as well.
- One method it to use the self-explanatory filters-light effects-lighting effect.
- Another is to use a simple black and white gradient set to 'value' and a lower opacity.
- Now is the time for you to add all the details you need to for your object. For example: a logo, a chip in the mug, the beverage in the mug, etc.
- Try things until you get something that works for you.
- Then, just tweak, tweak, tweak and your object will be done!
- Admire your object, and keep tweaking it.
Update 05 March 2020
You should read it
- How to zoom in and out (Zoom) in Photoshop
- How to install Zoom on a Mac
- Why doesn't Zoom sound? Zoom error has no sound
- How to Zoom out on a Mac
- How to secure your Zoom account, avoid leaking personal data
- Zoom in, zoom out the computer screen with Magnifier on Windows 7
- How to Zoom Out on Mac
- Is it safe to use Zoom? Things to know
- How to delete Zoom accounts completely
- What is zoom bombing and how do I stay safe on Zoom?
- Zoom adds Focus mode, helping learners not to be distracted
- How to change name on zoom
Maybe you are interested
Test Battery Usage of Every Browser on iPhone: The Winning Option Will Surprise You! Top 10 4K wallpapers for Windows computers June 1020 security patch of Windows 10 encountered a problem causing the machine to automatically restart Experience Bing Wallpaper: The application automatically changes to new computer wallpaper every day 4 reasons to encrypt Linux partition Please download the new Surface wallpaper from WallpaperHub
