Trick to remove the default application on Windows 10
Windows 10 interface is set with dozens of universal applications: Calculator, Calendar, Mail, Camera, Cortana, Contact Support, File & TV, Get Started, Groove Music, Maps, News, OneNote, People, Photos ... Among these applications are extremely useful applications such as Mail, Calendar, Calculator, Voice Recorder ... But besides, some other applications have no benefit at all, even even applications that users never touch.
Table of Contents
The Windows 10 interface is set with dozens of universal applications such as Calculator, Calendar, Mail, Camera, Cortana, Contact Support, File & TV, Get Started, Groove Music, Maps, News, OneNote, People, Photos . .
Among these applications are extremely useful applications such as Mail, Calendar, Calculator, Voice Recorder . But besides that, some other applications have no benefit at all, even applications that users never "touch" to.
So why not think about the solution is to remove these applications to free up hard drive space. Whether it's the default application or the app installed from Store, you can uninstall it.
In the article below, Network Administrator will guide you through the steps to remove the default applications and applications installed from Store on Windows 10.

Note:
Some applications like Cortana and Store cannot be removed on Windows 10. These are important system applications that make the Windows 10 operating system run smoother.
1. Remove the default application via PowerShell
Step 1:
First open Windows PowerShell under Admin.
To do this, first enter the PowerShell keyword in the Search box on Start Menu or on the Taskbar, then right-click Windows PowerShell and select Run as administrator .
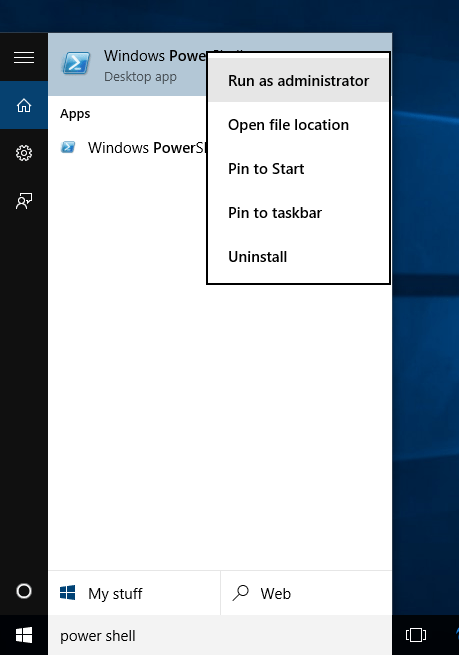
Alternatively, enter PowerShell in the Search box and then press Ctrl + Shift + Enter to run as Admin.
Step 2:
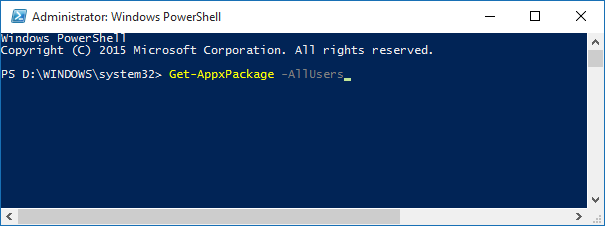
In the PowerShell window, enter the following command and press Enter to open the list of default applications and Universal applications installed on the Store:
Get-AppxPackage -AllUsers
Step 3:
Scroll down to find the application you want to remove.
Copy the application package name as well as the applications that cannot be removed by entering the application name. The package name will appear in the right pane next to PackageFullName.

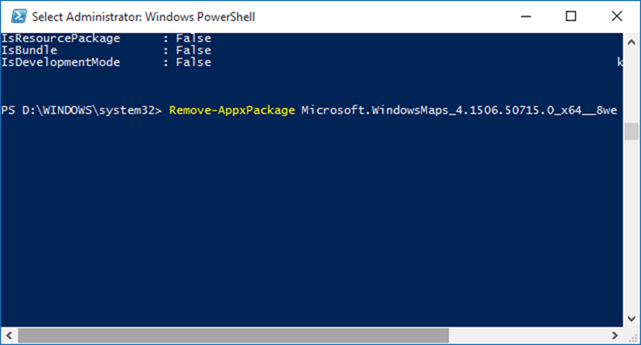
For example, in the above example, proceed to remove the Maps application. To remove the application, first copy the full package name of the application. To copy the full package name of the application, select the full package name of the application then use Ctrl + C to copy the name.
Step 4:
To remove the application, use the following command:
Remove-AppxPackage PackageFullName
Note:
In the above statement, replace PackageFullName with the full package name of the application.
Step 5:
To remove all default applications from all user accounts, use the following command:
Get-AppxPackage -AllUsers | Remove-AppxPackage
Step 6:
To remove all of the default apps and apps installed from Store in the current user account, use the command:
Get-AppxPackage -User | Remove-AppxPackage
Note:
In the above command, replace User with your user account name.
2. Uninstall the default application on Windows 10 via Settings
Step 1:
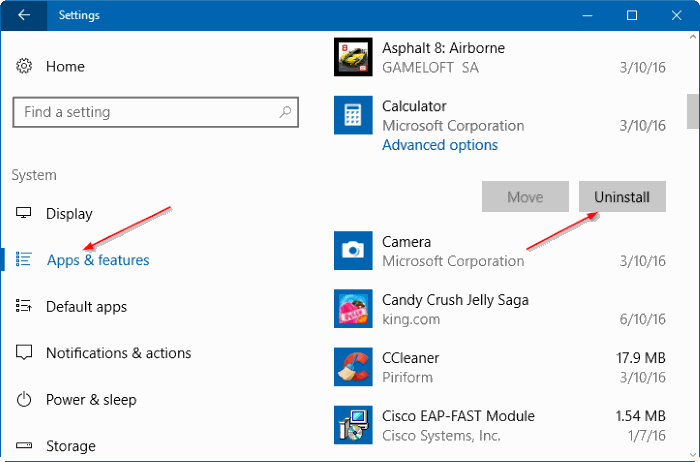
Open the Settings app and navigate to System => Apps & features .
Step 2:
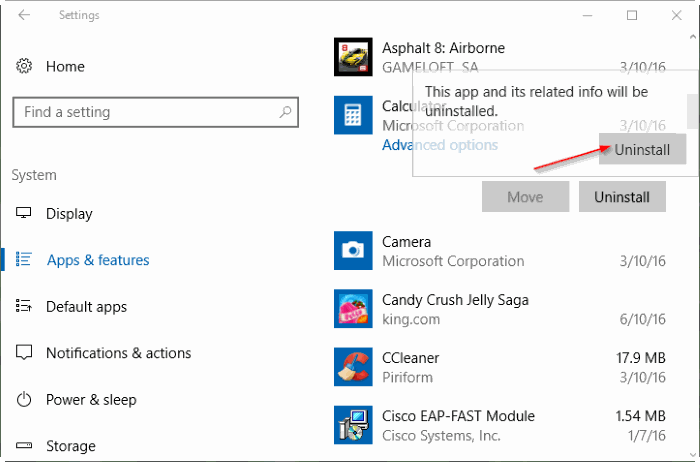
Find the default application you want to remove and then click the application to see the Uninstall option .
Step 3:
Click Uninstall, now the dialog box appears 'This app and its related info will be uninstalled'. Here, click Uninstall once again to remove the application from your Windows 10 computer.
Note:
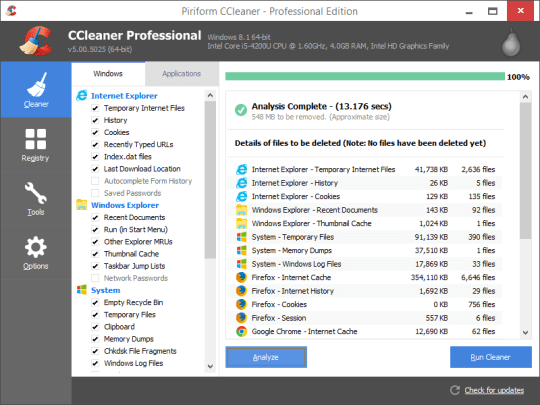
If the Uninstall button is gray, you cannot click Uninstall, then you can use CCleaner to uninstall the application. Follow the steps below:
First open CCleaner on your computer then click Tools , then click Uninstall to see the programs and applications installed on the system.
Right-click the application you want to uninstall and click Uninstall. At this time, a confirmation dialog box appears, click Uninstall to uninstall the application.
Download CCleaner and install it here.
Note:
With Edge and Cortana browsers you can't uninstall via PowerShell or CCleaner.
Refer to some of the following articles:
- Instructions for completely removing Onedrive application on Windows 10
- Trick to speed up Windows 10 computers
- Trick to speed up Start Menu on Windows 10
Good luck!
Was this article helpful?
Your feedback helps us improve.
Related Articles
 Instructions for completely removing the 3D Builder application on Windows 105 minutes read
 How to fix the error does not install the default Windows 10 application3 minutes read
 How to reinstall the removed default application on Windows 10?4 minutes read
 5 ways to remove default apps on Windows 105 minutes read
 Windows 11 users will soon be able to remove the clock application (Clock) if they want3 minutes read
 Trick to remove Edge browser on Windows 103 minutes read
Reader Comments 0
Sign in with email or Google to join the discussion.