Table of Contents
This guide provides a clear, practical overview of steps to set screen off time on laptop, with useful context, important details, and straightforward takeaways for everyday readers.
1. Set screen off time directly
To find the fastest and easiest way, this is your first choice.
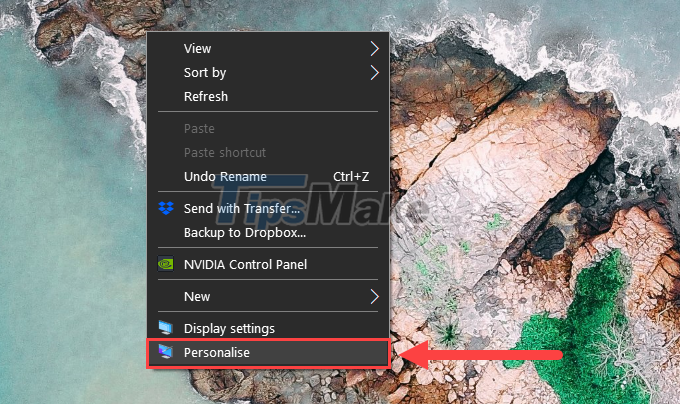
Step 1: At the main desktop screen, right-click and select Personalize to open the performance settings.
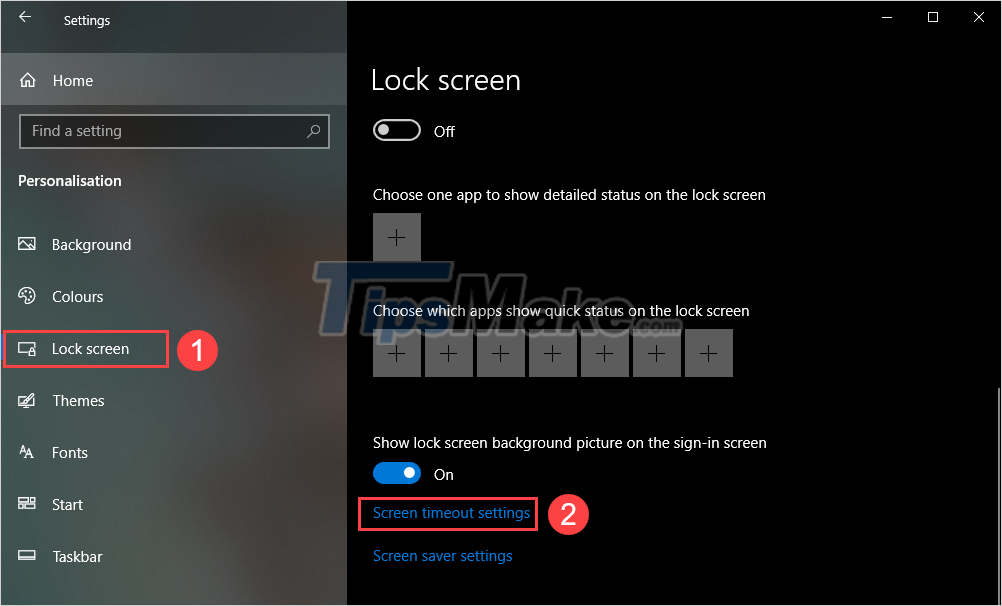
Step 2: In the Settings window, go to Lock screen (1) and select Screen timeout settings (2) to open the automatic screen off setting.
Step 3: In the Power & Sleep section, we will have 02 items set up as follows:
- Screen: Time to turn off the computer screen after not using
- Sleep: Time to put the device into Sleep mode (sleep) after not using it.

2. Set screen off time directly
In addition to setting the time directly on the screen, you can choose to set it through the Control Panel.
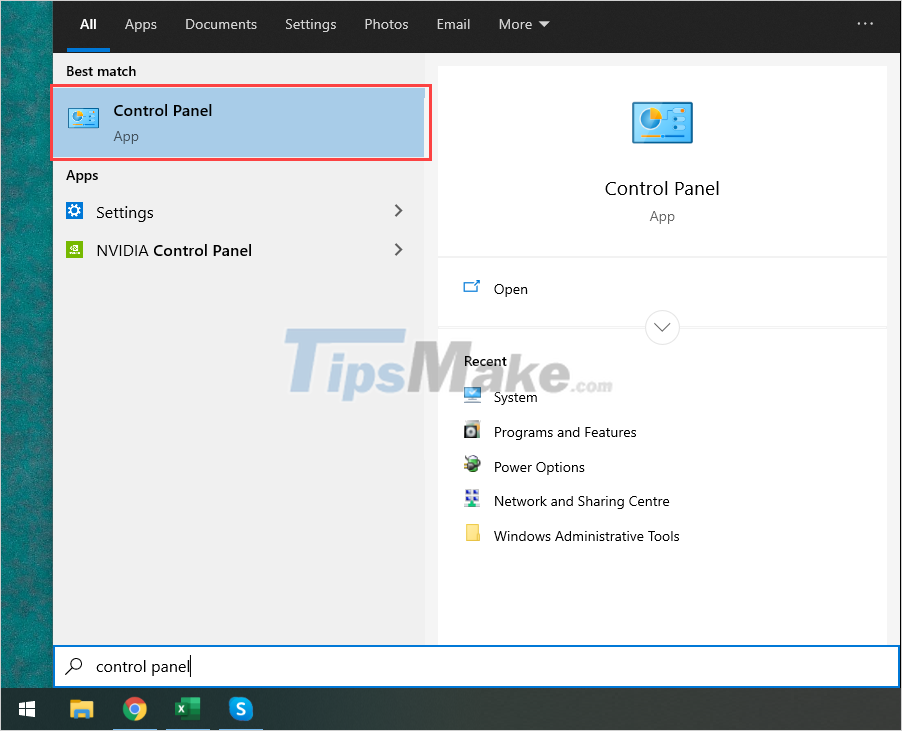
Step 1: At the main interface of the screen, open MenuStart and enter Control Panel to open.
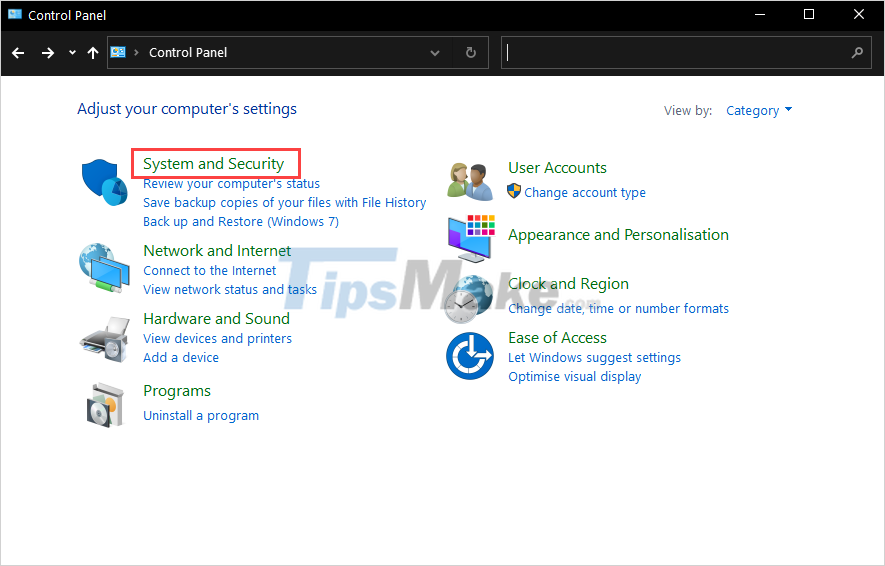
Step 2: Then, go to the System and Security section to open the settings related to the computer system.
Step 3: Next, go to Power Options to open performance-related settings.
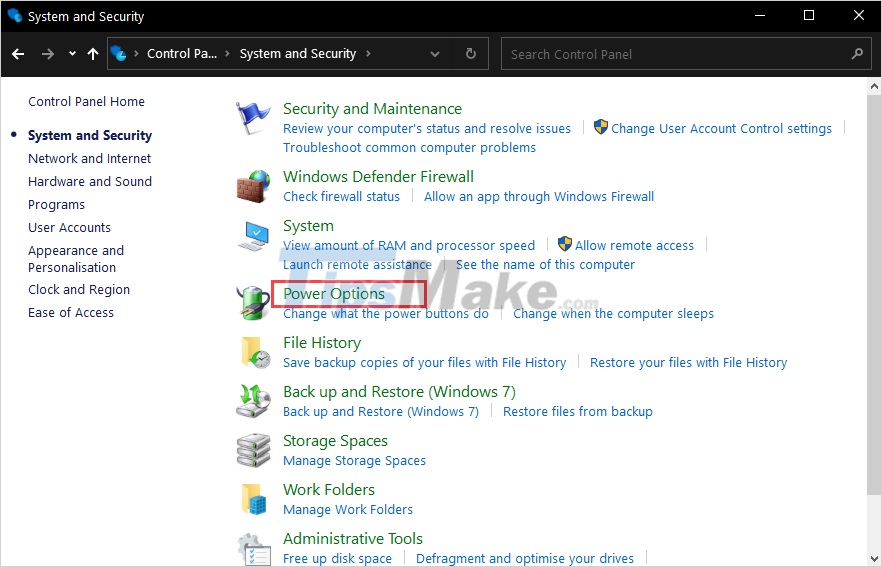
Step 4: Then, select Choose when to turn off the display.
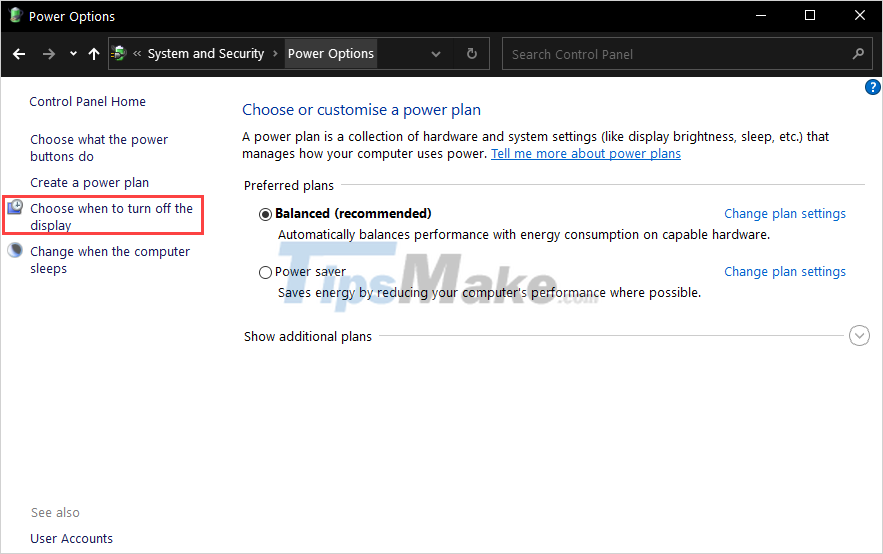
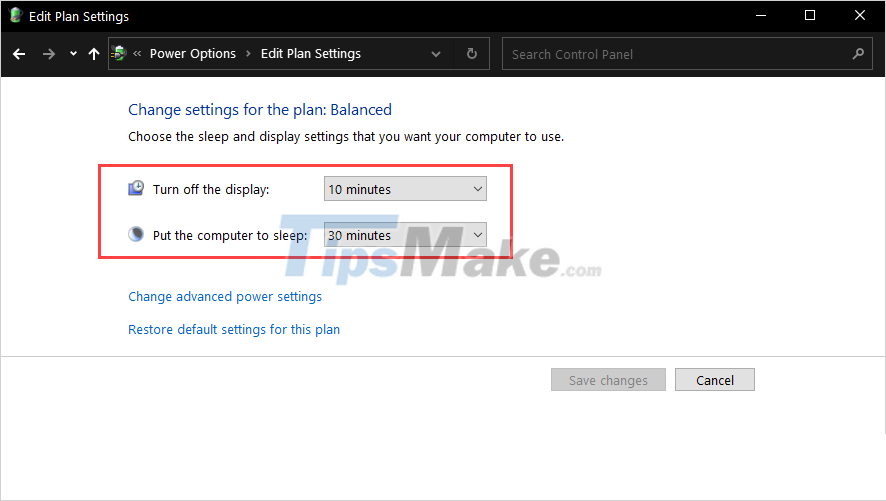
Step 5: Finally, you need to set the following content:
- Turn off the display: Time to turn off the screen after not using
- Put the computer to sleep: The time it takes to put the computer to sleep after not using it.
3. Set screen off time using Command Prompt
Command Prompt allows you to get a wide range of settings on your computer through code, but setting it up on CMD is a lot more complicated.
Step 1: At the main interface of the computer screen, open the Start Menu and enter CMD and then select Run as administrator.
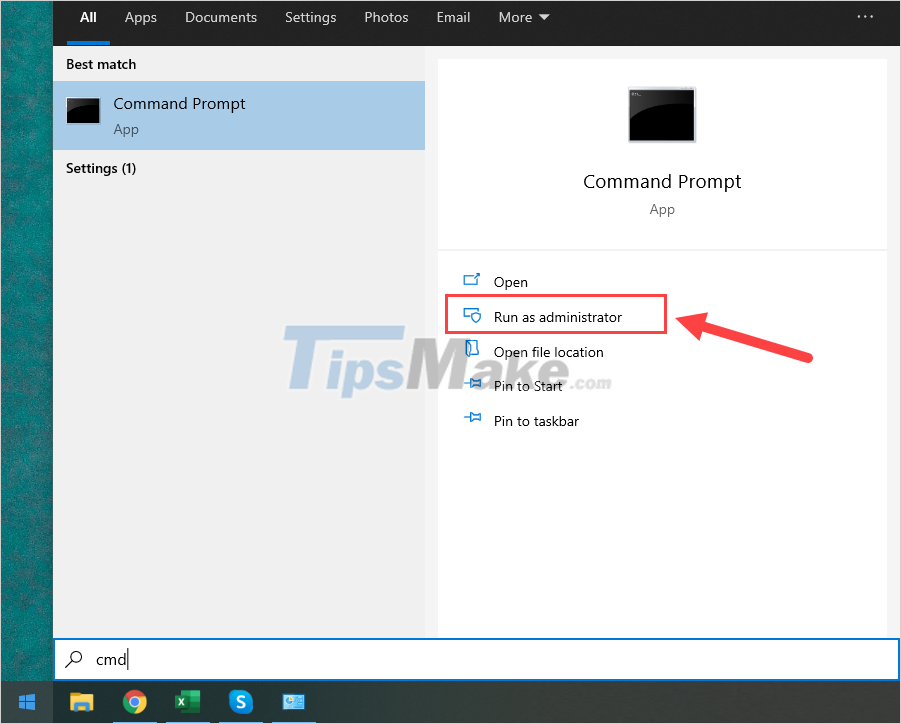
Step 2: When the CMD window appears, enter the command as follows:
powercfg.exe /SETACVALUEINDEX SCHEME_CURRENT SUB_VIDEO VIDEOCONLOCK 'Number of seconds'
Note: In the above command, you need to replace 'seconds' with the amount of time you want to turn off the screen after not using it (in units of s - seconds). For example: 5 minutes = 300s, 10 minutes = 600s.
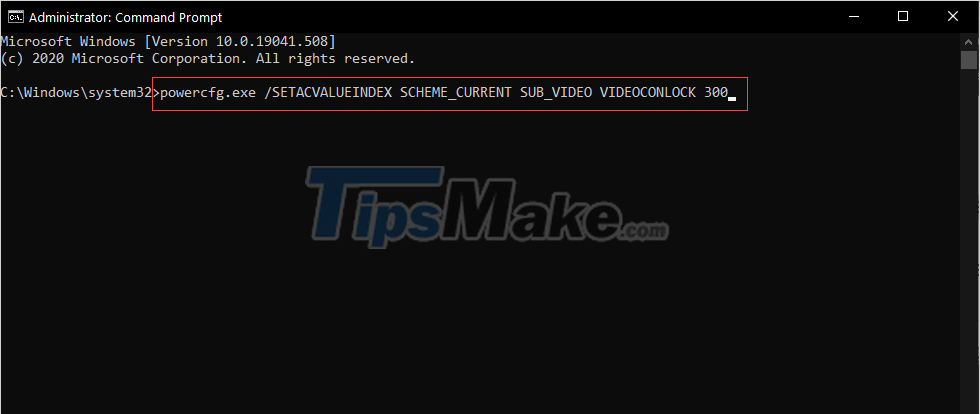
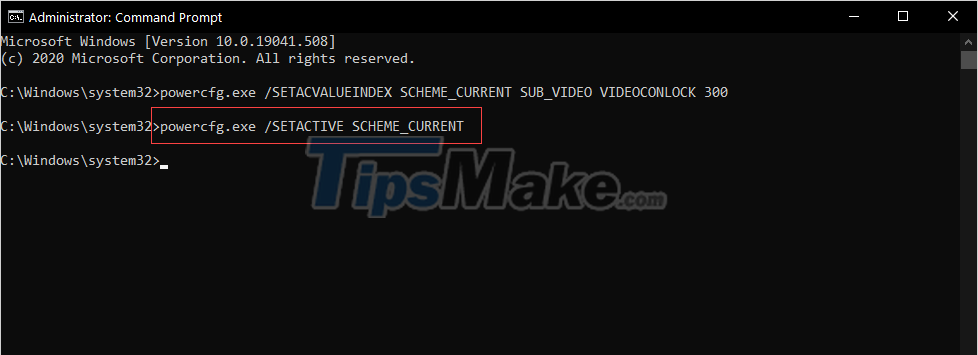
Step 3: Finally, you need to enter the following command to confirm the above changes.
powercfg.exe /SETACTIVE SCHEME_CURRENT
Once done, proceed to close the Command Prompt window and restart the computer to check.
In this article, TipsMake has shown you how to set the time to turn off the computer and laptop screen quickly and effectively. Have a nice day!
Key Takeaways
Use the information above as a practical reference for steps to set screen off time on laptop. Review each step carefully, confirm any requirements, and choose the option that best fits your situation.
FAQ
What does this guide explain about Steps to Set Screen Off Time on Laptop?
It explains the main concepts, practical considerations, and useful steps related to steps to set screen off time on laptop without requiring advanced knowledge.
Who can benefit from learning about Steps to Set Screen Off Time on Laptop?
This information is useful for readers who want a clear overview, practical guidance, and reliable steps related to steps to set screen off time on laptop.
What should I check before applying this information?
Review the requirements, confirm that your device, software, or situation matches the instructions, and back up important data before making major changes.
Related Articles
 Steps to Fix Laptop Screen Flickering3 minutes read
 Steps to Fix Windows Computer Screen Not Turning Off After6 minutes read
 7 Simple Steps to Make Your Laptop as Clean as New5 minutes read
 Instructions on How to Turn Off the Laptop Screen6 minutes read
 Take Care of the Laptop Screen: Explained8 minutes read
 How to Quickly Check the Laptop Screen for Any Damaged3 minutes read
Reader Comments 0
Sign in with email or Google to join the discussion.