Steps to install microphone on Windows 10
To voice chat or give commands to the computer, you need to connect the Microphone recording device to the computer. To set up Microphone for Windows 10 we need to do the following:
Table of Contents
1. Enable Microphone for Applications
By default on computers, Windows 10 only grants permission to use the Microphone for certain applications, and if the applications do not grant the permission, it will not be able to use the Microphone. Here's how to enable Microphone for all apps on Windows 10 computers.
Step 1: At the main screen of the Desktop, proceed to open the Start Menu and enter Settings to open the settings.

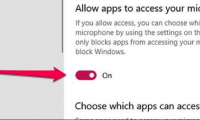
Step 2: Then, enter Microphone in the search bar to open Choose which apps can access your microphone.
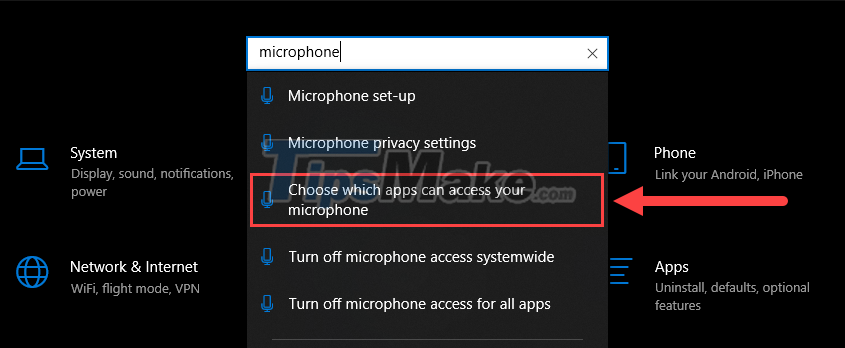
Step 3: In the Microphone settings window, you proceed to enable On for Allow apps to access your microphone.

2. Microphone Settings in Settings
If you have multiple Microphone input sources or are using Microphone for the first time on Windows 10, you need to set up the data input source for the system.
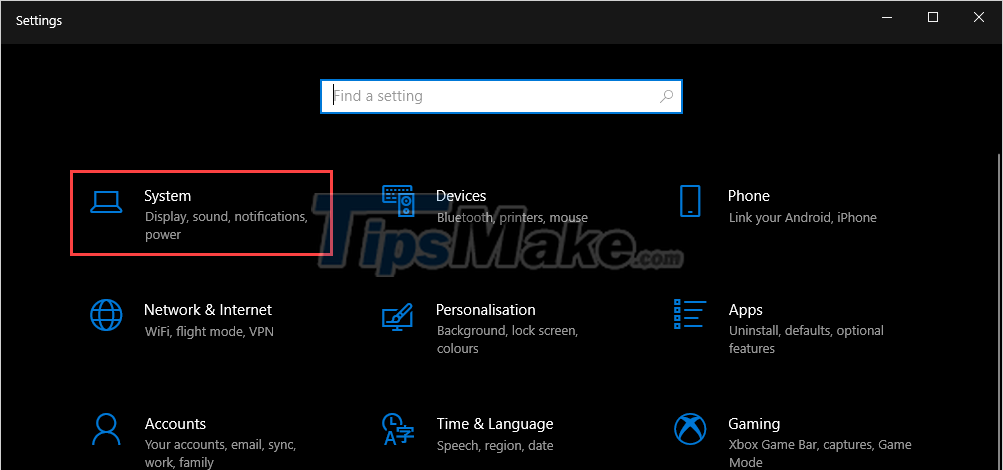
Step 1: You proceed to open the Start Menu and enter Settings to open the settings.

Step 2: In the Settings window, select System to open system-related settings.
Step 3: Next, select Sound to open all audio-related settings.

Step 4: To change the input of the Microphone, go to the Input section and proceed to change the option of Choose your input device.

3. Set Microphone at Home Screen
At the main screen of the Desktop, you can also adjust the sound directly through the Taskbar.
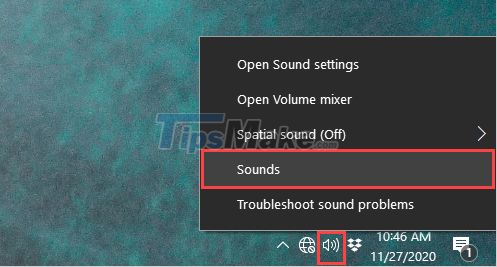
Step 1: At the main screen of the Desktop, right-click the Sound icon and select Sounds.
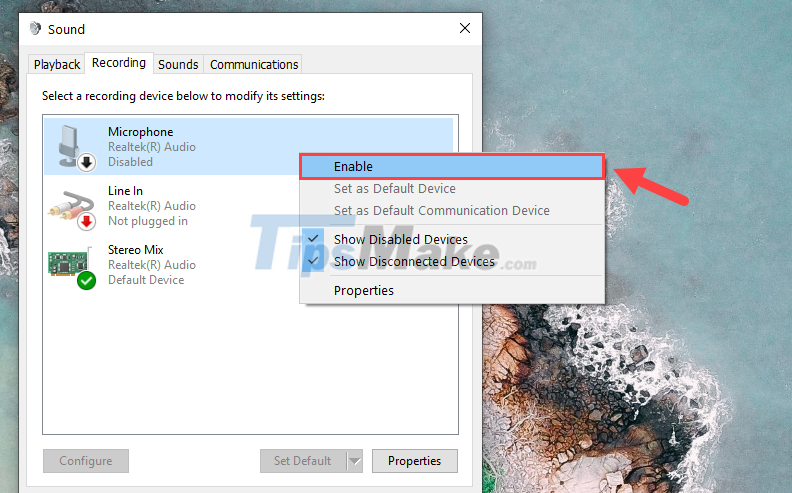
Step 2: Then, go to the Recording tab to check the entire Microphone input of the computer.

Step 3: To enable Microphone of Windows 10, you need to right-click on Microphone and select Enable.
Step 4: Next, right-click on the activated Microphone and select Properties to open the sound settings.

Step 5: In the setup window, select the Levels tab to adjust the microphone's volume, the setting items have the following features:
- Microphone: Mic's retractable volume
- Microphone Boost: Boost the Mic's input volume.
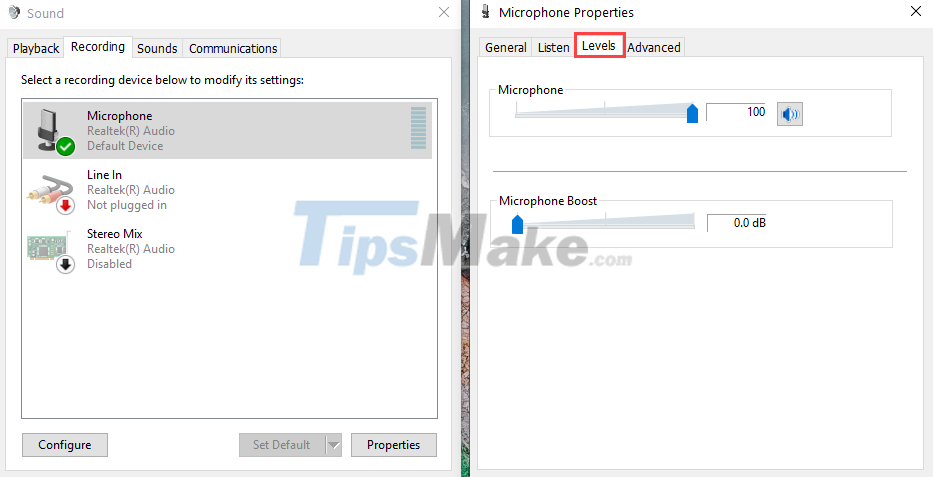
Step 6: In case you need to turn off Microphone on Windows 10, you just need to right-click on Microphone and select Disable.

In this article, Tipsmake has shown you how to install Microphone on Windows 10 quickly and effectively. Have a nice day!
Was this article helpful?
Your feedback helps us improve.
Related Articles
 How to test the Windows 10 microphone3 minutes read
 Steps to install and update microphone driver Windows 105 minutes read
 Instructions for setting up and installing Microphone on computer9 minutes read
 Instructions for checking Microphone, Headphone on Windows 75 minutes read
 How to fix microphone on laptop7 minutes read
 Test your microphone and headphones on Windows 10, 8, and 7.5 minutes read
Reader Comments 0
Sign in with email or Google to join the discussion.