
Simple tutorial on creating light beam effects in Photoshop
The beam effect gives the image more depth and appeal. This technique is often used in poster design, advertising banners or artistic photo editing.
TipsMake will guide you how to use the Gradient Tool, Distort filter and Lighting Effects to create a quick and effective beam effect.
Tools to use
- Gradient Tool: Create a background color for the effect.
- Distort Filter (Wave, Polar Coordinates): Create a beam of light.
- Lighting Effects: Add professional lighting effects.
Tutorial to create light beam effect in Photoshop
To ensure your manipulations are absolutely accurate to the Free Download instructions, we recommend that you use the latest version of Photoshop .
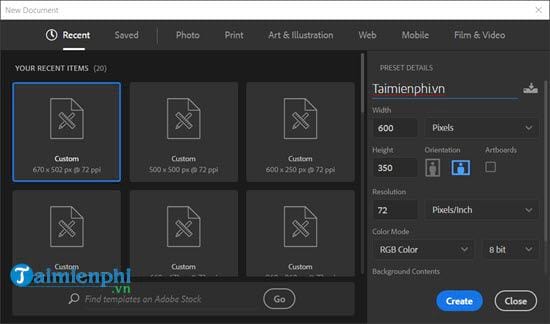
Step 1: Create file and prepare background
- Open Photoshop > File > New, select size 600 x 350 pixels (or customize as you like).
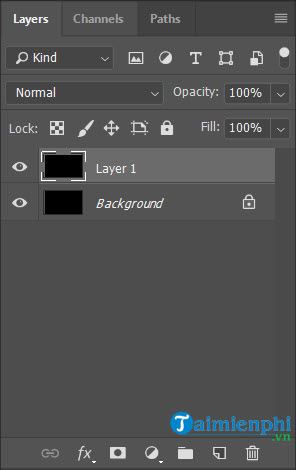
- Fill the background with black using Paint Bucket Tool (G), then duplicate the layer with Ctrl + J.
Step 2: Color this Layer black if it is not by default and duplicate it using the key combination Ctrl + J .
Step 3: Next, we will use the Gradient Tool by clicking on the icon as shown in the picture or using the shortcut key G.
Step 4: Choose the default color as shown in the picture with the first fill style, make sure all parameters are absolutely correct.
Step 5: Then go back to Layer , hold Shift and drag a segment from bottom to top as shown to fill the Gradient color.
The result after coloring will be as below, if you make a mistake you can redo it. No need to be too precise in this step.
Step 6: Next, go to Filter > select Distort > select Wave .
In Wave, adjust the following parameters:
* Number of Generators : 10.
* Wavelength : Min is 10 and Max is 120.
* Amplitude : Min is 5 and Max is 35.
* Scale : 100% for both.
* Type : Square.
* Underdefined Areas : Select Repeat Edge Pixels.
>> The result of the above steps will be as below.
Step 7: Go to Filter > select Distort > select Polar Coordinates .
In here you just need to set Rectangular to Polar.
Step 8: Press Ctrl + U and check Colorize , here you adjust HUE to 200 and Saturation to 25.
>> The result will be as follows.
Step 9: Go to Filter > Select Render > select Lighting Effects to choose the lighting effect.
In here you select Blue Omni in the Preserts section .
And the parameters of Blue Omni are as follows:
* Color : White with Intensity 35.
* Color : White with Exposure 0.
* Gloss : 69.
* Metallic : 0.
* Ambience : 9.
* Texture : None.
You can see the results right here.
Through this article, you have become familiar with many filters in Photoshop to help create professional beam effects. Filters such as Distort, Wave, Polar Coordinates are not only applied to beam effects but can also be used to create many other unique effects.
If you want to expand your design capabilities, you can try the moving light effect - a technique that makes the image more vivid and attractive. In addition, the shadow effect is also a useful tool, helping to create depth and highlight details in the photo. These are important techniques that you can apply flexibly to improve your photo editing skills in Photoshop.
You should read it
- 49 smart Photoshop tips you need to know (Part 3)
- 49 smart Photoshop tips you need to know (Part 1)
- Instructions for using Photoshop for newbies
- 49 smart Photoshop tips you need to know (Part 2)
- 10 Photoshop beginner skills need to know
- 17 best ideas and tutorials for Photoshop users
- 5 easy ways to improve Photoshop skills
- How to automate Photoshop with Photoshop Scripts
- How to use Photoshop CS5 - Part 2: Panels
- How to cut circular images in Photoshop
- 15 common problems in Photoshop and basic remedies
- How to write curves in Photoshop
Maybe you are interested
How to turn on / off Fullscreen Optimizations for apps and games in Windows 10 What does Easter Egg mean? How they are understood in the game What is the size of standard cover photo Zalo, Zalo OA? When you turn off the light in the room, where did the light go? 'Smile wants to lose teeth' with the most funny photos in the 'Funny Nature 2017' contest Label with the best astronomical images in 2017