How to write curves in Photoshop
Text in Photoshop can transform into many different artistic typefaces, instead of just choosing simple font or color. You can style text cut effects on Photoshop, integrate text into photos in Photoshop or simply create curving letters, arcs, circles for letters. The creation of typefaces in many different shapes is very simple, we can use the existing text editors, or create your own frames and enter the text. The following article will show you how to create artistic text on Photohsop.
- Typing Vietnamese in Photoshop
- How to insert 3D letters into images
- 10 best Photoshop typefaces to use in Creative Cloud
- How to create spray paint effect in Photoshop
Method 1: Write the letters curling Photoshop with Warp text
Step 1:
First, you need to insert the text in the image by clicking on the T icon , then select the font, font size, text color, adjust the position of the text.
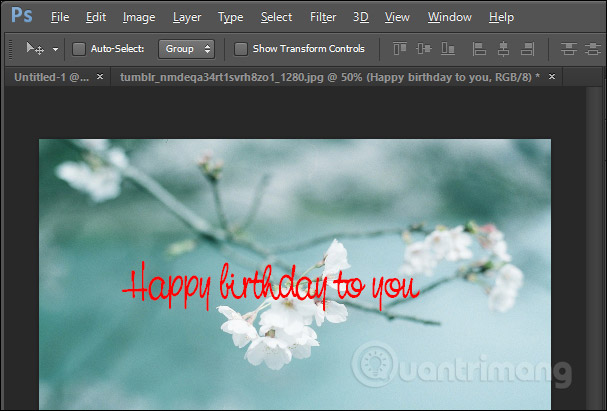
Step 2:
Next click on the text layer and then click on the text in the image and black out the entire text. Click the Warp text icon in the toolbar above the interface.

Display window interface to choose winding typefaces with 15 styles. Click on the Style frame and choose the twisty font you want to use.

Step 3:
Next we proceed to select the curvature of the text effect at Bend . The bar is set to the default value of 50%, but we can change that value by dragging the slider to the left or right. If the drag decreases, the curvature of the word is reduced.
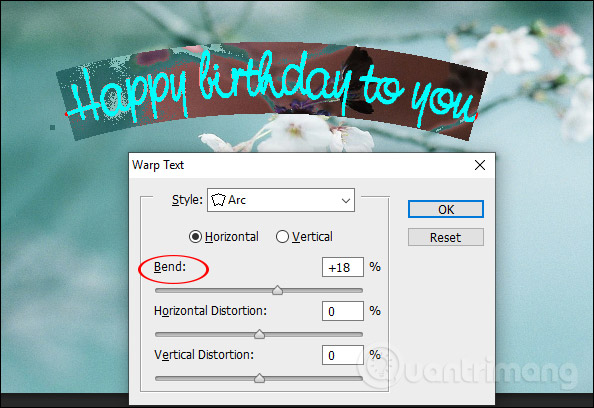
If the value is reduced to a negative value, the letter will bend in the opposite direction.
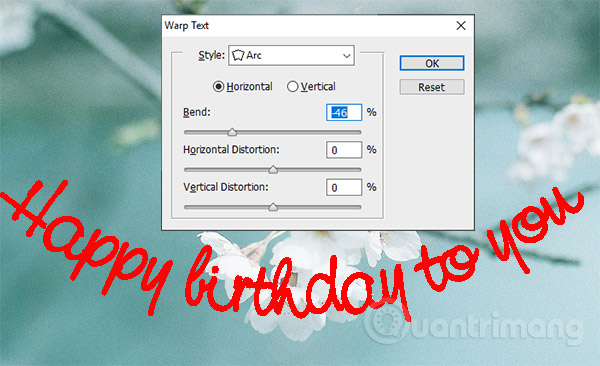
Step 4:
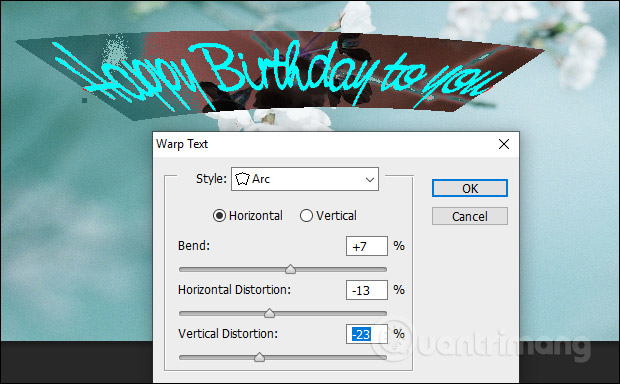
Also in the edit interface you will see there are 2 Horizonal and Vertical bars . Horizonal is used to bend letters in the left or right direction and Vertical rotates text in the top-down direction.
Depending on the image and we choose the appropriate type of lettering.
Method 2: Create curved text in Photoshop using Shape
Step 1:
First of all we need to select the image we want to create the frame for the text as shown below.

Step 2:
Draw the image in the image and then switch to the layer, click on the frame layer and move the Fill item to 0% to remove the background of the drawing.

Step 3:
Click on the T tool and then hover your mouse over the drawing until it shows the curled drawing, then click on the frame to enter the text. Finally we just need to enter the text in the frame is okay.

Method 3: Write the curvy Photoshop text using Pen Tool
Step 1:
Right-click on the pen icon and select Pen Tool to create an optional drawing line.

Draw lines by doting the points on the image and then creating a drawing line.

Step 2:
Next, the user presses the letter T to write the word that is drawn.
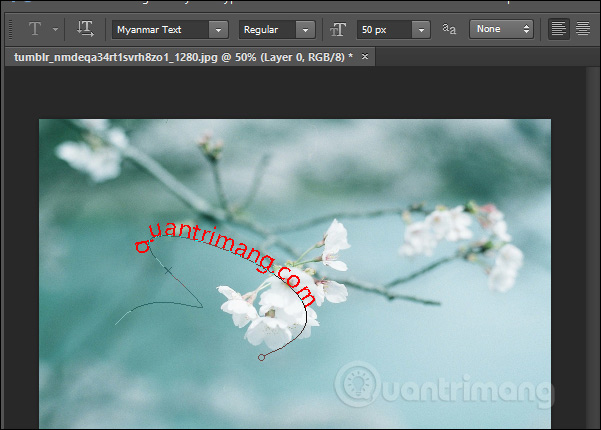
So you have 3 different ways to write art, winding in Photoshop. As for drawing with the Pen Tool, we need to adjust the drawing line carefully to match the line we want to write.
I wish you all success!