Set page margins in Excel
Show you how to set print margins in Excel. Setting margins for pages in Excel is an indispensable operation for print jobs after calculations. To set the margins for the printed page, follow these steps: Step 1: Go to the Home tab - PageLayout - click on the hat
The following article details you how to set print margins in Excel.

Setting margins for pages in Excel is an indispensable operation for print jobs after calculations. To set the margins for the printed page, follow these steps:
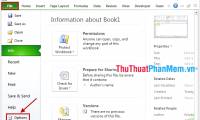
Step 1: Go to Home tab -> PageLayout -> click on the arrow below:

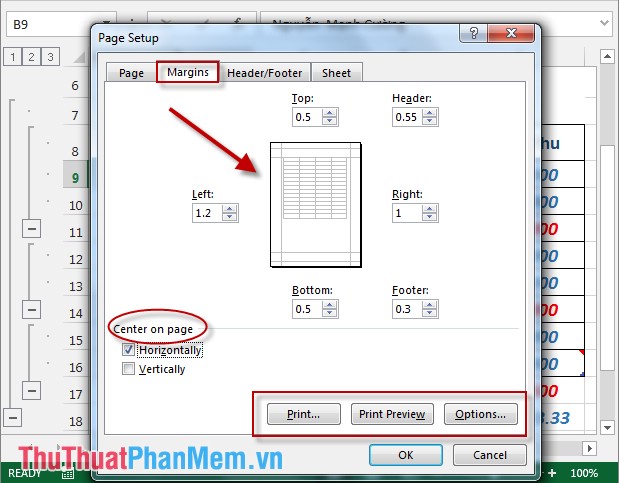
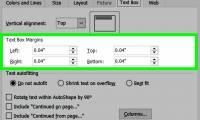
Step 2: The Page SetUp dialog box appears with the following options:
- Top: distance of upper margin to printed paper.
- Bottom: the distance of the bottom margin compared to the printed paper.
- Left: the distance of the left margin compared to the printed paper.
- Right: the distance of the right margin compared to the printed paper.
- In the Center on page:
+ If checked, Horizontally: Align all the tables with the paper compared to the paper printed horizontally.
+ If the Hori check box is selected : Align the table evenly compared to the paper printed horizontally.
- Options:
+ Print: Print the spreadsheet.
+ printPreview: Print preview .
+ Options : Other options.
- Depending on the size of the spreadsheet you set the print margins accordingly.
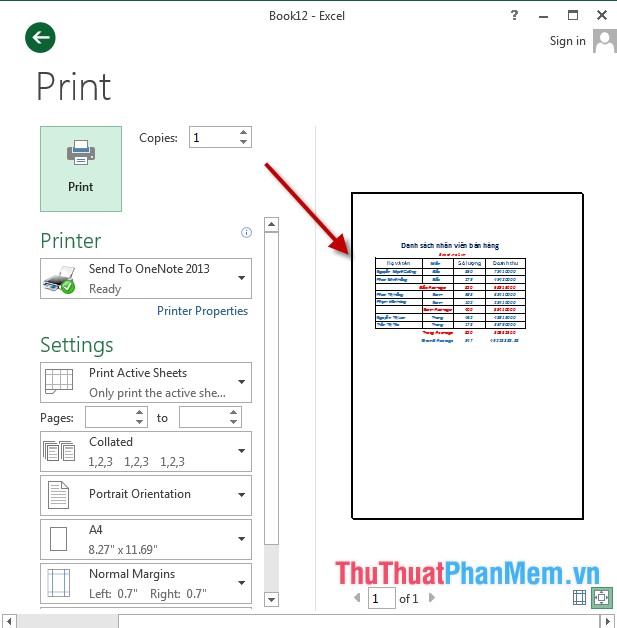
- For example, when selecting print preview mode, PrintPreview spreadsheet is displayed:
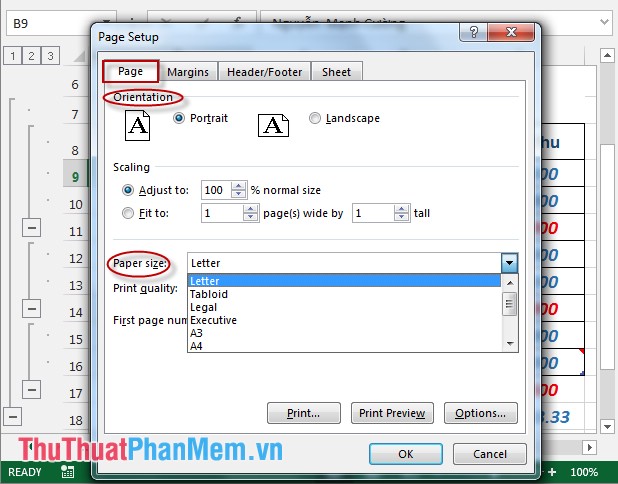
- In addition, you can set the type of paper to print vertical or horizontal or paper size by switching to the Page tab :
+ Orientation: Select paper orientation: Portrait - portrait , Landscape - horizontal, choose paper size in Page size:
Above is a detailed guide on how to set print margins in Excel.
Good luck!
Was this article helpful?
Your feedback helps us improve.
Related Articles
 Guidance on how to align Excel correctly3 minutes read
 Instructions for alignment in Excel - Adjust the margins for Excel before printing2 minutes read
 How to Set Margins in Microsoft Publisher4 minutes read
 Align text correctly in Excel3 minutes read
 MS Word - Lesson 11: Formatting Word Pages7 minutes read
 How to align correctly in Word3 minutes read
Reader Comments 0
Sign in with email or Google to join the discussion.