Create and edit Textbox in Excel
The following article gives detailed instructions for you to create and edit Textbox in Excel.

To insert Textbox you perform the following steps:
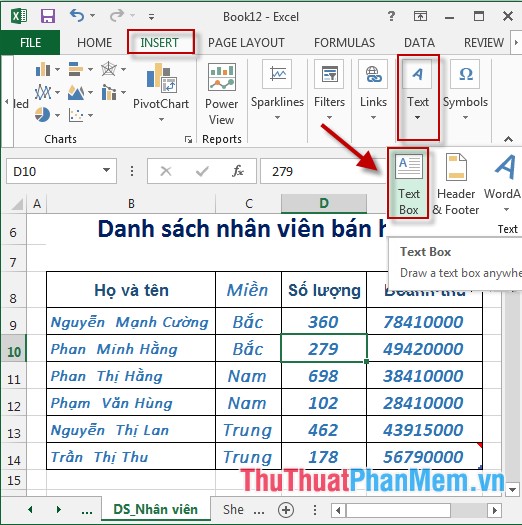
Step 1: Go to the Insert tab -> Text -> Textbox:
Step 2: Drag and move the mouse to create areas for Textbox -> enter the content to create Textbox:
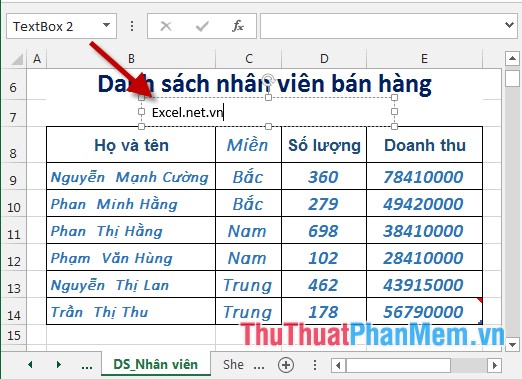
Step 3: After entering the textbox content -> Select the whole Textbox content -> the dialog box appears choosing the font, font size, font color for Textbox:

- After editing, you have a Textbox:

Alternatively, you can rotate the Textbox direction by clicking on it and moving in a circle to get the direction of rotation:

Step 4: Edit the text in the Textbox. Click on Textbox -> select Format -> WordArt Styles tab with the following options:
- Text Fill: Fill the background color for text in Textbox.
- Text Outline: Create a border color for text.
- Text Effects: Create effects for text.
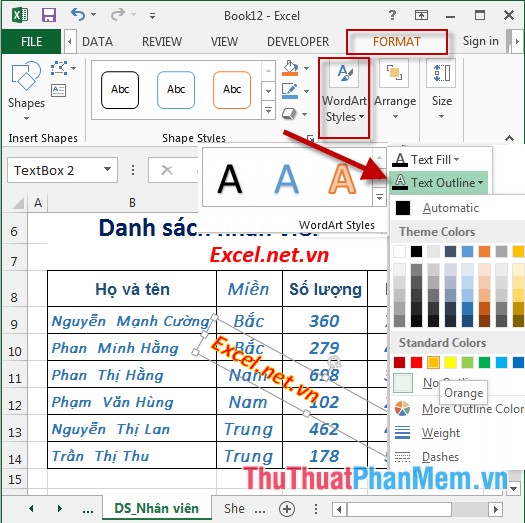
Step 5: Edit the frame for Textbox. Click on Textbox -> select Format -> Shape Styles tab with the following options:
- Shape Fill: Fill the background color for the frame in Textbox.
- Shape Outline: Create a border color for the frame.
- Shape Effects: Create effects for frames.
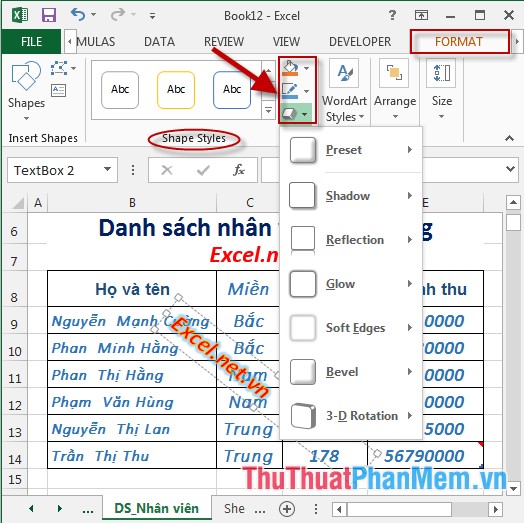
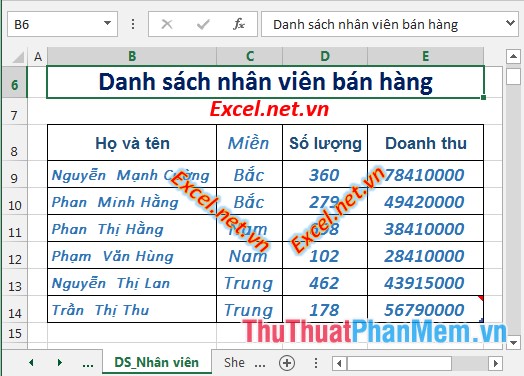
- So just a few simple steps you have created Textbox:
The above is a detailed guide on how to create and edit Textbox in Excel 2013.
Good luck!