How to Set Margins in Microsoft Publisher
Microsoft Publisher has 2 types of margin controls: page margins, which determine the amount of space between the edges of the page to the text and graphics on it, and text box margins, which determine the amount of space between the edges...
Table of Contents
Method 1 of 3:
Setting Page Margins in Publisher
-
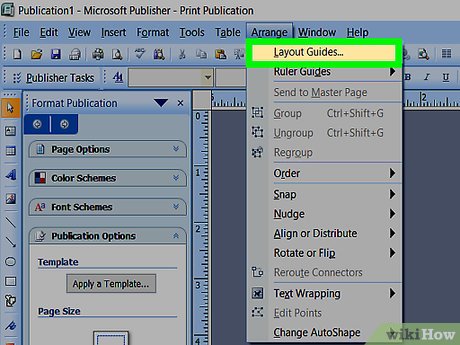 Display the "Layout Guides" dialog box. The "Layout Guides" dialog box is where you control the page margins for your Microsoft Publisher publications.
- In Publisher 2003 and 2007, select "Layout Guides" from the "Arrange" menu.
- In Publisher 2010, select "Custom Margins" from the "Margins" dropdown button in the "Page Setup" group of the "Page Design" menu ribbon.
- Publisher 2010 also offers 4 preset margin options on the "Margins" dropdown button menu: Wide, Moderate, Narrow, or None. The Moderate option offers the same margin widths as the initial values displayed on the "Margin Guides" page of the "Layout Guides" dialog box.
-
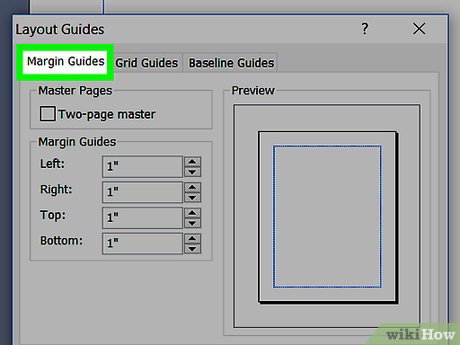 Select the "Margin Guides" tab. In most cases, this tab will already be selected when you open the "Layout Guides" dialog box.
 -
 Set the margins in the "Margin Guides" section. The spin box controls set the page margins for your publication. Click the up arrow to increase a margin or the down arrow to reduce a margin. You can also enter a value directly in the box. The Preview pane on the right of the "Margin Guides" page shows the result of your margin adjustment.
- Use the Inside spin box to adjust the margins between the page text and the center of the layout.
- Use the Outside spin box to adjust the margins between the page text and the horizontal edges of the layout.
- Use the Top spin box to adjust the margin between the top of the page text and the top of the page layout.
- Use the Bottom spin box to adjust the margin between the bottom of the page text and the bottom of the page layout.
- You can set the values in these spin boxes only as low as the minimum margins supported by your printer. To determine the minimum margins for your printer, follow the instructions under "Determining the Nonprintable Region for Your Printer."
Method 2 of 3:
Determining the Nonprintable Region for Your Printer
-
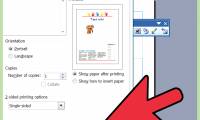
 Open WordPad. WordPad is a simple text processor that comes pre-installed on most Windows-based computers. You can find it under "Accessories" in the "Programs" menu when you click the "Start" button and select "All Programs."
 -
 Select "Page Setup" from the "File" menu.
 -
 Set the margins to zero. Enter "0" in the Left, Right, Top, and Bottom margin fields. These values will automatically be reset to the minimum margins for your printer. Record these values for future reference.
Method 3 of 3:
Setting Text Box Margins in Publisher
-
 Right-click the text box whose margins you want to reset. This will display a popup menu.
 -
 Select "Format Text Box." This displays the "Format Text Box" dialog box.
 -
 Select the "Text Box" tab. This displays the "Text Box" page, with controls for setting vertical alignment, text box margins, and options for auto fitting text.
 -
 Set the margins in the "Text Box Margins" section. The spin box controls set the margins for the Left, Right, Top, and Bottom text boxes. Click the up arrow to increase the margin or the down arrow to reduce a margin. You can also enter a value directly in the box.
Was this article helpful?
Your feedback helps us improve.
Related Articles
 How to Use Basic Microsoft Publisher6 minutes read
 How to Download Microsoft Publisher6 minutes read
 How to convert Microsoft Publisher files (.pub) to PDF3 minutes read
 How to Add a Photo to a Document Using Microsoft Publisher11 minutes read
 How to Create an Invitation in Microsoft Publisher13 minutes read
 How to Use Microsoft Publisher6 minutes read
Reader Comments 0
Sign in with email or Google to join the discussion.