Perform printing in Excel
Guide you to perform printing in Excel. After setting up the page to print the final step, you can manipulate to print the worksheet in Excel. Step 1: After setting up the worksheet - click File - Print: Step 2: The Print window appears in pa section
The following article gives detailed instructions for you to perform printing in Excel 2013.

After setting up the page to print the final step, you can manipulate to print the worksheet in Excel.
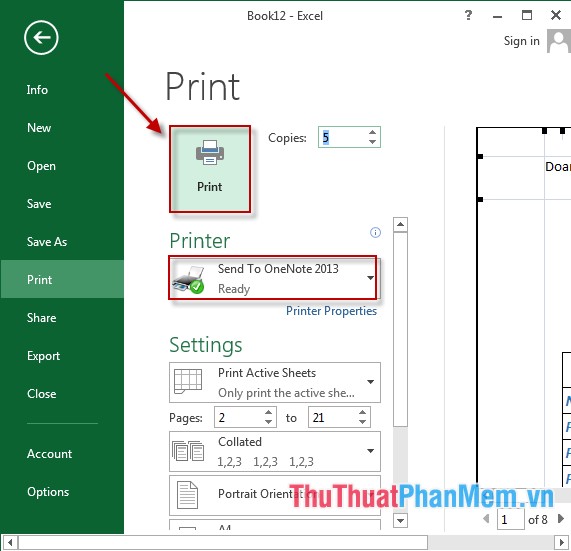
Step 1: After setting up the worksheet -> click File -> Print:
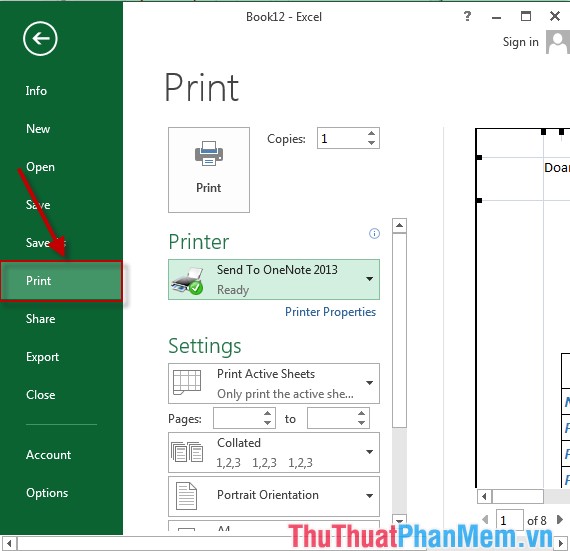
Step 2: The Print window appears in the pages section : select the number of pages to print, for example print from page 2 to page 21:

Step 3: Select the printing type when the number of copies is greater than 1:
- Collated: Print the page numbers in the first version and then the second version.
- Collated: Print the page numbers in the first version and then the second version.
- Uncollated: Print the first page of all copies in turn, then move to the next page.

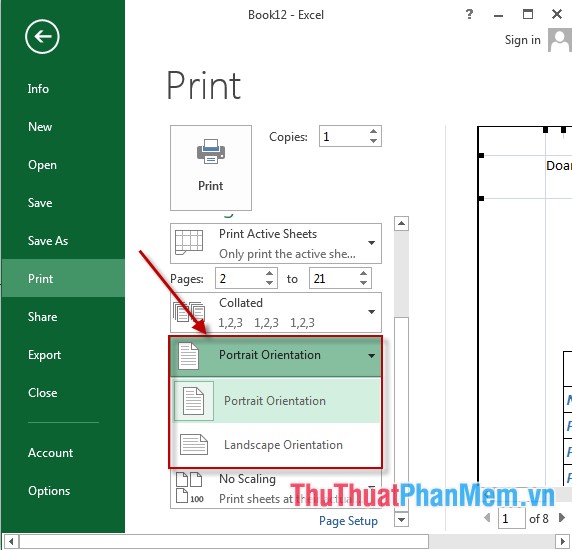
Step 4: Select printing direction:
- Portrait Orientation: Vertical orientation.
- Landscape Orientation: Horizontal paper orientation.
Step 5: Align the printed page as shown:
- Top: Top margin.
- Bootom: Bottom margin.
- Right: Right margin.
- Left: Left margin.

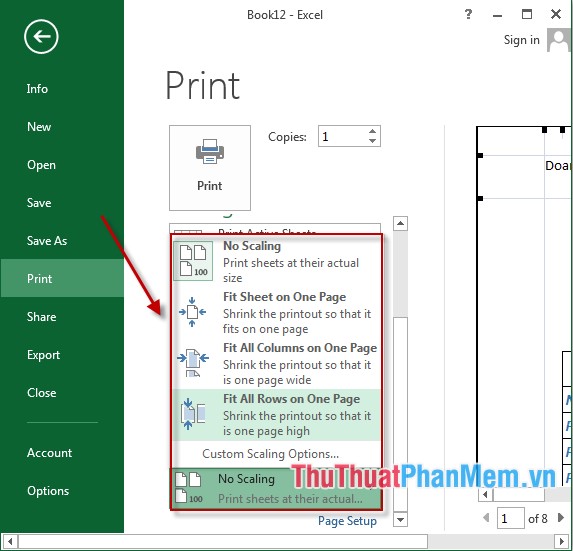
Step 6: Verify the number of pages printed on a sheet of paper is described as shown:
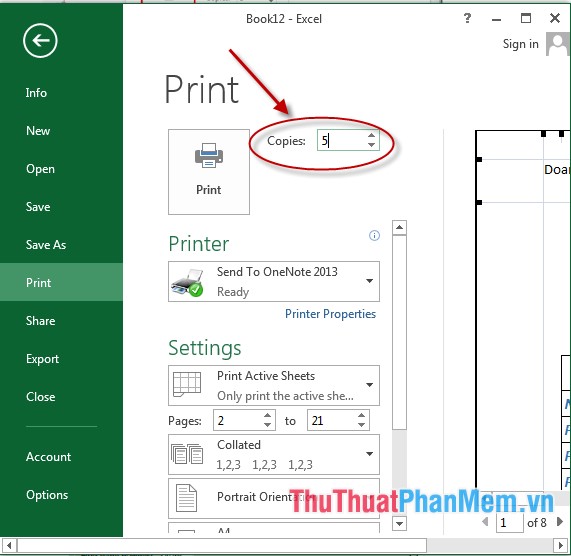
Step 7: Click Copies to enter the number of prints:
Finally, click on the printer to select the printer and click on Print to print the data:
Above is a detailed guide to you how to perform printing in Excel 2013.
Good luck!
Was this article helpful?
Your feedback helps us improve.
Related Articles
 Instructions for printing two-sided paper in Word, PDF, Excel5 minutes read
 How to fix the error of printing without finishing the page in Excel3 minutes read
 How to fix the error of printing missing documents in an Excel sheet3 minutes read
 Some printing tips are essential in excel7 minutes read
 Excel 2019 (Part 11): Layout and Printing8 minutes read
 Show you how to align the printed Excel file with A4 paper3 minutes read
Reader Comments 0
Sign in with email or Google to join the discussion.