Table of Contents
The following guide provides a clear overview of Step, with the most relevant background, details, and practical takeaways.
Step Overview
Step 1 Before opening a new Flash file, you must search for a photo or any object (such as a car image or house.). For example, I will use an interior photo of the house. You can download my photo if you like.
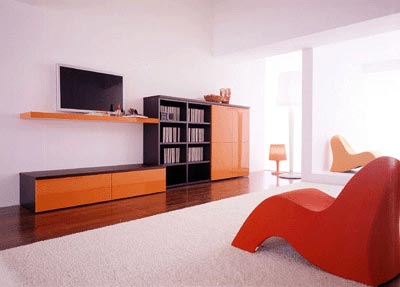
Step 2 Launch Flash program, set the width, height and frame rate as you like. In the example I took is 36fps, the background color is white (you can choose a different color). Step 3 Go to File > Import > Import to stage and insert it into your photo. Select the image just inport, press F8 key (Convert to Symbol) to convert it into a Movie Clip.
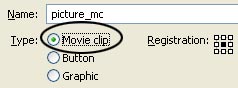
Step 4 Select the Selection tool (V) and double-click the newly created movie clip. You will enter the inner editing of the Movie Clip

Step 5 Select the image, press again the F8 key to convert it again into a Movie Clip
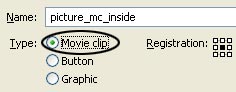
Step 6 Lock layer 1, create layer 2, select it and grab the LINE Tool (N). Select the stroke color as a dark color if you have left the white background and if the background is dark, you should choose a light color LINE. In the example, I selected the background color to be white, so the LINE color would have to be black. Part Stroke Style select Solid with a thickness of 1 LINE.

Step 7 Then, draw a border for the object (which is the picture) as shown below
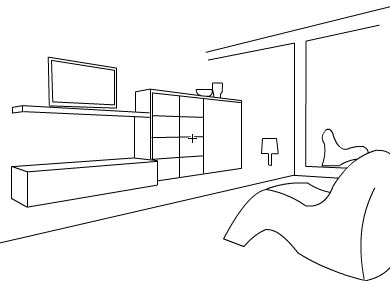
Step 8 Create layer 3, grab the Brush Tool (B), choose Brush size at the big size, choose Brush color and click on some points on the contour object.
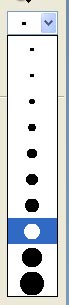
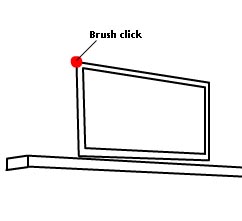
Step 9 Press F6, and draw a few more points on the object border (still using the Brush Tool).
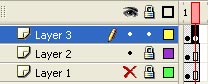
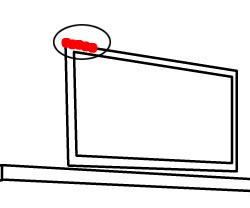
Repeat this process until there are no spots left on the picture. See the picture below
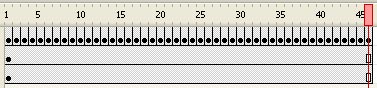
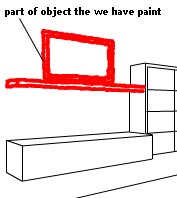
Step 10 Select layer 3 and convert it to a mask by right-clicking on layer 3 and selecting Mash in the menu that appears.
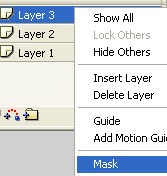
Step 11 Create layer 4, lock layer 2, select the first frame and press Ctrl + C key (Copy). Back to layer 4, select the first frame and press Ctrl + Shift + V (Paste in Place) Step 12 Lock layer 2 and layer 4, create layer 5. Select the Brush Tool (B) and draw a few points on the other part of the picture just like you did in the first part of the object (picture)
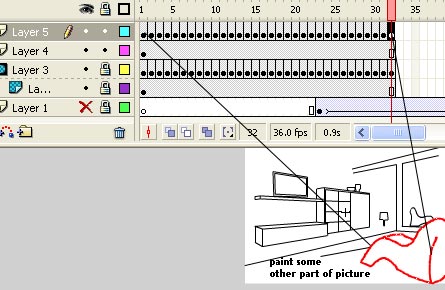
Step 13 Select layer 5 and convert it to a mask by right-clicking on layer 5 and selecting Mask in the menu that appears.
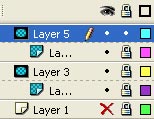
Step 14 Go back to layer 1, unhide, unlock and use the drag and drop method to move the first frame to frame 25. See the picture below
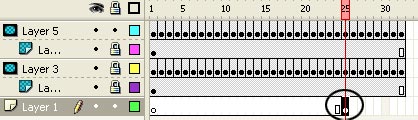
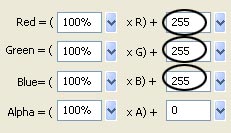
Step 15 After that, select frame 45 and press F6 key. Go back on frame 25, take the Selection Tool (V), click once on the picture to select it, go to the Properties Panel at the bottom of the screen. On the right, you will see the Color menu. Select Advanced, click Settings and choose the following image selection.

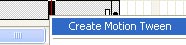
Step 16 Right-click anywhere in the gray area between the two keyframes on the timeline and choose Create Motion Tween from the menu that appears.
Step 17 About sound. Create a new layer above all other layers and name it sound. Then search for any music file and import it into Flash Library ( File > Import > Import to Library ). Select the first frame of layer sound and use the drag and drop technique to move it from the Library to the Stage.

Go back to the main scene (Scene 1) and test your product ( Ctrl + Enter ). Download the original file.
FAQ
What is the main topic of Macromedia Flash - Photo Effects Appear with Sound: Step?
The following guide provides a clear overview of Step, with the most relevant background, details, and practical takeaways.
Why is Step important?
Step Overview Step 1 Before opening a new Flash file, you must search for a photo or any object (such as a car image or house.).
What should readers remember about Step?
For example, I will use an interior photo of the house.
Related Articles
 Macromedia Flash - Photo Effects with Sound7 minutes read
 Macromedia Flash - Vivid Photo Effects4 minutes read
 Macromedia Flash - an Attractive Photo Appearance Effect4 minutes read
 Macromedia Flash: Create Effects for Nature Photos4 minutes read
 Macromedia Flash - Effects of Lighting on Photos4 minutes read
 Macromedia Flash - Animation and Rotation Effects4 minutes read
Reader Comments 0
Sign in with email or Google to join the discussion.