Macromedia Flash - Photo effects with sound
This tutorial will show you how to create a visual effect with extremely vivid sound, with just a few tips and flash tips implemented in Flash 8. You won't need to use any Action Script code. Which in the post. This effect can be applied on headers, banners, ads on websites .
Step 1
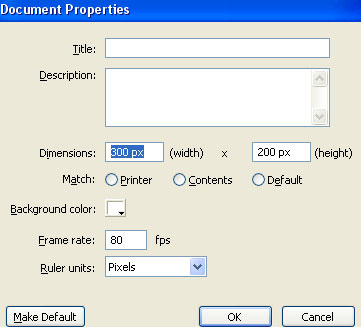
Open a new Flash file by going to File > New > Flash document and clicking OK . Set the size of the Flash file to about 300 x 200 pixels and Frame rate is 80 fps. Select white (#FFFFFF) as background color and click OK .
Step 2
First, download some photos to use in this article. If you already have photos on your computer, you can skip this step.
Step 3
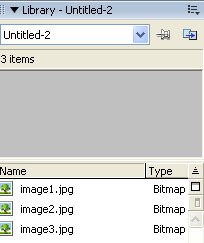
Go to File > Import > Import to Library . In the file explorer window, find up to 3 photos that you have downloaded or prepared in advance, hold Shift while selecting them. Then click Open . If the flash library of the computer is open (Ctrl + L) you will see 3 photos that have just opened in it.
Step 4
Select the Selection Tool (V) and use the "drag and drop" technique to drag the first image into the scope of the Flash file.
Step 5
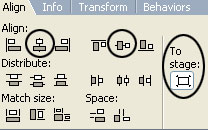
Click on the image you just dragged, go to the Align Panel (Ctrl + K) and do the following:
- Make sure the To Stage button in the Align / Distribute section is selected
- Click the Align horizontal center button
- Click on the Align vertical center button
Step 6
Double click on layer 1 and rename it to image1. After that, click on frame 100 and press F5 key
Step 7
Create a new layer above the layer image1 and name it image2.
Step 8
Select the layer image2, use the drag and drop technology to drag the second image from the flash library into the workspace.
Step 9
Repeat step 5.
Step 10
Create a new layer above the layer image2 and name it mask1. After that, select the mask1 layer and grab the Rectangle Tool (R).
Step 11
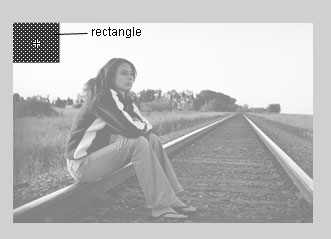
In the Colors section of the toolbar, remove the border color by clicking on the Stroke color (with the pencil icon next to it) and selecting the square icon with a red slash. For background color (Fill color), select # D6D6D6 color and draw a rectangle about 38x24px at the top left corner of the image (See picture below).
Step 12
Select the rectangle, press F8 key (Convert to Symbol) to convert that rectangle into a Movie Clip Symbol.

Step 13
After that, click on frame 15 and press F6 key. Go back on the first frame and repeat step 5.
Step 14
After you have aligned the rectangle with the center, select it and use the Free Transform Tool (Q) to drag the rectangle down like in the image below.
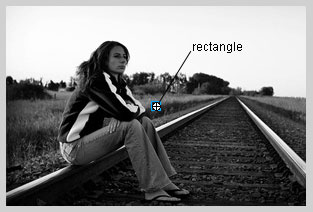
Step 15
Pick the Selection Tool (V) and click on the rectangle to select it. Then go to the Properties Panel (Ctrl + F3) below the screen. On the right side, you will see the Color menu section. Select Alpha and drag the contrast to 0% .

Step 16
Right-click anywhere on the gray area between frame 1 and frame 15 on the timeline and choose Create Motion Tween from the menu that appears.

Step 17
Select mask1 layer and convert it to a mask by right-clicking on the mask1 layer and selecting Mask .
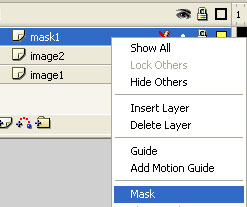
After that step we have:

Step 18
Create a new layer above the layer mask1 and name it image2 again. After that, go back to the first frame of layer2 and press Ctrl + C key (Copy). Continue to select frame 10 both the image2 layer and press F6 key. Still on frame 10, press Ctrl + Shift + V key (Paste in Place).
Step 19
Create a new layer above layer2 and name it mask2. Then click on frame 10 and 25 of layer mask2, press F6 key.
Step 20
Go back to layer mask1, select frame 15 and press Ctrl + C (Copy). After that, go back on frame 25 of layer mask2, press Ctrl + Shift + V (Paste in Place). Still on frame 25, move the small rectangle to the right a bit (use the right arrow key on the keyboard).

Step 21
Go back on frame 1 of layer mask1 and press again Ctrl + C key (Copy). Select frame 10 of layer mask2 and press Ctrl + Shift + V (Paste in Place)
Step 22
Right-click anywhere on the gray area between frame 10 and 25 on the timeline and choose Create Motion Tween from the menu that appears.
Step 23
Click on frame 100 of layer mask2 and press F5 key.
Step 24
Repeat step 17
Step 25
After creating the image, we will now create the sound, create a new layer on the top and name it sound.
Step 26
You can download the audio file here.
Step 27
Return to the workspace of the file. Go to File > Import > Import to Library and insert the downloaded audio file into the file library.
Step 28
Click on frame 30 of layer sound and press F6 key. Use the drag-and-drop technology to drag audio files from the library into the workspace (See image below)

Repeat the steps until the mask fills the entire image.
Download the source file here.