Macromedia Flash - Vivid photo effects
Through this tutorial, you will learn how to create a vivid photo effect with some basic flash tips. This article does not need to use Action Script code.
Through this tutorial, you will learn how to create a vivid photo effect with some basic flash tips. This article does not need to use Action Script code. You can use this tutorial to create a photo album effect, or in banner ads .
Step 1
First, you need to prepare the photos to use in this lesson, if you don't have photos available, you can download the images here:


Step 2
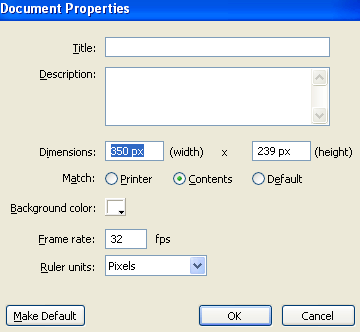
Create a new flash file. Press Ctrl + J ( Document Properties ) to set the width of the file to 350 px , the height to 239 px (or the general size of the photos you have prepared). Set the background to white, Frame rate to 32 , after setting it all, press OK .
Step 3
Rename the current layer as photo 1 by double-clicking on the default name (Layer 1).
Step 4
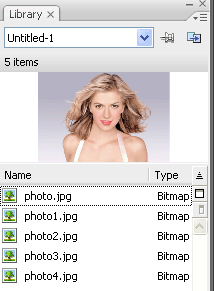
Go to File > Import > Import to Library . In the file explorer window, find up to 5 photos that you have prepared, hold Shift and select those photos, then click Open . If you are opening the Library ( Ctrl + L ) section on the Flash screen, you will see 5 photos that you just imported appear.
Step 5
Use the Selection Tool ( V ) and use the drag and drop technique to drag the first photo from the Library into the work area.
Step 6
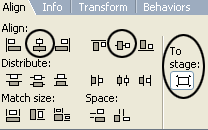
While the image is still selected, go to the Align Panel ( Ctrl + K ) and do the following:
- Make sure the To Stage button of Align / Distribute is selected
- Click the Align horizontal center button
- Click on the Align vertical center button
Step 7
Still select the image, press F8 ( Convert to Symbol ) to convert the image file into a Movie Clip.

Step 8
Click on frame 5, 10 and 15 and press F6, respectively
Step 9
While you're still on frame 15, take the Selection Tool ( V ) and click once on the image. In the Properties Panel ( Ctrl + F3 ) below, in the Color menu select Advanced . Click the Settings button and make the adjustments as follows:
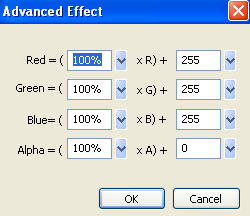
Repeat the process at frame 1
Step 10
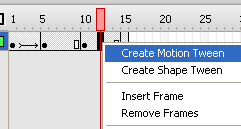
Right-click anywhere between frame 1 and 5, between frame 10 and 15 on the timeline and choose Create Motion Tween from the menu that appears.
Step 11
Create a new layer above the layer photo 1 and name it photo 2
Step 12
Click on frame 12 of photo 2 and press F6 key. While you're still on frame 12, using the Selection Tool ( V ) drag the next image from the Library into the work area. Then repeat steps 6 and 7.
Step 13
Click on frame 17 and 22 of layer photo 2 and press F6 one after another . While still on frame 22, repeat step 9. Do the same for frame 12.
Step 14
Right-click anywhere between frame 12 and 17, between frame 17 and 22 on the timeline bar and choose Create Motion Tween .
So we have done 2 effects for image 1 and image 2. Continue to do the same process with the rest of the images with each image is a layer and the same distance as above. Download the source file here .


 Steps to change Taskbar position on Windows 11
  Instructions to block ads on Smart TV
  How to change the image background color with the Paint 3D application
  How to install Bliss OS X86 on PC and VirtualBox
  Steps to fix printer not showing up in Windows Remote Desktop session
  How to install Nextcloud server on Windows 10