Macromedia Flash - RGB color slider
This tutorial will help you learn how to create a set of RGB color sliders in the Flash 8 program. Please follow the steps of the lesson sequentially or download the source file for reference.
This tutorial will help you learn how to create a set of RGB color sliders in the Flash 8 program. Please follow the steps of the lesson sequentially or download the source file for reference.
Step 1
Create a new flash file. Go to Modify > Document ( Ctrl + J ). Set the width of the flash file to 450 x 350px . The background color you can set arbitrarily, in this lesson I will use white. Set the frame rate to 14fps or whatever you want.
Step 2
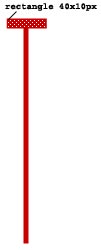
Pick the Rectangle Tool ( R ). In the Properties Panel select the Fill color to be red, Stroke color choose no color, then draw a rectangle with dimensions of 5x 225px .


Step 3
Take the Rectangle Tool (R) and continue drawing a horizontal rectangle (to make the color control bar) with a size of 40 x 10px and place it as shown below.
Step 4
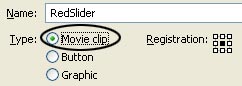
Select the entire slider ( Ctrl + A ) and press F8 key ( Convert to Symbol ) to convert it into a Movie Clip.
Step 5
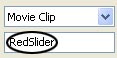
When the Movie Clip created (slider) is still selected, go to the Properties Panel ( Ctrl + F3 ). On the left side of Properties you will find the entry, enter the name in the field that is RedSlider
Step 6
Grab the Selection Tool (V) and double click on the Movie Clip. You will edit inside the movie clip

Step 7
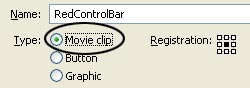
Select the Selection Tool (V) and select only the horizontal slider (created in step 3). Press F8 ( Convert to Symbol ) to convert it into a Movie Clip.
Step 8
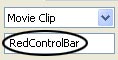
When the horizontal slider is still selected, go to the Properties Panel and enter RedControlBar in the box. See the picture below.
Step 9
Using the Selection Tool, select once the horizontal slider, open the Action Script Panel (F9) and enter the following code:
onClipEvent ( load ) {
top = _y ;
bottom = _y +224;
left = _x ;
right = _x ;
}
Step 10
Close the Action Panel (F9) and select the Selection Tool (V). Double click on the newly created Movie Clip (horizontal slider)

Step 11
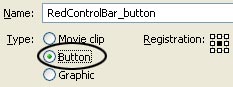
Press F8 again to move the horizontal slider to Button.
Step 12
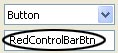
When the horizontal slider is still selected, go to the Properties Panel and enter RedControlBarBtn
Step 13
Take the Selection Tool (V) click once on the button (Button) you just created, go to the Action Script Panel (F9) and enter the following code:
on ( press ) {
startDrag ( this , false , left, top, right, bottom)
}
on ( release ) {
stopDrag ();
}
Step 14
Return to the main scene (Scene 1)

Step 15
Using the Text Tool (A), go to the Properties Panel and select the properties below:
- Choose Dynamic Text . You need to select this type of text because it can be changed via ActionScript.
- Select Arial font, bold type ( B )
- Choose font size 12
- Text color is black.
- The rendering option is Bitmap text (no anti-alias)

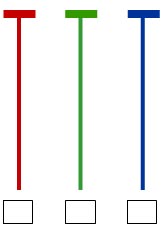
Then click and drag a text field below the slider. See the picture below.
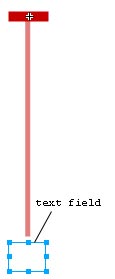
Step 16
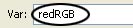
In the Properties Panel , in the Var section enter redRGB
So we have completed the first slider ( Red ). Repeat the steps above to create the Green and Blue colored bars according to the respective steps.
Step 17
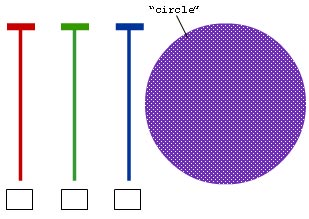
Using the Oval Tool (0), select no color for the Stroke color , and choose any color in the Fill color field and draw a circle with a size of 230 x 230px

Step 18
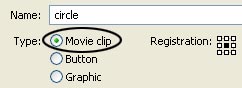
Select the drawn circle, press F8 key ( Convert to Symbol ) to convert it into a Movie Clip Symbol.
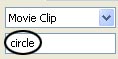
Step 19
While still selecting the newly created Movie Clip (circle), go to the Properties Panel and enter circle into the section
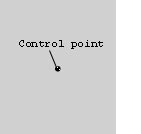
Step 20
Now create a control point: select the Oval Tool (O), choose the Stroke color without color, Fill color choose any color and draw a 5 x 5px circle.
Step 21
When the control point is still selected, press F8 key and convert it into a Movie Clip Symbol
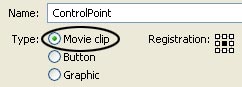
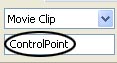
Step 22
Go to the Properties Panel of the control point, at the part and enter ControlPoint .
Step 23
Pick the Selection Tool (V), click on the control point, go to the Properties Panel again. On the right side you will see the Color menu section. Select Alpha and 0% .

Step 24
onClipEvent ( enterFrame ) {
_parent .redRGB = ( _parent .RedSlider.RedControlBar. _y +122) .toString (16);
if ( length ( _parent .redRGB) == 1)
_parent .redRGB = "0" + _parent .redRGB;
_parent .greenRGB = ( _parent .GreenSlider.GreenControlBar. _y +122) .toString (16);
if ( length ( _parent .greenRGB) == 1)
_parent .greenRGB = "0" + _parent .greenRGB;
_parent .blueRGB = ( _parent .BlueSlider.BlueControlBar. _y +122) .toString (16);
if (length ( _parent .blueRGB) == 1)
_parent .blueRGB = "0" + _parent .blueRGB;
finalColor = "0x" + _parent .redRGB + _parent .greenRGB + _parent .blueRGB;
_parent .circleColor. setRGB (finalColor);
_parent .circleColor. setRGB (finalColor);
}
Step 25
Create a new layer and name it action. Select the first frame, go to the Action Script Panel (F9), enter the following code:
circleColor = new Color (circle);
And finally test the product (Ctrl + Enter).
Was this article helpful?
Your feedback helps us improve.
Related Articles
 Macromedia Flash - Effects of lighting on photos3 minutes read
 Macromedia Flash - An attractive photo appearance effect4 minutes read
 Macromedia Flash - Falling text effect2 minutes read
 Macromedia Flash - Photo effects with sound6 minutes read
 Macromedia Flash - Complete Flash banner design3 minutes read
 Macromedia Flash: Create effects for nature photos3 minutes read
Reader Comments 0
Sign in with email or Google to join the discussion.