Table of Contents
This article examines Macromedia Flash and explains the main developments, practical implications, and context readers should understand.
Macromedia Flash Overview
Step 1 First you need to prepare an image to make the effect, you can save as to the following image if you do not already have the image on the machine.

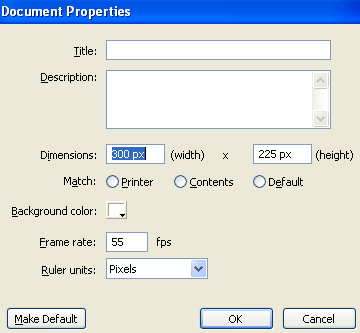
Step 2 Create a new flash file, press Ctrl + J (Document Properties) and set the width to 300 px and height to 225 px, with the background color white. Set Frame rate to 55 and click OK.
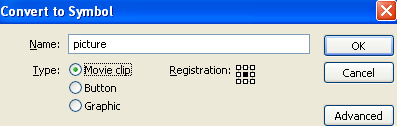
Step 3 Name the current layer as picture by double-clicking on the default name (Layer 1) and renaming. Press Enter after entering the new name. Step 4 Go to File > Import > Import to stage ( Ctrl + R ) and import into the image you prepared in step 1. Step 5 Select the imported image, press F8 (Convert to Symbol) to convert it into a Movie Clip Symbol.
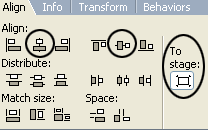
Step 6 Select the newly created Movie Clip ( picture ), go to the Align Panel ( Ctrl + K ) and select the following properties: - Click the To Stage button in the Align / Distribute section - Click on Align horizontal center - Click on Align vertical center
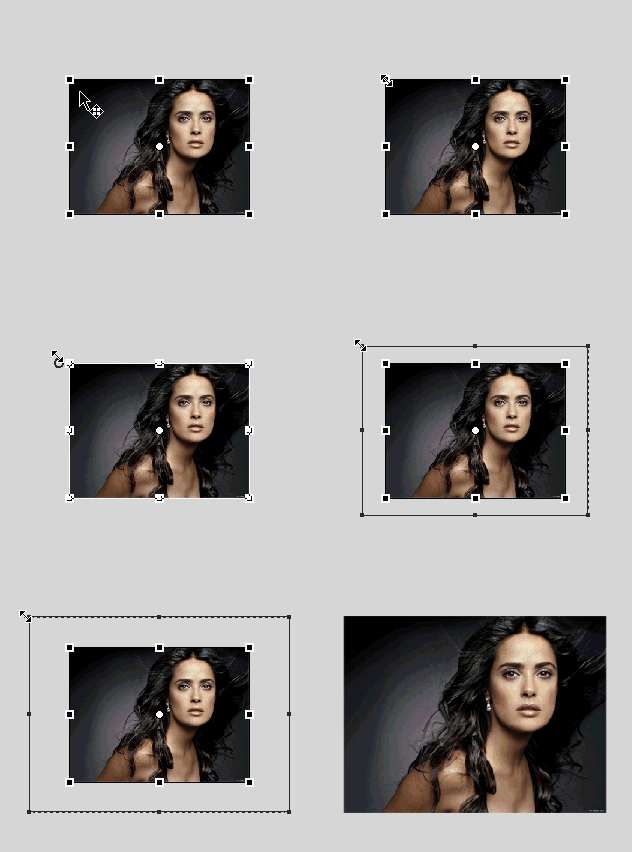
Step 7 Click on frame 15 and 70 and press F6 key on the keyboard respectively. While selecting frame 70, press F6 10 times. Then click on frame 100 and press F6 key. Step 8 While you're still on frame 100, take the Free Transform Tool (Q) and enlarge the image like this:
Step 9 After that, select the Selection Tool (V) and click once on the picture to select it. Go to the Properties Panel ( Ctrl + F3 ), on the right you will see the Color menu. Select Advanced in this menu and click the Settings button, then set the following color ratios:
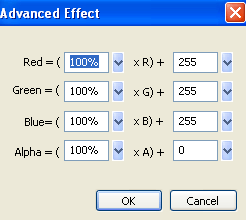
Step 10 Go back on frame 80 and go to the Properties Panel ( Ctrl + F3 ). At Tween choose Motion, for Ease set to 100 and Rotate choose CW.
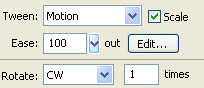
Step 11 Select frame 71 and press Delete key on the keyboard. Repeat this process for each frame 73,75,77 and 79. Step 12 Go back on the first frame and repeat step 8 Step 13 After that, select the Selection Tool (V) and click once on the picture to select it. Go to the Properties Panel ( Ctrl + F3 ), on the right you will see the Color menu. Select Advanced in this menu and click the Settings button, then set the following color ratios:
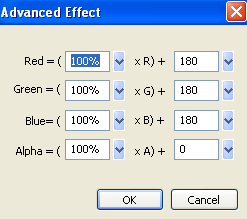
Step 14 Select the Filters tab on the left side of the Properties tab, click the plus icon ( + ) and select Blur. Then set the options as follows:
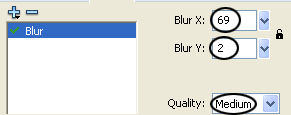
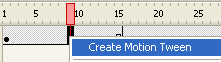
Step 15 Right-click anywhere on the gray area between the two keyframes on the timeline and choose Create Motion Tween from the menu that appears.
And finally, try running your product. Donwload the source file here.
FAQ
What is the main topic of Macromedia Flash - Animation and Rotation Effects?
This article examines Macromedia Flash and explains the main developments, practical implications, and context readers should understand.
Why is Macromedia Flash important?
Macromedia Flash Overview Step 1 First you need to prepare an image to make the effect, you can save as to the following image if you do not already have the image on the machine.
What should readers remember about Macromedia Flash?
Step 2 Create a new flash file, press Ctrl + J (Document Properties) and set the width to 300 px and height to 225 px, with the background color white.
Related Articles
 What Is Animation: Animation Animation Effects in CSS9 minutes read
 Macromedia Flash - an Attractive Photo Appearance Effect4 minutes read
 Macromedia Flash: Create Effects for Nature Photos4 minutes read
 Macromedia Flash - Photo Effects with Sound7 minutes read
 Macromedia Flash - Effects of Lighting on Photos4 minutes read
 Macromedia Flash - Create Menu Effects6 minutes read
Reader Comments 0
Sign in with email or Google to join the discussion.