Macromedia Flash - Text effect: light ball
With this tutorial you will learn how to create a light effect for your text, using the 'light ball' and Action Script in Flash 8.
With this tutorial you will learn how to create a light effect for your text, using the 'light ball' and Action Script in Flash 8.
Step 1 : Open a new Flash file with the size of 300 x 200px and the background color is black.

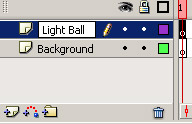
Step 2 : Double-click Layer1 to rename the Background layer. Then Insert a new layer named Light ball .
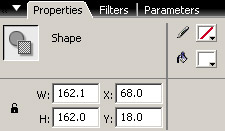
Step 3 : Select the Oval Tool (O) and select the following properties
- Stroke col or: must choose colorless mode
- Fill color : select white color
- Hold Shift and drag the background to the circle and resize the circle to 162x162px
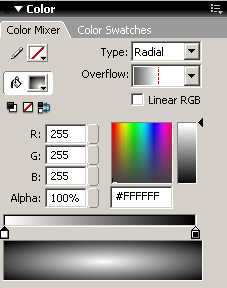
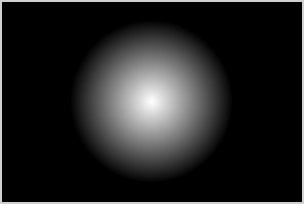
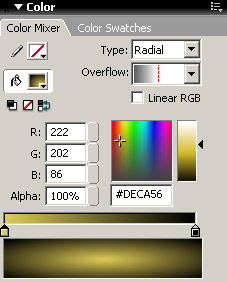
Step 4 : Click on the drawn circle, open the Color Mixer Panel (Shift + F9) and set the properties like the image below.
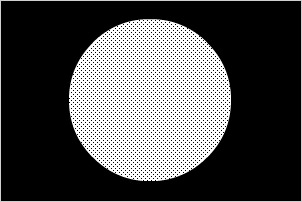
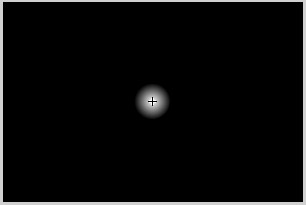
Your circle result will look like this:
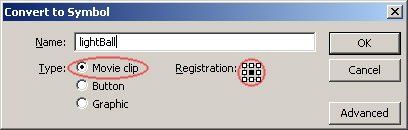
Step 5 : Select the Light ball layer again and press F8 key ( Convert to Symbol ) to convert it into a Movie Clip
- Type : Movie clip
- Registration : choose center
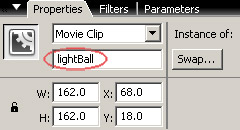
Step 6 : Open the Properties Panel (Ctrl + F3) and enter the newly converted Movie Clip into the section
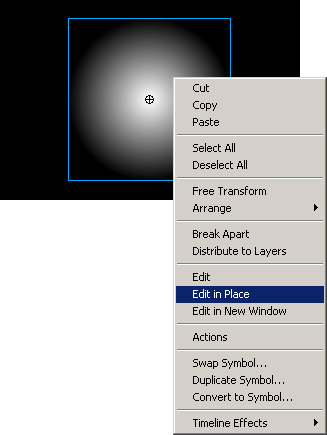
Step 7 : Double-click the newly created Movie Clip (lightBall) or right-click and choose Edit in Place
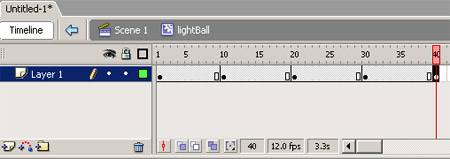
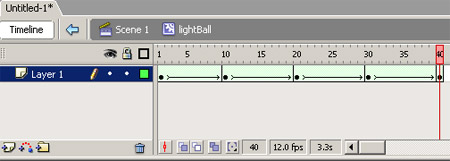
Step 8 : Click on frame 10, 20, 30 and 40 press F6 key on each frame (to create Keyframe).
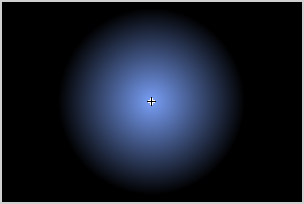
Step 9 : Go back on frame 10 and select the Free Transform Tool (Q) and drag your light ball. Then, open the Color Mixer Panel and set the options as shown below.
Step 10 : Select frame 20, go to the Free Transfrom Tool (Q) and drag the image a little bit further.
Step 11 : Select frame 30, select again the Free Transform Tool (Q) and increase the size of the circle a bit. Then open the Color Mixer Panel and set the color on the left slide to # 789EF5 (or the color you chose)
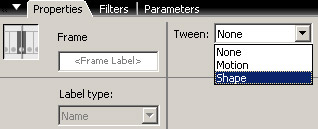
Step 12 : Select layer1 , in Properties (Ctrl + F3) under Tween choose Shape
Step 13 : Go back to the main scene (Scene 1) select the first frame of the shadow layer, open the Action Script Panel (F9) and paste it into the following script content:
startDrag ("lightBall", true);
_level0.drag = lightBall;
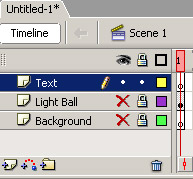
Step 14 : Add a new layer and name it Text
Step 15 : Lock and hide all layers except the Text layer. Select the Text layer and use the Text Toll tool (A) with white color and then enter the content as you like.

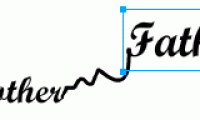
Step 16 : Copy the text you just entered and put it in a new layer, name this new layer Text1 . After that, change the text color of Text1 to color: # C4E8FD and use the arrow keys to move this layer slightly down and to the right (see image below)
Step 17 : Unhide and unlock all layers
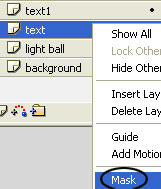
Step 18 : Select the Text layer and convert it to a Mask by right-clicking on the Text layer and selecting Mask .
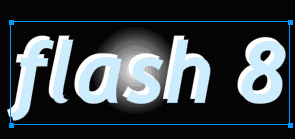
And so that's done, let's run your file. You can get the completed file here.
Was this article helpful?
Your feedback helps us improve.
Related Articles
 Macromedia Flash - Running text effect2 minutes read
 Macromedia Flash - Create banner text effect5 minutes read
 Macromedia Flash - Text display effect5 minutes read
 Macromedia Flash - Falling text effect2 minutes read
 Macromedia Flash - Product image advertising effects5 minutes read
 Macromedia Flash - Effects of lighting on photos3 minutes read
Reader Comments 0
Sign in with email or Google to join the discussion.