Macromedia Flash - An attractive photo appearance effect
This article will show you in detail how to create visual effects and disappearance using some special flash tips.
TipsMake.com - This article will show you in detail how to create an image appearance and disappearance effect using some special flash tips. You don't have to use action code to do this. To do this, you must use flash filters .
You can use this trick to create any flash banner . In addition to this article, you will also be able to learn how to import any image into a flash stage, how to do it. to convert it into movie notations, how to activate it, how to use the Free Transform tool and more.
Step 1
First save the picture below, we will use it for this lesson.

Step 2
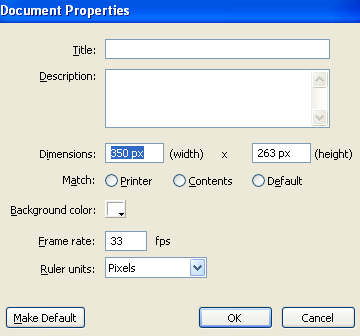
Create a new flash file. Press Ctrl + J on the keyboard ( Document Properties ) and set your text length to 350 pixels and your text height to 263 pixels . Choose white as the background color. Set your Flash movie 's frame rate to 33 and click OK

Step 3
Call the current layer photography . Double-click on its default name (Layer 1) to change the name. Press Enter when you have typed in a new name.
Step 4
Select File > Import > Import to stage ( Ctrl + R ) and import the image you just saved in step 1.
Step 5
While the image is still selected, press F8 ( Convert to Symbol ) to convert it into a Movie Clip.

Step 6
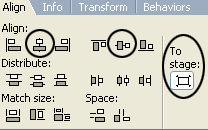
While the new Movie Clip ( photography_mc ) is still selected, go to the Align Panel ( Ctrl + K ) and follow these steps:
1. Make sure that the Align / Distribute in To Stage section is enabled.
2. Click the Align horizontal center button
3. Click the Align vertical center button.

Step 7
Now click on frame 30, 45, 55, 65 and 80 and press F6 .
Step 8
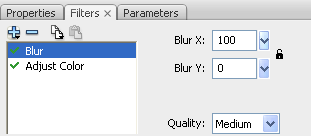
Now go back on frame 45, select the Selection Tool (V) and click on the photo. Then go to the Properties Panel ( Ctrl + F3 ) below, select Filters tab on the left part, and click on the 'plus' icon and select Blur . Make the following changes:

Then click the 'plus' icon again and select the Adjust Color Filter . Make the following changes:

Repeat the above steps for frame 55.
Step 9
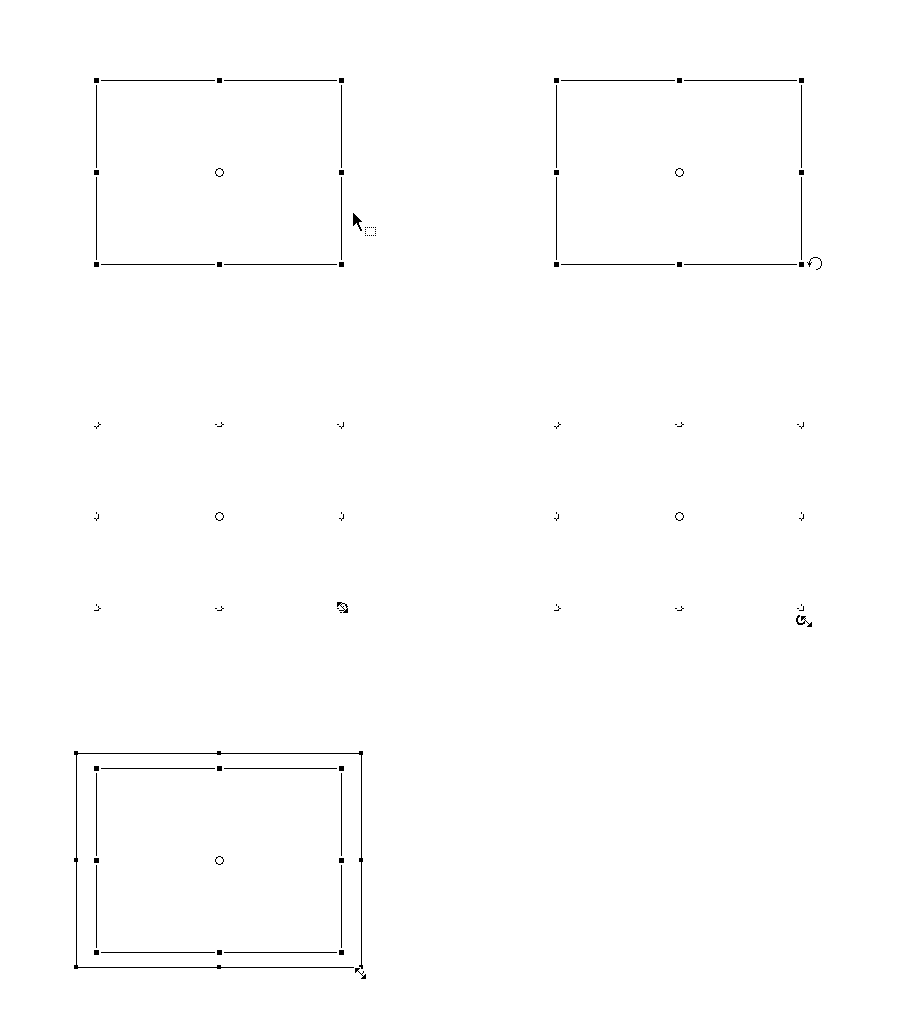
While you're still on frame 55, select the Free Transform Tool (Q) and enlarge the image like it is shown on the picture below

Step 10
Select the Selection Tool (V) again and click on frame 55. After that, go to the Properties Panel ( Ctrl + F3 ), for Tween choose Motion , for Ease set 100 , for Rotate choose CCW . As shown below:

Step 11
Right-click anywhere on the gray area between frame 30 and 45, between frame 55 and 65 on the timeline and choose Create Motion Tween from the menu that appears.

The work is complete, you can download the source file here .
Discover more
Macromedia FlashShare by
Kareem WintersYou should read it
- Macromedia Flash - Photo effects with sound
- Macromedia Flash - Effects of lighting on photos
- Macromedia Flash - Animation and rotation effects
- Macromedia Flash - Making fireworks effects
- Macromedia Flash - Vivid photo effects
- The Quiet Details That Make a Sports Betting Platform Feel Reliable
- Instructions on creating toy set images with ChatGPT AI
- How are AI agents changing the journalism industry?
- Solution for prototyping in 3D space
- Macromedia Flash - Vivid photo effects
- Photoshop - The 'white' tool for photos