Instructions for creating 2-layer security for GoDaddy accounts
In the following article, we will introduce you to the basic steps to enable 2-layer security (or 2 steps verification - authentication ) for GoDaddy accounts. See more articles:
- How to enable security for Dropbox

For new accounts created on GoDaddy, the company has the option to enable this 2-layer security feature, but for those who have not enabled 2 step authentication , follow the steps below:
- Log in to the GoDaddy admin account.
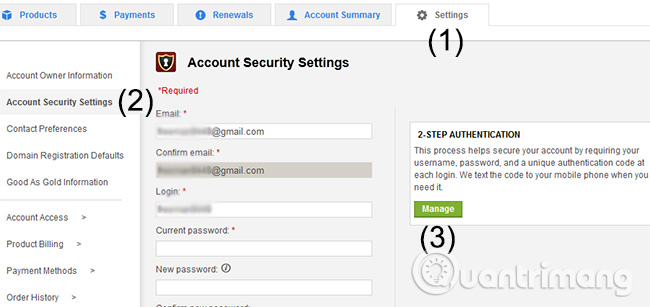
- Go to Settings> Account Security Settings > you will see a 2-step authentication section , click Manage :

- Click on Add Authentication:

- Enter your phone number, if in Vietnam, change the phone number to +84 as shown below.Then click Continue:

- GoDaddy will send a confirmation code via the registered phone number, in 6-digit form:

- If you want to remove this security layer, you should do the same, now will appear the Remove button instead of Continue as shown above
Good luck!
Share by
Samuel Daniel
Update 26 May 2019