Macromedia Flash - Effects of lighting on photos
In this article, we will step by step learn how to create a lighting effect on the photo with some special flash tips and Macromedia Flash filters.
In this article, we will step by step learn how to create a lighting effect on the photo with some special flash tips and Macromedia Flash filters . You don't need to use Action Script codes to do this. You can use this effect for some flash banners, effects . This lesson is easy to practice, let's start.
Step 1
First, save the image below for our lesson

Step 2
Create a new Flash document, press Ctrl + O (Open) and open the image you just saved in step 1.
Step 3
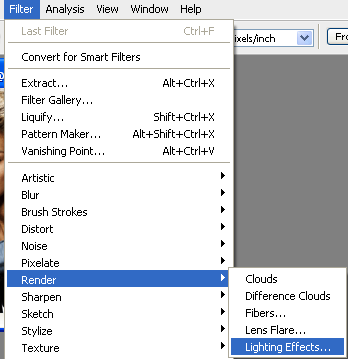
Now select Filter > Render > Lighting Effects .
Then, select the following option and click OK .
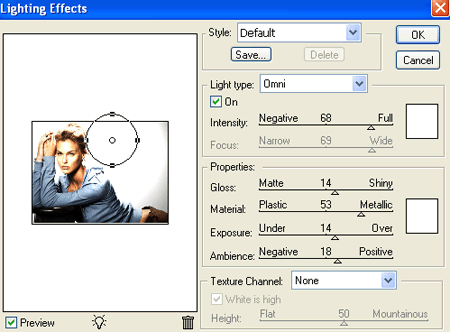
Now, you will see the following:

Step 4
Now in Photoshop in File > Save > Save as ( Shift + Ctrl + S ) and save this image as LightingPhoto .
Step 5
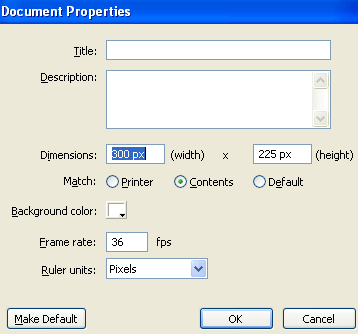
Create a new flash document. Press Ctrl + J key on the keyboard ( Document Properties ) and set your document width to 300 pixels and its height to 188 pixels. Choose white as the background color. Set the frame rate for your Flash movie to 36 and OK .
Step 6
Call the current layer lighting photo , Double-click on its default name (Layer 1), change the name and press Enter.
Step 7
Now select File > Import > Import to stage ( Ctrl + R ) and import lighting photo into the flash stage. While the image is still selected, press F8 key ( Convert to Symbol ) to convert it into a Movie Clip Symbol.

Step 8
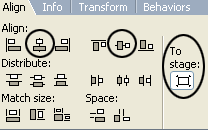
While the new Movie Clip is still selected, go to the Align Panel ( Ctrl + K ) and do the following:
1. Make sure the To Stage button in the Align / Distribute section is turned on.
2. Click the Align horizontal center button.
3. Click the Align vertical center button.
Step 9
Now click on frame 80 and press F6 key.
Step 10
Now go back to the first frame, select the Selection Tool ( V ) and select the image. After that, go to the Properties Panel ( Ctrl + F3 ) below the working interface. On the right you will see the Color menu. Select Advanced , click the Settings button and create some customizations as follows:
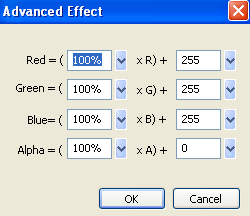
Step 11
While you're still on frame 1, select the Free Transform Tool ( Q ) and enlarge the image a bit like the image below
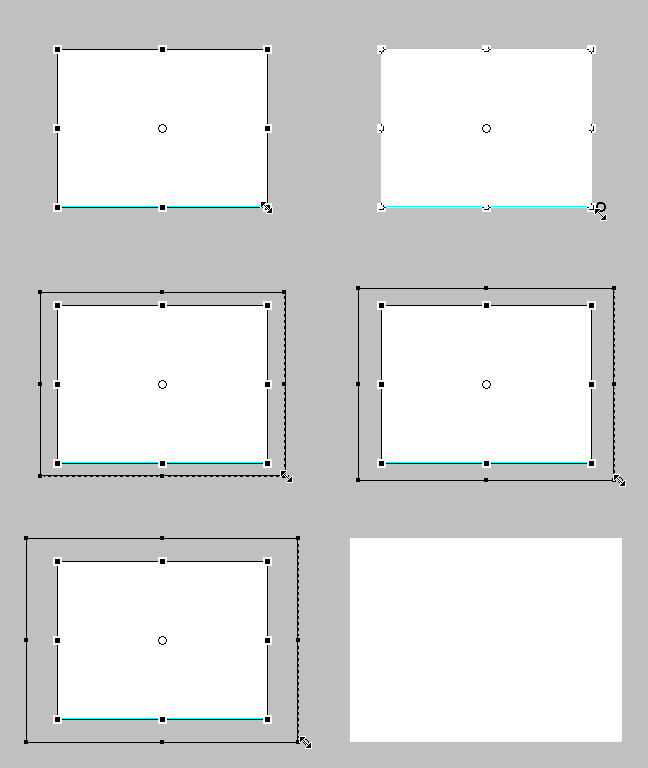
Step 12
Select the Selection Tool ( V ) and click on the first frame. After that, go to the Properties Panel ( Ctrl + F3 ) below the working interface and select the following option:
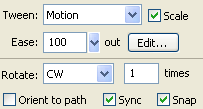
We are finished. Check the Movie ( Ctrl + Enter ) and you can download the original file here.
Discover more
Macromedia Flash dong bo anh lenShare by
David PacYou should read it
- Macromedia Flash - Falling text effect
- Macromedia Flash - Photo effects with sound
- Macromedia Flash - Complete Flash banner design
- Macromedia Flash: Create effects for nature photos
- Macromedia Flash - Animation and rotation effects
- The Quiet Details That Make a Sports Betting Platform Feel Reliable
- Instructions on creating toy set images with ChatGPT AI
- How are AI agents changing the journalism industry?
- Macromedia Flash - Text presentation in Flash
- 10 indispensable Office applications of Linux
- Macromedia Flash - Program flash download design