Instructions on how to set up Microsoft Word to create backups yourself
Creating a backup of documents in Word will help you get back to the original content of certain documents, in case the old version has problems. And it is possible to automatically create a Word backup..
One of the options to help you get back the contents of Word text files when that error is to create a backup. When the original text file has a problem, or a mistake is deleted, the user can rely on that backup to restore the previous content. And on the Word editing tool, users can set the automatic mode to create backups when clicking Save. In this article, we will show you how to set up Word to create a document backup.
This article is done in Word 2007, with another version of Word you do the same.
- Create a quick dot (……………) line in Microsoft Word
- How to open backup file in Word 2013?
- Instructions on how to create frames in Word 2007, 2010, 2013, 2016
Step 1:
At the Word interface, users click on the Microsoft Office icon in the top left corner of the interface.

Step 2:
Next, click on Word Options below.

Step 3:
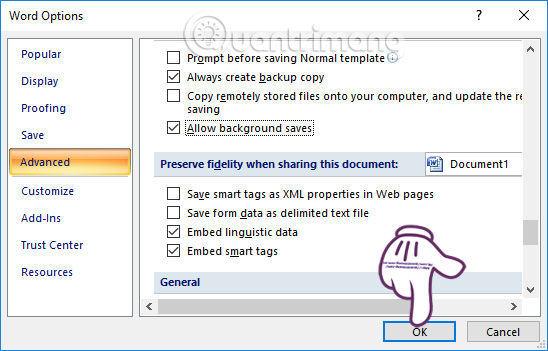
Switch to the Word Options interface, we click on the Advanced item in the menu list on the left of the interface.

Look at the content to the right of the user to the Save section and then select to Always create backup copy . Such a Word document will be backed up.

Step 4:
If your text file is small, the backup process will take place quickly. But text files with heavy and incremental content or if you save the document to an external storage device such as USB, the process of creating a backup of content on Word will take time to proceed.
If you do not want to lose time when backing up with heavy-capacity Word files, we can use the backup feature in the background document when clicking on Allow background saves option also in the Advanced interface on Word Options.

Finally click OK to save the changes and close the Word Options dialog box.
Step 5:
Before the backup is created, users need to save the open document file more than once. The backup will be in the same folder as the original text file as shown below. We can open and edit the contents of this backup file as well as regular files.
The backup file always starts with the word Backup of . with the tail format as .wbk.

Thus, you have enabled automatic backup protection on Word. The backup will contain the original file content with the content updated at the last time when clicking Save. For example, if the user presses to save the text twice, the contents of the backup file will be the content of the Word file at the first time click Save. However, to limit the risks, you need to familiarize yourself with the operation of clicking Save immediately after entering the content. Or adjust the auto-save time on Word in lesson How to change the auto-save time in Word 2013.
I wish you all success!