Table of Contents
This guide explains how to create a Frame in Word - Instructions on How to Create a Frame in, with clear steps, practical tips, and important checks before you begin.

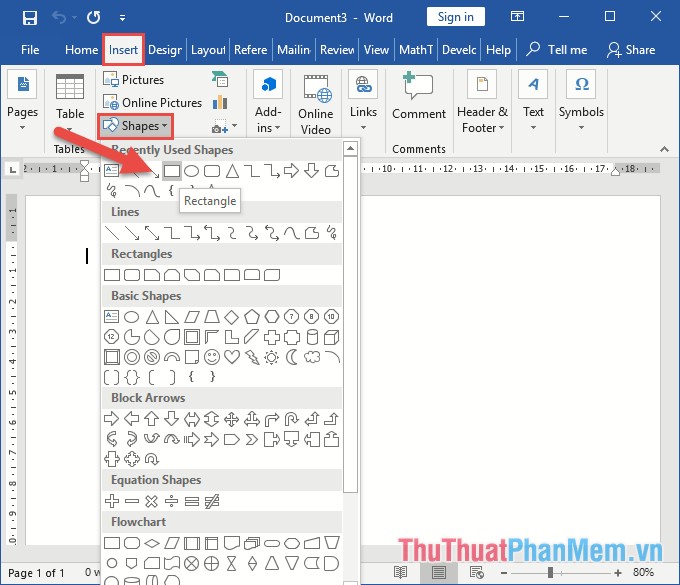
Step 1: Open the data file to create the frame -> go to the Insert tab -> Shapes -> click the Rectangle icon :
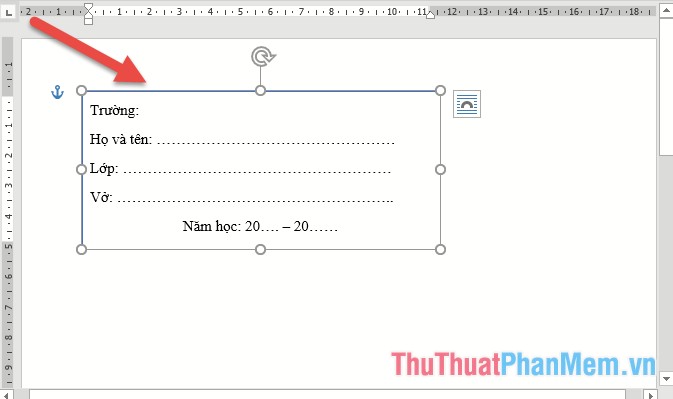
Step 2: Place the cursor in the position you want to draw the frame -> drag and drop the mouse diagonally to form the desired frame. Once you have created the frame, right-click Edit Text -> enter the content to be inserted -> the results are as desired:
Step 3: After the guys click on the Format tab, click the Shape Fill icon -> select the background color for the newly created frame:

Step 4: Click the Shape Outline icon to choose the border color and especially you choose the lightness for the newly created frame by selecting Weight -> selecting the border size to create the frame:

Step 5: Select effects for the newly created frame by clicking Shape Effects -> choose the type of effect to create:

Now that you have created the frame in Word, all you need to do is copy it and print. The example here has created notebook labels by framing:
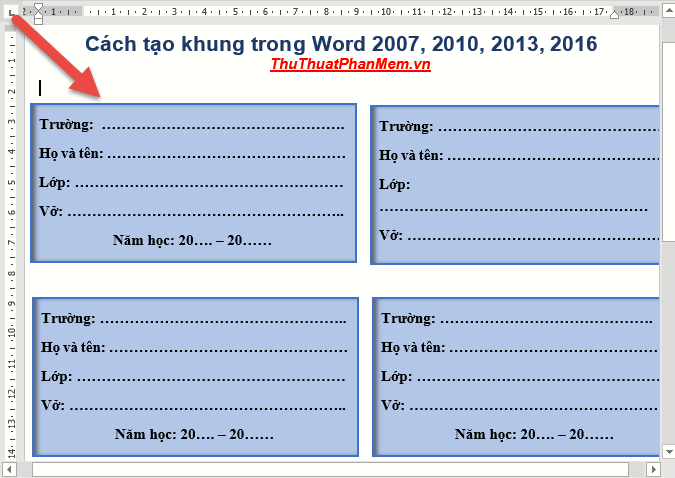
Above detailed how to create frames in Word. With this framework you can easily create invitations or simply notebook labels.
Good luck!
FAQ
What should I know about Create a Frame in Word - Instructions on How to Create a Frame in?
Focus on the key features, requirements, limitations, and practical use cases explained in this guide.
How do I get the best results with Create a Frame in Word - Instructions on How to Create a Frame in?
Follow the recommended steps, use current software or information, confirm compatibility, and review settings before major changes.
Are there any risks or limitations?
Potential limitations depend on compatibility, data quality, cost, privacy, support, and how the product or method is used.
Related Articles
 How to Show the Alignment Frame in Word: Step-by-Step Guide4 minutes read
 Instructions on How to Create Frames in Word 2007, 2010, 2013, 20165 minutes read
 Beautiful Border Frames on Word: Word Border Frame3 minutes read
 How to Draw a Frame in Word4 minutes read
 How to Frame Text in Word3 minutes read
 Instructions for Creating Cover Letters on Word: Create a Word Cover5 minutes read
Reader Comments 0
Sign in with email or Google to join the discussion.