Table of Contents
How to Use Screen Snip, a New Screen Capture Feature on Windows is easier to understand when the core ideas are paired with practical examples. The sections below explain the topic clearly, highlight useful steps, and point out details that can prevent common errors.
In Windows 10 Build 17661 (Windows 10 Redstone 5), Microsoft has included a number of new features including a combination of screen capture and editing without having to install any other support tools.
- Microsoft released Windows 10 (PC) Build 17661 for Insider Fast users
- How to take screenshots of Windows 10 using Windows Ink Workspace
- Ways to take screen shots of Windows 10
Instructions for taking screen shots of Windows 10
Step 1:
First of all, press Win + Shift + S key combination to use screen capture tool. Then the Screen Snip interface will appear so you can choose which partition to capture.

Here you will see 3 icons corresponding to 3 different tools and functions.
- Rectangular clip: Capture the screen by selecting a rectangular area.
- Freeform clip: Take a screenshot freely by dragging the mouse as you like.
- Fullscreen clip: Capture the entire screen.
Choose the type of screen capture you like.

Step 2:
We localize the screen you want to capture and release it to get a screen shot.

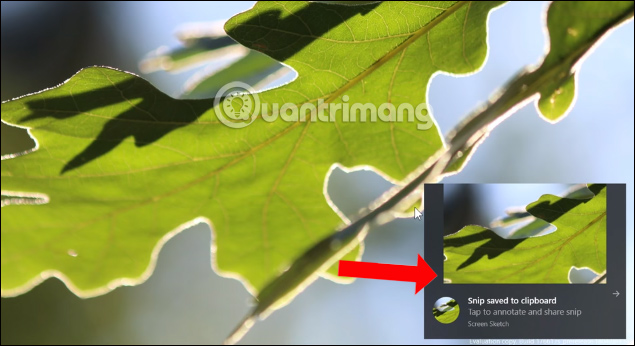
Immediately on the right side of the screen, a small window will appear under the Notification center corner, informing users of the captured and saved photos to the clipboard.
Step 3:
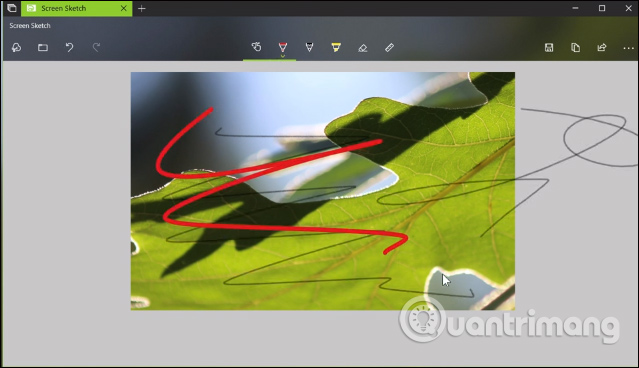
When clicking on this message, users will be taken to the image editing page using the Screen Sketch tool. Here we will have full tools to edit images, draw pictures, add content to the screenshot.
The tools used include:
- Touch writing: Free notes on computer screen shots.
- Ballpoint pen: Large pen.
- Pencil: Pen with small strokes.
- Highlighter: Pen writing notes.
- Eraser: Eraser.
- Ruler: Ruler.
- Crop: Crop the picture.
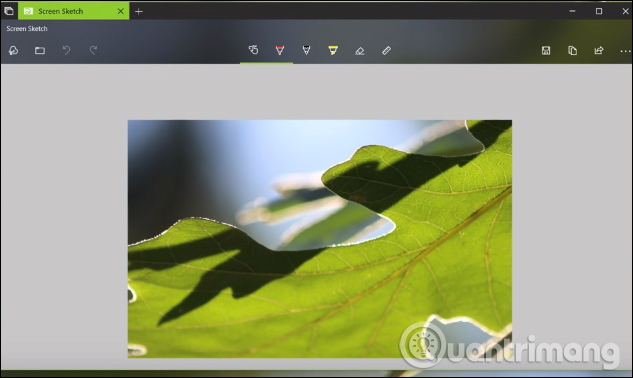
After the drawing is complete, click the Save icon in the right snapshot interface to save it.
Step 4:
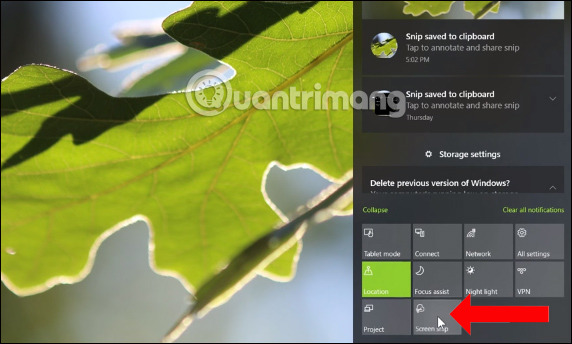
To quickly open Screen Snip tool, users can access the Notification Center and then click the Screen Snip icon to open the screen capture tool on the computer.
- Instructions for filming and taking game screen shots in Windows 10
- How to capture a Windows 10 screen area using Snipping Tool
- Capture Screenshot with Snipping Tool
I wish you all success!
FAQ
What is How to Use Screen Snip, a New Screen Capture Feature on Windows?
In Windows 10 Build 17661 (Windows 10 Redstone 5), Microsoft has included a number of new features including a combination of screen capture and editing without having to install any other support tools.
Why is How to Use Screen Snip, a New Screen Capture Feature on Windows important?
A clear understanding of How to Use Screen Snip, a New Screen Capture Feature on Windows helps you make informed decisions, avoid common mistakes, and use the relevant tools or techniques more effectively.
How should beginners approach How to Use Screen Snip, a New Screen Capture Feature on Windows?
Start with the fundamental concepts, follow the examples step by step, and test each change in a safe environment before applying it to important systems or data.
Related Articles
 How to Create Screen Snip Shortcut in Windows 104 minutes read
 How to Use Snip && Sketch on Windows 106 minutes read
 How to Add Screen Snip to Windows 10 Right-click Menu4 minutes read
 Click: How to Screenshot in Windows 1010 minutes read
 6 Ways to Take Screenshots of Windows 11 with Extremely Easy12 minutes read
 How to Take a Screenshot with the Snipping Tool on Microsoft9 minutes read
Reader Comments 0
Sign in with email or Google to join the discussion.