Table of Contents
How to Capture a Computer Screen with Snipaste is easier to understand when the core ideas are paired with practical examples. The sections below explain the topic clearly, highlight useful steps, and point out details that can prevent common errors.
There are many ways to take a screenshot and send it to someone by pressing the "prt sc" button available on the computer keyboard,. This will immediately copy the photo to the Clipboard. You can paste images into any photo editing or graphic editing tool by pressing Ctrl + V.
However, when you want to capture a specific part of the screen, you need another tool. Currently, there are many free and paid software but only Snipaste is the most suitable application. This is a free application that captures individual UI interface elements on the screen. This small utility can take screenshots from any part of a window.
- How to use Snipping Tool on Windows 10 full set
- How to take photos of computer screen fast, without using software
You can download Snipaste from the link below and install it. This utility will run in the system tray. You can review Snipaste's options by right-clicking on its icon in the system and clicking preferences.
Link to download Snipaste
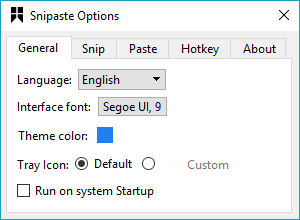
On the General tab, there will be 4 tabs showing the language, font, theme color and tray icon for the application.
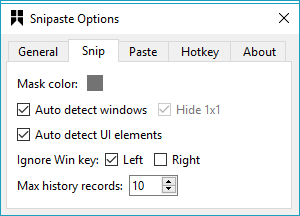
In the Snip tab , you can customize the screen capture mode similar to detecting windows and other UI interface components.
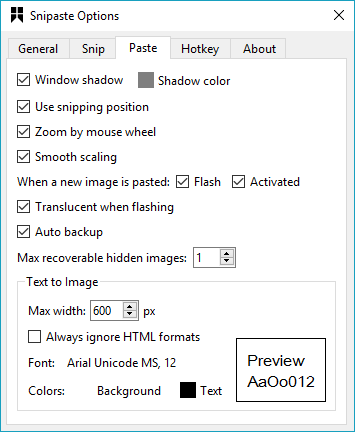
In the Paste tab , you can set windows shadow, zoom by scrolling, image size and automatically backup,.
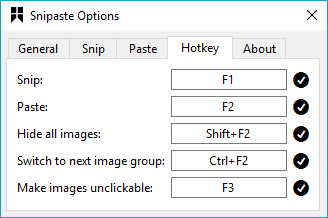
The Hotkey tab will allow you to set the necessary hotkeys. You can switch to the next UI component using the keyboard shortcut.
Screen capture with Snipaste
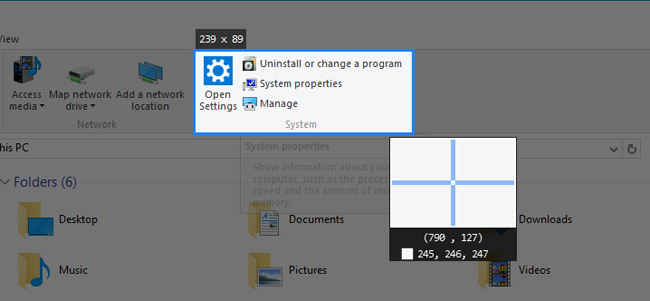
First, you need to run Snipaste and press F1. This will activate Snipaste. Move the mouse over any element of the window, it will highlight the single element or you can also select the area according to your needs by dragging the mouse.
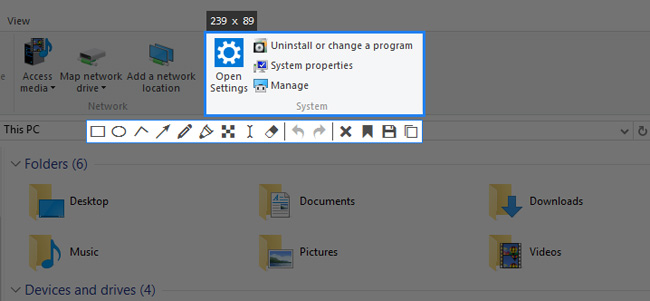
Once you have taken the shot, it gives you a number of options, where you can save, draw and paste into another window.
Very simple, isn't it? Now you can capture any part of the screen at will!
FAQ
What should you know about screen capture with Snipaste?
First, you need to run Snipaste and press F1. This will activate Snipaste. Move the mouse over any element of the window, it will highlight the single element or you can also select the area according to your needs by dragging the mouse.
What is How to Capture a Computer Screen with Snipaste?
There are many ways to take a screenshot and send it to someone by pressing the "prt sc" button available on the computer keyboard,.
Why is How to Capture a Computer Screen with Snipaste important?
A clear understanding of How to Capture a Computer Screen with Snipaste helps you make informed decisions, avoid common mistakes, and use the relevant tools or techniques more effectively.
Related Articles
 What Is Capture: What Is a Capture?3 minutes read
 7 Quick and Simple Ways to Take Screenshots of HP Laptops7 minutes read
 Screen Capture on Computer and Phone6 minutes read
 26 Useful Screen Capture Apps for macOS17 minutes read
 15 Useful Screen Capture Applications for Windows12 minutes read
 How to Fix the Error That You Cannot Take Pictures of the7 minutes read
Reader Comments 0
Sign in with email or Google to join the discussion.