How to capture a Windows 10 screen area using Snipping Tool
To be able to capture the computer screen, the fastest way is to use the PrtScn key. However, this shortcut will take a picture of the entire screen, while you just want to capture a single area on the computer screen, how to do it?
If we are using Windows 10 operating system, it is very simple, it is using the tool available Snipping Tool. Users just need to select the area on the screen and Snipping Tool will help you capture the right position. Let's see how to capture a screen area on Windows 10 with Snipping Tool together with Network Administrator.
Step 1:
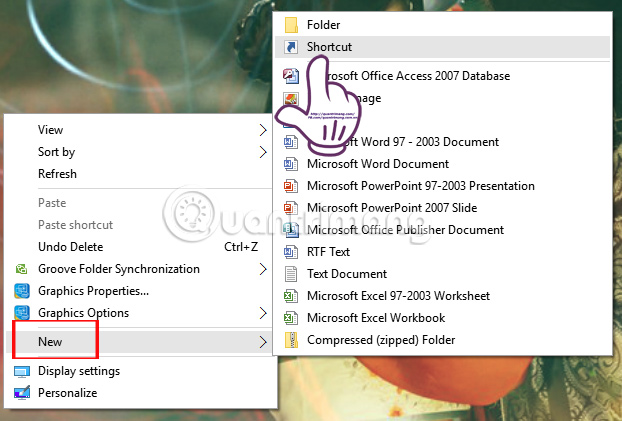
First of all, at the computer screen , right-click and select New , then select Shortcut .
Step 2:
Next, the Create Shortcut dialog box interface. Here the Type the location of the item section , enter the snippingtool / clip path and click Next .
Step 3:
Next in Type a name for this shortcut , we can enter a new name for this shortcut and click Finish .
Step 4:
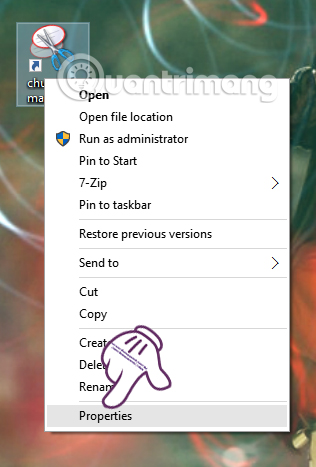
Go back to the screen, right-click the newly created Snipping Tool shortcut and select Properties .
Step 5:
New interface appears. At the shortcut tab, click the Shortcut key and enter a shortcut to launch the shortcut of Snipping Tool . By default the shortcut will include the Ctrl key, Alt key and another user-selected key.
Finally click Apply and OK to save.
Step 6:
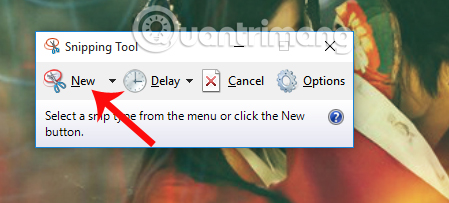
After that, go back to the screen of the computer and the shortcut will see the shortcut. Press the key combination set to open the shortcut of Snipping Tool. In the tool dialog, click on the New icon .
Soon the computer screen will be blurred. Snipping Tool provides users with 4 screen capture options, including full window capture, 1 screen capture, full screen capture or shooting option. Here we will capture a screen area so you just need to drag the mouse to create the area you want to cut on the computer screen and then release the hand. Immediately, the image taken in an area on the computer will appear at the editing interface of the Snipping Tool.
Our next job is to edit the screenshot with the Snipping Tool's available editing tools and then save it when you click the Save icon. Very simple right ?! You just need to localize the screen you want to capture as soon as the snapshot is taken with the Snipping Tool.
Refer to the following articles:
- Instructions for filming and taking game screen shots in Windows 10
- Ways to take screenshots on Windows 10
- How to take screen shots of iPhone 7, iPhone 7 Plus?
I wish you all success!
You should read it
- Instructions for enabling or disabling Snipping Tool in Windows 10
- Steps to Fix Snipping Tool Not Working Error On Windows
- Snipping Tool cannot be used, summarize effective ways to fix it
- How to create and use useful Snipping Tool shortcuts in Windows
- Snipping Tool on Windows 10 and 11 can store data that users have deleted?
- 5 Best Alternatives to Windows Snipping Tool
- How to use Snipping Tool to take screenshots on Windows 10
- How to use Text Actions in Snipping Tool on Windows 11
May be interested
- Snipping Tool finally supports GIF filesmicrosoft has just released a number of major updates to the built-in apps on windows 11.
- How to use Snipping Tool to take screenshots on Windows 10windows 10 users have many ways to take screenshots like paint, press prtscn key or alt + prtscn key combination if you want to capture a running window. however, today tipsmake.com will introduce more to you a screen capture tool
- Instructions for recording screen using Snipping Tool on Windows 11in the new version, snipping tool has been provided with a feature to record computer screen videos so you can easily save the activities you perform on the screen.
- 3 simple and effective ways to fix Snipping Tool not working errorsnipping tool is a utility integrated into the windows operating system. this tool allows users to capture, edit, and save screenshots directly to the computer. however, it does not always work stably.
- How to Take a Screenshot with the Snipping Tool on Microsoft Windowswindows' snipping tool allows users to capture a screenshot, or a snip, of the entire screen or a portion of the screen. the captured screenshot will appear in the tool's mark-up window. from the mark-up window, users may save the snip,...
- How to create GIF images from screen recording videos on Snipping Toolwindows 11 has updated the feature to create gif images from screen recording videos on snipping tool, to save the content you need to use in a new format.
- 5 Best Alternatives to Windows Snipping Toolthe windows sniping tool is very handy; however, you can do more than just take a screenshot thanks to the many alternative tools available.
- Why do people abandon Snipping Tool on Windows to switch to ShareX?while the windows snipping tool has been improved recently, it still leaves a lot to be desired. you won't realize its limitations until you try sharex.
- How to use Text Actions in Snipping Tool on Windows 11initially, windows 11 lacked native optical character recognition (ocr). the closest thing to ocr can be done using microsoft powertoys which provides the ability to copy text from images.
- Instructions for editing screen recording videos on Snipping Toolwindows 11 has integrated the clipchamp video editor on snipping tool so that users can edit videos as they want, without having to use other applications.