How to use Snip & Sketch on Windows 10
Starting with Windows 10 1809, Microsoft introduced a new application called Snip & Sketch to replace the popular Snipping Tool. This tool provides similar functionality and can be used for screen capture.
Table of Contents
Starting with Windows 10 1809, Microsoft introduced a new application called Snip & Sketch to replace the popular Snipping Tool. This tool provides the same functionality and can be used to take screenshots, use tools such as pens or pencils to draw on it and share anywhere you want. Today's tutorial will share how to use the Snip & Sketch application to capture and annotate screenshots in Windows 10.
Snip & Sketch application in Windows 10
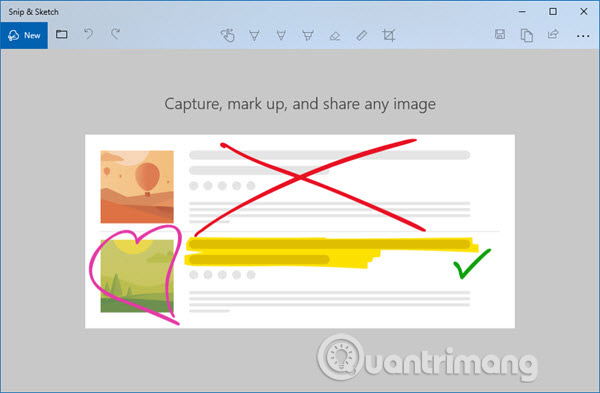
The application is available in the App list or you can search for Snip & Sketch in the Cortana search box. Click on the Snip & Sketch app when it appears. When you open this application, you will be greeted with a message: ' Capture, mark up, and share any image ' - "Capture, mark and share any image".
If your Windows 10 does not have this app, you can download it here.
Snip & Sketch screen capture
Click the New button at the top left.
This will minimize the interface, and provide you with a set of tools, where you can choose to use a rectangular clip, free-form clips or full-screen clips.

Choose any of these options and if you are using anything other than full-screen clips, you can select the area where you want to take a screenshot. Hold the left arrow key while doing this. Once done, release the left arrow key.
The area marked with the hour will appear in the canvas of Snip & Sketch application.
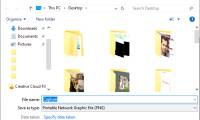
Images can be saved in .png format.
Edit Snip & Sketch screenshots
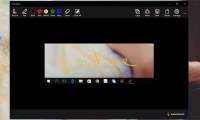
After taking a screenshot, you will have a set of Markup tools (markup tools) to use. Note that as soon as the editor opens, you will receive a PEN to write. However, if you move the mouse while the left arrow button is being pressed, it will start drawing.
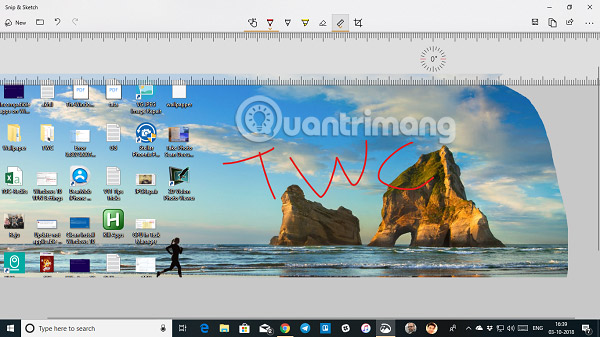
1. At the top, you have tools including Touch Writing , Ballpoint pen , Ballpoint pen , Highlighter , Ruler / Protractor (Ruler / Ruler) and Crop tool (Cutting tool).
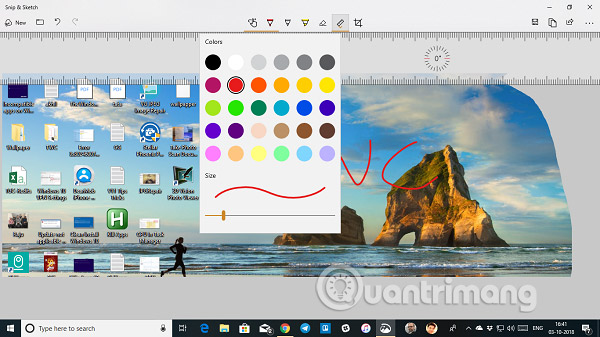
2. Click on the lower part of any of these tools, except Touch Writing and Crop Tool. You will have more options. Here, you can change the color and size of the pen. When you click on the Ruler tool , you can switch to Protractor.
3. At the top left, you have the option to save, copy and share screenshots.
4. You can also edit any other image by clicking on the folder icon next to the New button at the top left.
When you activate the ruler or protractor tool, they will not disappear unless you close and restart the application.
Launch Snip & Sketch application with Print Screen key
A tool like Snip & Sketch will be useless if you can't launch with a shortcut. Although the Print Screen key can keep screen shots in the clipboard or save it to OneDrive or Dropbox when configured, it makes more sense if you can launch this application with Print Screen.
Go to Settings> Ease of Access> Keyboard . Turn on the convert button in Print Screen shortcut with Use the PrtScn to open Snip & Sketch.

However, you will have to disable the configuration of Print Screen with any other application and restart the Windows 10 computer so that this button will take effect.
Good luck!
See more:
- How to use Screen Snip, a new screen capture feature on Windows 10
- How to use Snipping Tool on Windows 10 full set
- How to capture a Windows 10 screen area using Snipping Tool
Was this article helpful?
Your feedback helps us improve.
Related Articles
 Snip and Sketch tool Windows 10 has been updated to the new version with many noticeable changes2 minutes read
 How to take screenshots, annotate images with Snip & Sketch on Windows 107 minutes read
 How to create Screen Snip shortcut in Windows 103 minutes read
 How to Screenshot in Windows 1010 minutes read
 How to add Screen Snip to Windows 10 right-click menu3 minutes read
 How to Open Sketch Files3 minutes read
Reader Comments 0
Sign in with email or Google to join the discussion.