Table of Contents
This updated guide examines How to Take a Screenshot in Microsoft Windows and organizes the essential facts, background, and practical takeaways in clear American English.
Method 1of 7:
Taking a Full-Screen Screenshot on Windows 8 and 10
 Go to the screen that you want to screenshot. Before you can take a screenshot, you must make sure that the screen which you want to screenshot is up with no distractions (e.g., open windows or programs).
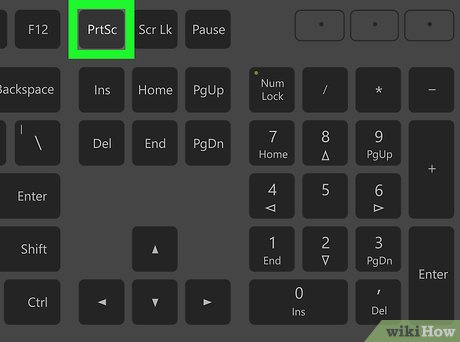 Find the "Print Screen" key on your keyboard. The⎙Print Screenkey is most often found in the upper-right side of the main keyboard (not counting the number pad if your keyboard has one), and it usually has "SysReq" ("System Requirements") written below it.
- The Print Screen key will usually be abbreviated to "PrtSc" or something similar.
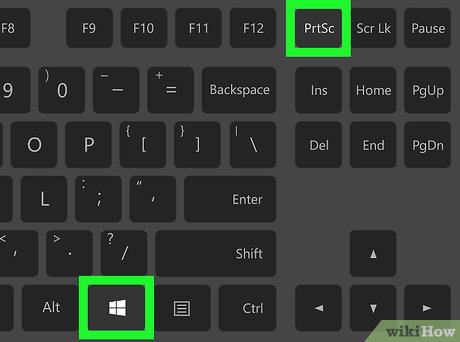 Press the⊞Winkey and the⎙Print Screenkey at the same time. Doing so will take a screenshot of the current screen; in most cases, you'll see the screen dim briefly.
- Your screen won't dim if your computer has certain display settings disabled. This is most common on old computers on which you upgraded to Windows 10.
- If your screenshot doesn't appear when you look for it, try pressingCtrl+⊞Win+⎙Print ScreenorFn+⊞Win+⎙Print Screen.
 Find the screenshot. You'll find the screenshot inside of the "Screenshots" folder, which is inside of your computer's "Pictures" folder. Each screenshot that you take will be labeled "Screenshot (number)" to correspond with the order in which the screenshot was taken.
- For example, the first screenshot you take will be labeled "Screenshot (1)", etc.
Method 2of 7:
Taking a Full-Screen Screenshot on Any Windows Computer
 Go to the screen that you want to screenshot. Before you can take a screenshot, you must make sure that the screen which you want to screenshot is up with no distractions (e.g., open windows or programs).
 Press the⎙Print Screenkey. It's typically found in the upper-right side of the keyboard, just right of the row of "Function" keys (e.g., F12 ) at the top of the keyboard. Pressing the Print Screen key will take a picture of the entire screen's contents.
- The Print Screen key may be entitled "PrtSc" or something similar.
- If your computer has anFnkey in the lower-left side of the keyboard, you might need to pressFnand⎙Print Screenat the same time.
 Open Paint. This program comes installed on all Windows computers. To open it:
- Open Start

- On Windows 8, open Search
- Click the search bar at the bottom of the Start menu.
- Type inpaint
- Click Paint at the top of the Start window.
- On Windows 8, Paint will be in the Search results.
- For a Windows XP computer, click Start , select Programs , select Accessories , and click Paint .
- Open Start
 Paste in the screenshot. Once the Paint window opens, pressCtrl+Vto paste in the screenshot. You should see the screenshot appear in the Paint window.
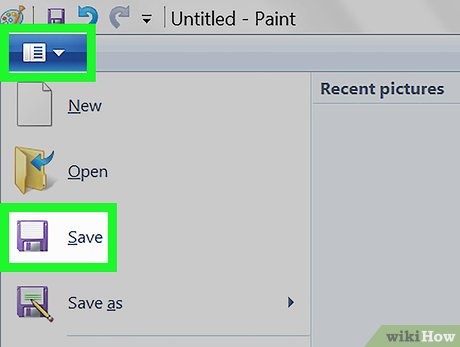 Save the screenshot. PressCtrl+S, then enter a name for your screenshot, select a save folder on the left side of the window, and click Save .
- You can change the screenshot's file type by clicking the "Save as type" drop-down box at the bottom of the window and then clicking a different format (e.g., JPEG ) in the drop-down menu.
- The most common file types are JPG and PNG. The recommended format for screenshots is PNG, due to the high quality and small file size.
Method 3of 7:
Taking a One-Window Screenshot
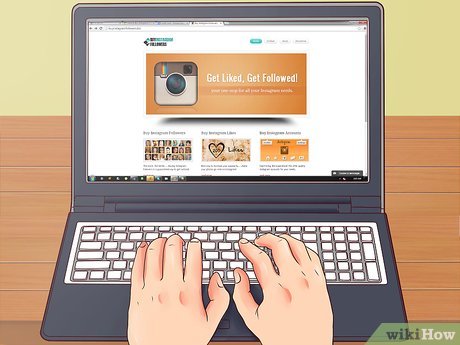 Click the window that you want to capture an image of. The One-Window screenshot function will take a picture of the "active" window on your screen, which means that it should be in front of all your other windows.
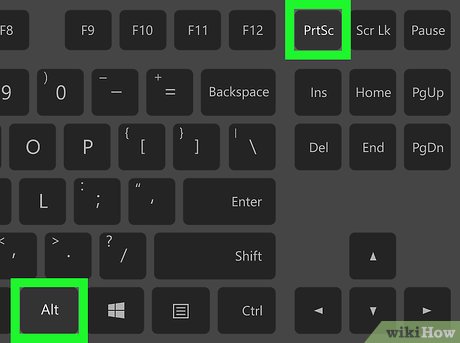 Hold downAltand press⎙PrtScr. An image of the window will be copied to the clipboard. The dimensions of the image will be determined by the size of the window when the screenshot is captured.[1]
- You will not receive any confirmation that the screenshot has been taken.
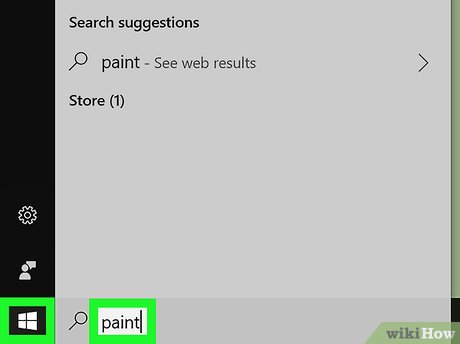 Open Paint. This program comes installed on all Windows computers. To open it:
- Open Start

- On Windows 8, open Search
- Click the search bar at the bottom of the Start menu.
- Type inpaint
- Click Paint at the top of the Start window.
- On Windows 8, Paint will be in the Search results.
- For a Windows XP computer, click Start , select Programs , select Accessories , and click Paint .
- Open Start
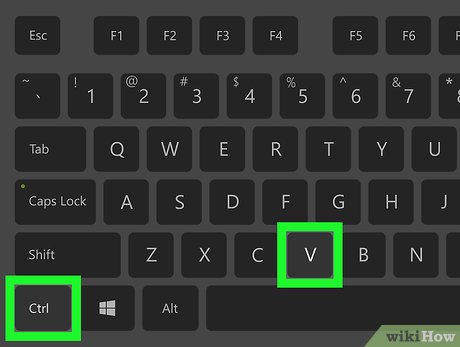 Paste in the screenshot. Once the Paint window loads, pressCtrl+Vto paste in the screenshot. You should see it appear in the Paint window.
- You can also paste the screenshot into other programs, such as Word or into the body of an email. Simply open the program that you want to paste the image into and pressCtrl+V.
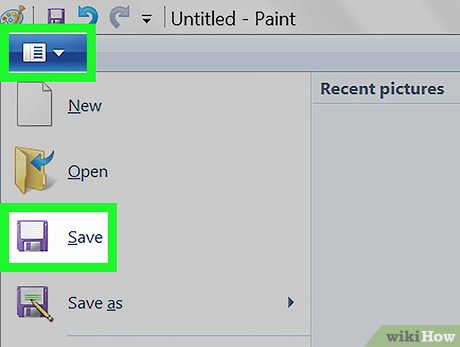 Save your screenshot as an image file. Click File , click Save , enter a file name, click a location on the left side of the page, and click Save .
- You can change the screenshot's file type by clicking the "Save as type" drop-down box at the bottom of the window and then clicking a different format (e.g., JPEG ) in the drop-down menu.
- The most common file types are JPG and PNG. The recommended format for screenshots is PNG, due to the high quality and small file size.
Method 4of 7:
Using the Snipping Tool Program
 Open the Snipping Tool. The Snipping Tool is available in all versions of Windows Vista, 7, 8 and 10 except the Starter and Basic editions. It is not available in Windows XP.[2]
- In Windows Vista and 7, click the Start button, select All Programs , select Accessories , and select the Snipping Tool from the list.
- In Windows 8, simply start typingsnipping toolwhile on the Start screen and select it from the Search results.
- In Windows 10, click Start
 , type insnipping tool, and select Snipping Tool from the Search results.
 Choose the shape of the Snip. "Rectangular Snip" is chosen by default. Click the Arrow button next to the Mode button to change the Snip shape:.
- Free-form Snip lets you draw any shape with your mouse. The area inside the shape will be snipped.
- Rectangular Snip lets you select a rectangular area, which will be snipped.
- Window Snip lets you choose a window to snip.
- Full-screen Snip snips the whole screen, with all windows (except the Snipping Tool window) included.
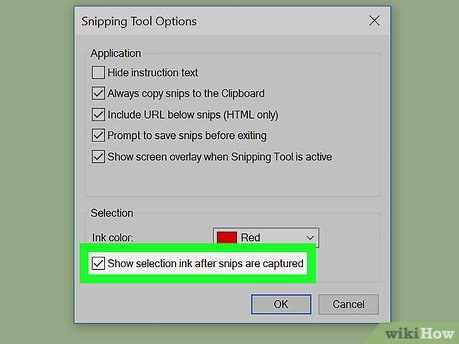 Adjust the Snip border. By default, any snip you make will have a red border around it. You can disable or change this by clicking the Tools tab in the top-left side of the Snipping Tool toolbar, selecting Options from the drop-down menu, and unchecking the box next to 'Show selection ink after snips are captured'. This will remove the border from any future snips.
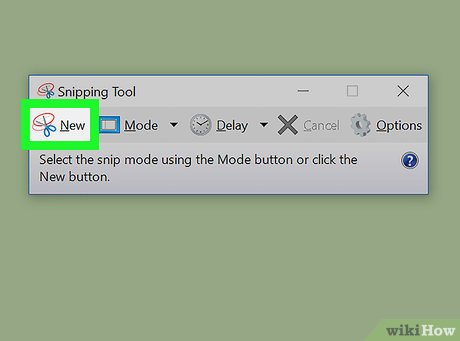 Create a new Snip. Click the New button to start the selection. The screen will fade, and you can draw your Snip area, or select the window if you chose Window Snip. Release the mouse when selecting to create the Snip.
- If you had Full-screen Snip selected, your Snip will automatically be created once you click New .
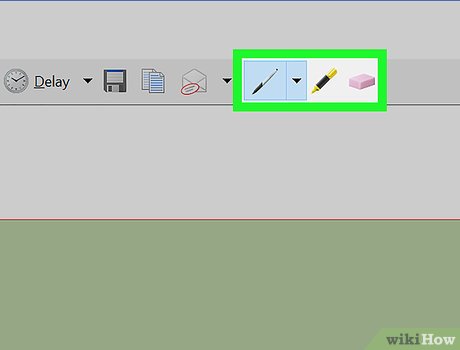 Annotate the Snip. Once you create the Snip, it will open in a new window. You can use the Pen tool to draw on it and make notes, and use the Highlight tool to draw attention to text.
- The Erase tool will only erase annotations, not the screenshot itself.
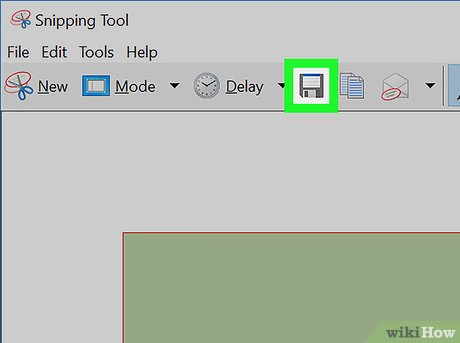 Save the Snip. Click the floppy disk icon to open the save dialog. Type in a name for the screenshot and change the "Save as type:" field if desired. You can now send the screenshot by email or put it on a website.
- PNG is the default format in Windows 7 and 8. It's a lossless compressed format, which means that it will take high-quality screenshots at a small file size. It is the recommended format for taking screenshots.
- JPG or JPEG is the default format in Windows Vista. It is a lossy format, meaning that the screenshot will look slightly blocky and some colors may be a bit off. It's mainly designed for photographs, and not recommended for screenshots.
- GIF is unsuitable for reproducing color photographs, but well-suited for images such as graphics or logos with solid areas of color, resulting in crystal sharp edges between color areas.
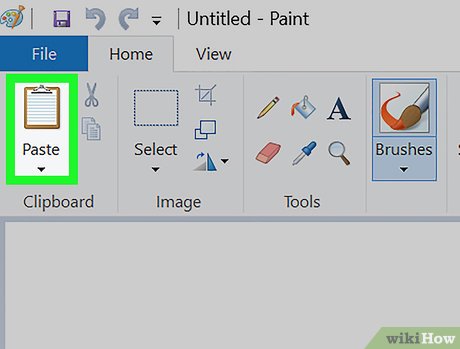 Copy the Snip. By default, the Snip is copied to the clipboard when you create it. This means you can paste it into Paint or Word, much like you would with a full-screen screenshot. In Paint, you can make more edits than you can in the Snip annotation editor.
- To paste the Snip, open a window that supports pasting and pressCtrl+V.
Method 5of 7:
Using the Snipping Tool Shortcut
 Go to the page that you want to screenshot. Open the program or screen that you want to take a picture of, making sure that any windows or items that you don't want on-screen are out of the way.
 Press⊞Win+⇧Shift+S. Doing so will cause your screen to turn light-grey, and your mouse will turn into a crosshairs icon.
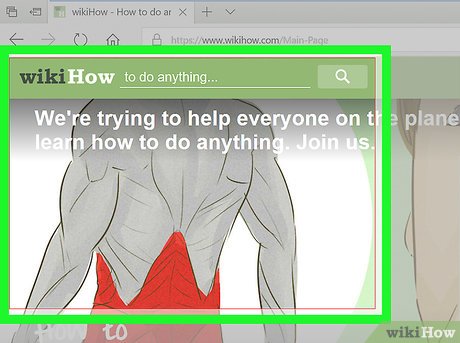 Select an area to screenshot. Click and drag your mouse from the top-left corner of the area that you want to screenshot to the bottom-right corner.
- For example, if you want to screenshot the entire screen, you'd click and drag your mouse from the top-left corner of the screen to the bottom-right corner of the screen.
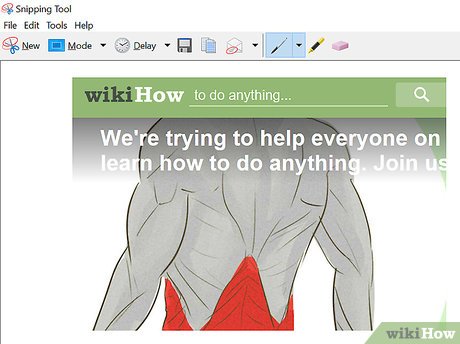 Release the mouse button. This will both take a screenshot of your selected area and save it to your clipboard, from which point it can be pasted into any program that accepts pasted photos.
 Paste your screenshot. Open any program which supports pasting in photos (e.g., Paint, Word, etc.) and pressCtrl+V. You should see the section of the screen that you selected appear in your program.
- You can save your screenshot's document by pressingCtrl+S, entering a name, selecting a save location, and clicking Save .
- Photos can also be pasted into some online services, such as emails.
Method 6of 7:
Screenshotting Several Windows in a Row
 Understand how this works. A program called "PSR.exe" that's built into virtually all Windows computers allows you to record as many as 100 different screens and save them all to one document. This program also makes a note of where you click and which actions you perform on each screen.
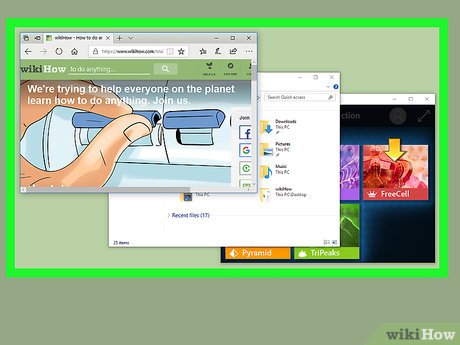 Go to the initial page that you want to screenshot. This should be the first page in the sequence of pages that you want to screenshot.
 Open Start
 . Click the Windows logo in the bottom-left corner of the screen. The Start menu will pop up.
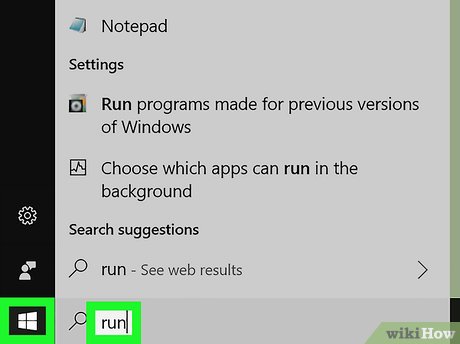 Open the Run program. Type inrunand then click Run at the top of the Start window.
 Enter the command to open PSR. Typepsr.exeinto the Run window.
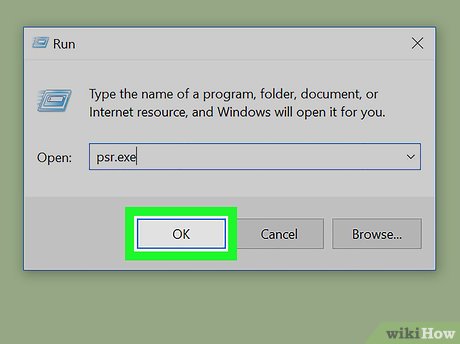 ClickOK. It's at the bottom of the Run window. This will bring up a small, rectangular toolbar at the top of the screen.
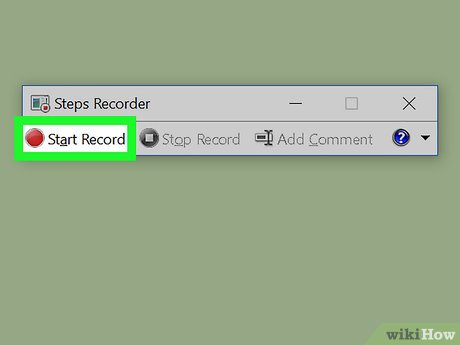 ClickStart Record. This is at the top of the toolbar. Doing so turns on the Steps Recorder, which will record the next 25 screen changes.
- If you want to record more than 25 changes, first click
 on the right side of the toolbar, click Settings... , and change the "Number of recent screen captures to store" number.
- If you want to record more than 25 changes, first click
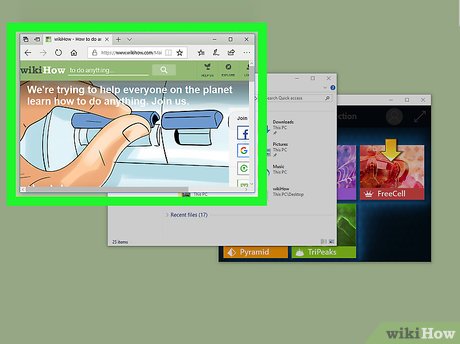 Click through your different screens. Each time your screen changes (other than simply moving your mouse), the Steps Recorder will take a screenshot.
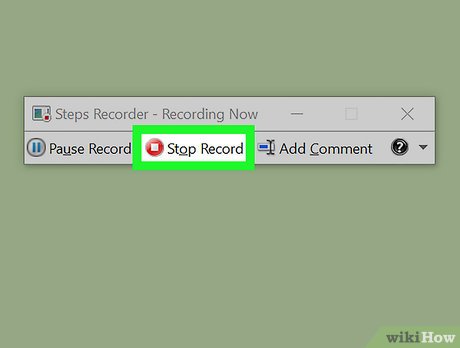 ClickStop Record. It's at the top of the toolbar. Doing so stops recording screen changes and opens the results window.
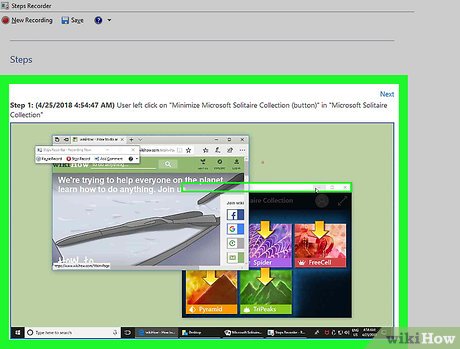 Review your screenshots. Scroll down through the window to make sure that you captured all of the screenshots that you wanted to save.
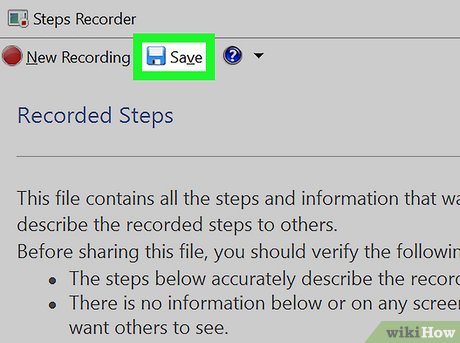 Save your screenshots to a ZIP folder. Click Save at the top of the window, enter a file name and select a save location, and click Save .
- This will save the screenshots in one HTML file. You can open the HTML file in your computer's Internet Explorer browser to view its contents.
Method 7of 7:
Using Windows Tablets
 Open the screen you want to screenshot. Before you can take a screenshot, you must make sure that the screen which you want to screenshot is up with no distractions (e.g., open windows or programs).
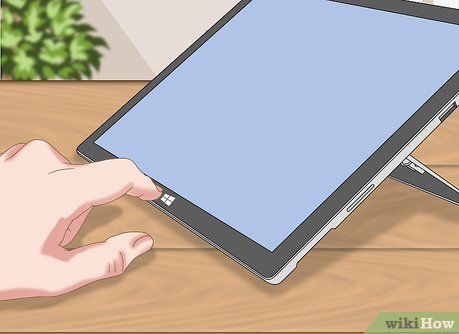 Press and hold the Windows logo. This is the logo on the bezel of the tablet, not the Windows button on your desktop.
- If there is no Windows button on the tablet, then press the Power button.
 Press the Volume Down button (or Volume Up if using the Power button). The screen will dim momentarily to indicate a screenshot was taken.
- Your screenshot will be stored in the Screenshots folder, which you can access by Opening File Explorer and navigating to Pictures → Screenshots.
FAQ
What is How to Take a Screenshot in Microsoft Windows about?
It provides a structured overview of screenshot, explains the main context, and highlights practical takeaways for readers.
Why does this topic matter?
Understanding the main concepts helps readers evaluate the issue, avoid common mistakes, and make better-informed decisions.
How should readers use this information?
Use the guidance as a practical starting point, confirm details that may have changed, and follow current product, safety, or security recommendations.
Related Articles
 How to Take a Screenshot on Windows 118 minutes read
 The Fastest Ways to Take Screenshots on a Computer or Laptop9 minutes read
 Instructions for Using the Screenshot Tool in Microsoft Word 20133 minutes read
 The Simplest Way to Take a Screenshot on Windows 11 Using Keyboard Shortcuts9 minutes read
 How to Take Screenshot on HP Windows 10 Computer7 minutes read
 How to Take a Screenshot Using Firefox and Windows9 minutes read
Reader Comments 0
Sign in with email or Google to join the discussion.