
How to use Disk Quota to limit Windows storage capacity
Disk Quota is a great way to control storage space on your computer, ensuring that users cannot use more storage space than is allocated.
Disk Quota is a great way to control the storage space on your computer, ensuring that users cannot use more storage space than is allocated. When you exceed the allocated storage space, you will see a warning and even prevent you from storing files. Here is a guide on how to use Disk Quota on Windows.
How to limit storage space on Windows using Disk Quota
Step 1:
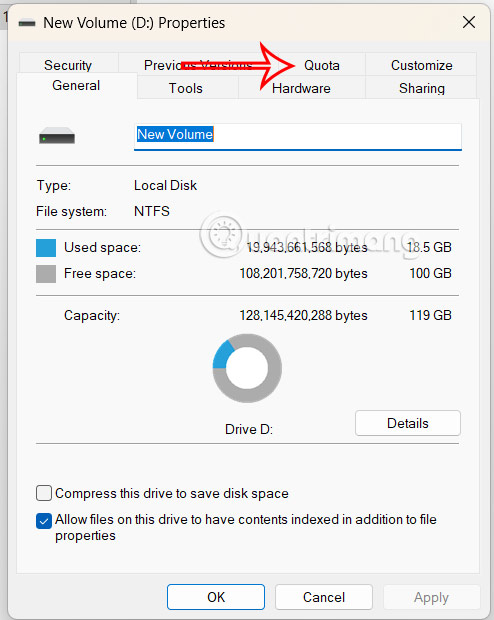
Open File Explorer, right-click the drive you want to limit and select Properties . Then, click the Quota tab to adjust.
Step 2:
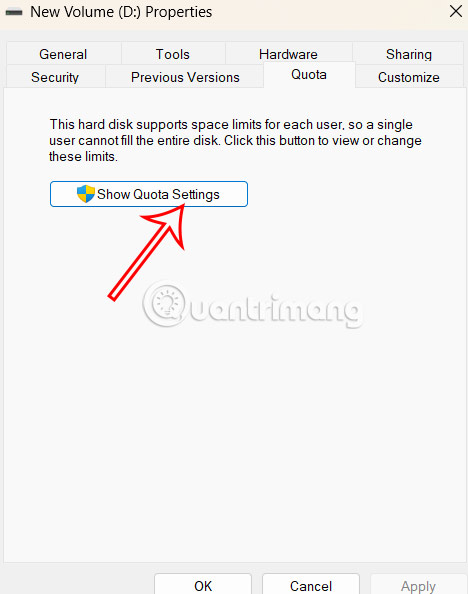
Click Show quota settings below.
Switch to the interface as shown, first you need to select Enable quota management to enable storage capacity limit. Below click Limit disk space to .
Enter the capacity limit you want to set for all users of that drive.
Step 3:
At Set warning level to , we set the warning level you want Windows to notify when the storage limit is about to be reached. If you want to prevent users from storing more files when they exceed their quota, select Deny disk space to users exceeding quota limit.
How to set storage limits for each user
Step 1:
We also need to select Enable quota management and then click Quota Entries .
Step 2:
To display the new interface, click on Quota and select New Quota Entry in the displayed list.
In the interface displayed at Enter the object names to select, enter the name of the user account you want to set the storage limit for and then click Check Names below.
Step 3:
Click Limit disk space to and set the storage limit for this account . Under Set warning level to, also enter the warning level when the limit is approaching.
Repeat these steps for all user accounts you want to limit.
Storage Usage Monitoring Guide
You click on Quota Entries and see a list of different user accounts along with their usage. Right-click on the account and select Properties .
Here you can directly change the amount of storage allocated to an account.
How to turn off storage limit
Step 1:
In the Quota Settings for interface, uncheck Enable quota management . To turn off the capacity limit for each account, click the Quota Entries button .
Step 2:
Right- click on the account you want to disable and select Properties .
Step 3:
Then you check Do not limit disk usage to turn off the storage limit for that account.
You should read it
- Disk Quotas configuration in Windows 2003
- The Fsutil quota command in Windows
- 4 best disk capacity analysis tools on Windows 10
- What is a disk signature? Fix disk signature conflict error
- Fix 100% Full Disk error on Windows with the following 14 tips
- Disk Management access in Windows 7 and Windows 8
- How much disk space does Windows 10 take?
- What is RAM Disk? How does it work?
- Rescue the system with these 5 bootable Windows PE recovery disks
- How to disable the 'Low Disk Space' warning in Windows 10/8/7
- How to enable / disable Disk Write Caching in Windows 10
- How to fix Windows cannot be installed to this disk. The selected disk has an mbr partition table
Maybe you are interested
Microsoft Copilot has a Copilot button and here's how to use it Discovered a potential glacier near the surface of Mars, suitable as a base for future astronauts Huawei recruited Nvidia employees, preparing to play with the company in GPU production? Laptops with 'super terrible' prices Download the original Nokia 8 Sirocco wallpapers How to access Linux server from Android