How to enable / disable Disk Write Caching in Windows 10
Disk Write Caching is a feature that improves system performance, using RAM memory to collect write commands sent to the data storage device, then cached until the device. Slower archives can be written to..
This makes applications run faster by allowing them to continue without waiting for write requests to be written to the drive.
This guide will show you how to enable or disable Disk Write Caching on a storage device for better performance or quick erase in Windows 10.
Note : You must be logged in as admin to be able to enable or disable Disk Write Caching.
How to enable / disable Disk Write Caching in Windows 10
Step 1 . Open Device Manager (devmgmt.msc).
Step 2 . Expand Disk drives and double-click the drive for which you want to enable or disable Disk Write Caching.

Step 3 . Do step 4 (to turn on) or step 5 (to turn off) below, depending on what you want to do.
Step 4 . To enable Disk Write Caching on the device:
A) Click the Policies tab and choose Better performance.
B) Check the box to Enable write caching on the device under Write-caching policy.
C) Select or uncheck the option Turn off Windows write-cache buffer flushing on the device under Write-caching policy.
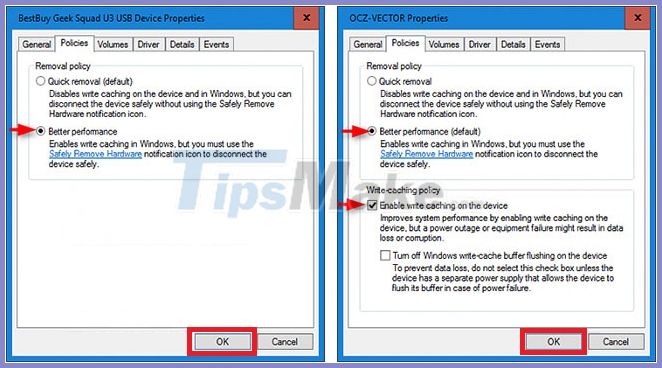 Enable Disk Write Caching on the device
Note : To avoid data loss, do not select Turn off Windows write-cache buffer flushing on the device unless the device (the drive) has its own power supply (e.g. UPS) that allows the device to flush buffer (transfer data). computer from the computer's temporary storage area to the computer's permanent memory) in the event of a power failure.
D) Click OK and go to step 6 below.
Step 5 . To disable Disk Write Caching on the device, click the Policies tab , choose Quick removal, click OK, and go to step 6 below.
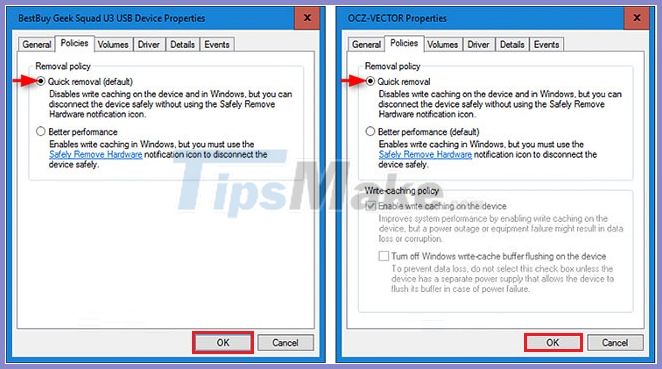 Disable Disk Write Caching on the device
Step 6 . If prompted to restart your computer to apply the changes, click Yes or No , depending on what you want to do.
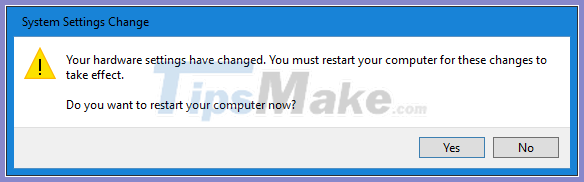 Click Yes or No
Yes = Reboot the computer immediately. Remember to save and close everything first.
No = Allows you to manually restart your computer after it's ready. Your changes won't be applied until you restart your computer.