Print A5 size in Word is different from A4 size printing. Sometimes in office work you will need to print the A5, not the usual A4, to know how to print A5, follow the following article of TipsMake.vn .
Step 1: Put the A5 in the paper tray
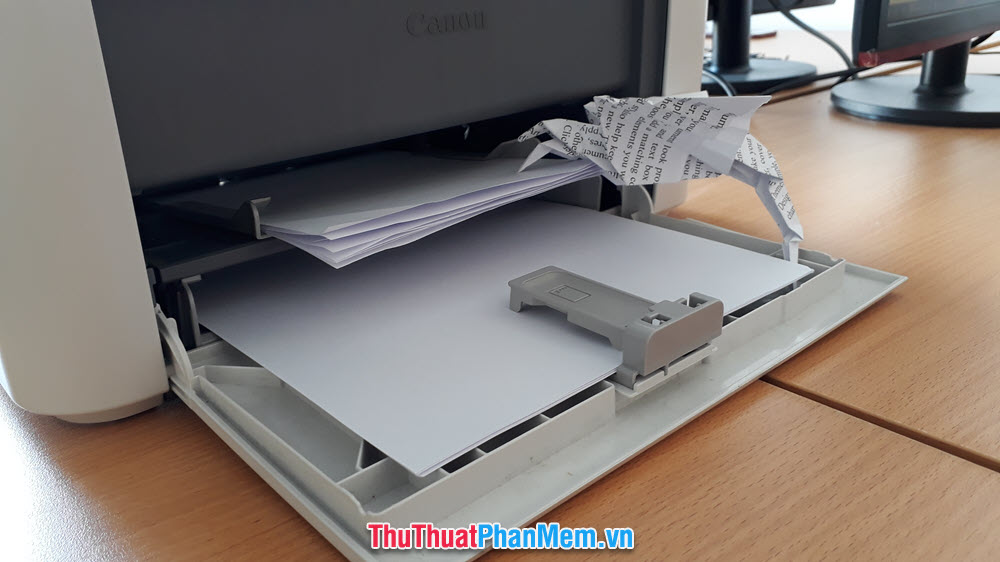
The printer paper tray is usually the largest of the sizes of an A4 sheet or the same length as an A5 sheet. When placing A5-sized paper on the machine, you need to narrow the paper clip distance of the A5-dimensional rotation and then put it in the paper tray (as shown below).
Because if you put it horizontally, your document will not print in the correct orientation and will be cut across the page causing data loss.

Step 2: Change to A5 paper size
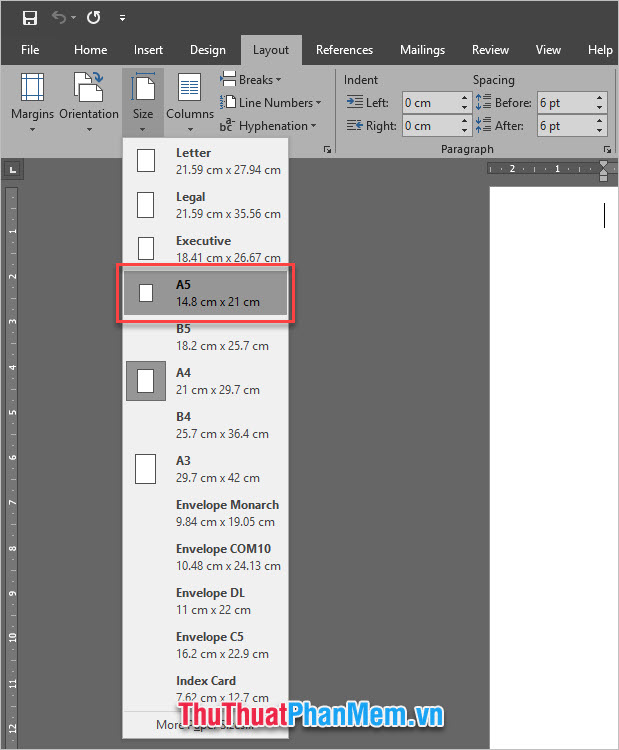
Go to the ribbon Layout , under Page Setup open the Size option .
Size is the optional paper size section, in which you can see that the most common paper sizes are available and the A5 sizes you need.

Step 3: Start printing settings
There are two ways to open the print interface: Go to File and select Print, or you can use Ctrl P or Ctrl F2 .
When you open the Print interface , you can see that the paper size when printing is the paper size you just installed (A5 size).
You continue with other settings such as installing the printer and Drive to control the printer. This installation command can be ignored if you have installed the default printer, then when printing jobs, Word will prioritize selecting that printer for you always.
Set the paper rotation direction, with Landscapce Orientation rotating the paper horizontally, Portrait Orientation rotating the paper vertically.
Select Print All Pages to print all the pages in the document, choose the number of prints in Copies . Finally, Print to print.
You wait for a while for the printer to finish its work, so you have a print on A5 paper already.
Thank you for reading the article of TipsMake.vn , please follow the posts of the page for more useful tips.
